Outlook 2013 – Set-up
1. Add account
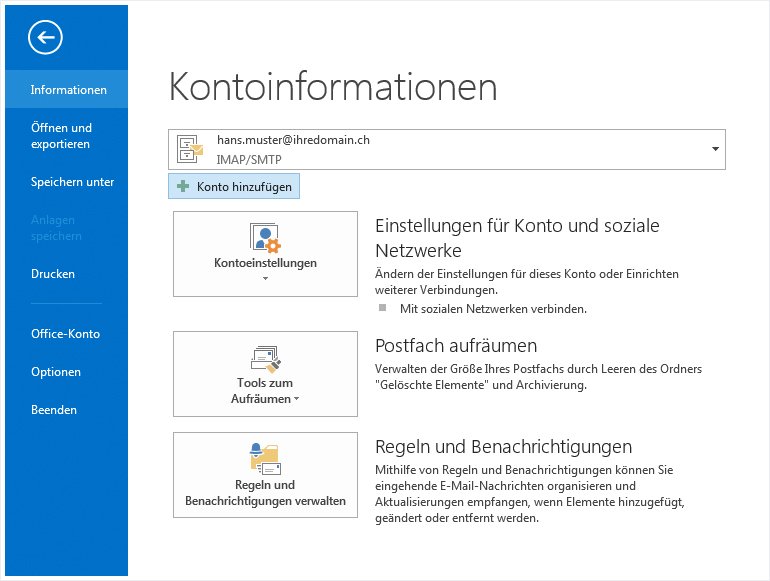
Under «File» → «Information», click on «Add account» to configure a new account.
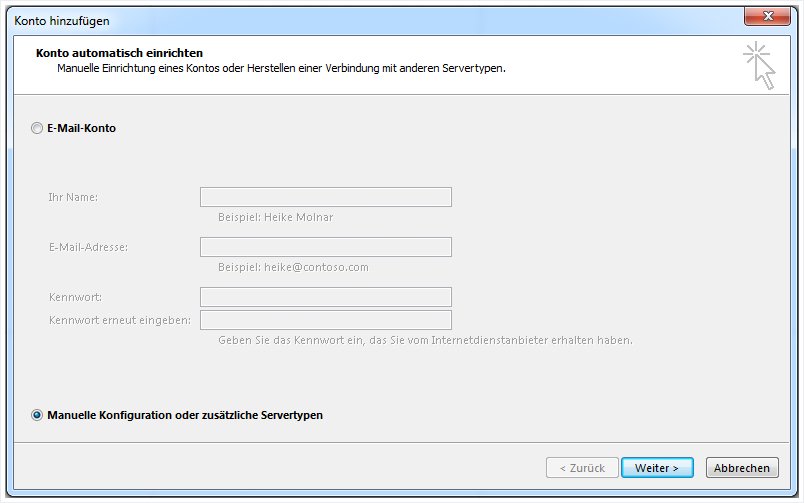
2. Set up account automatically
Select the «Manually configure server settings or additional server types» option and then click «Next».
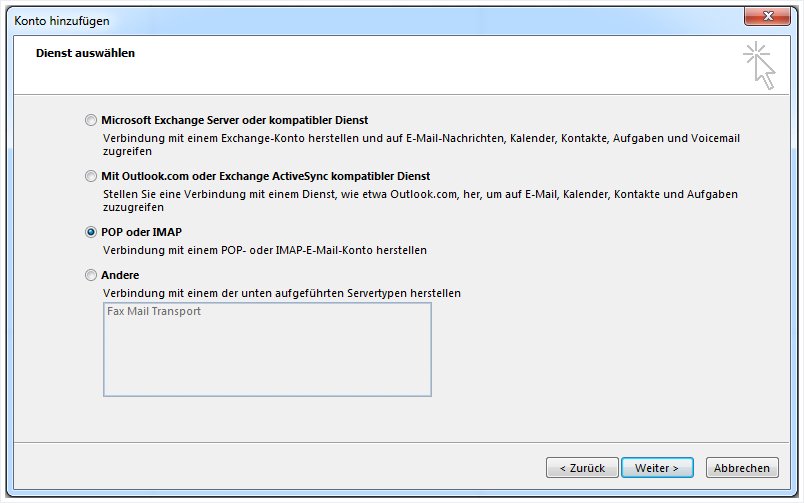
3. Select service
Select «POP or IMAP» and then click «Next».
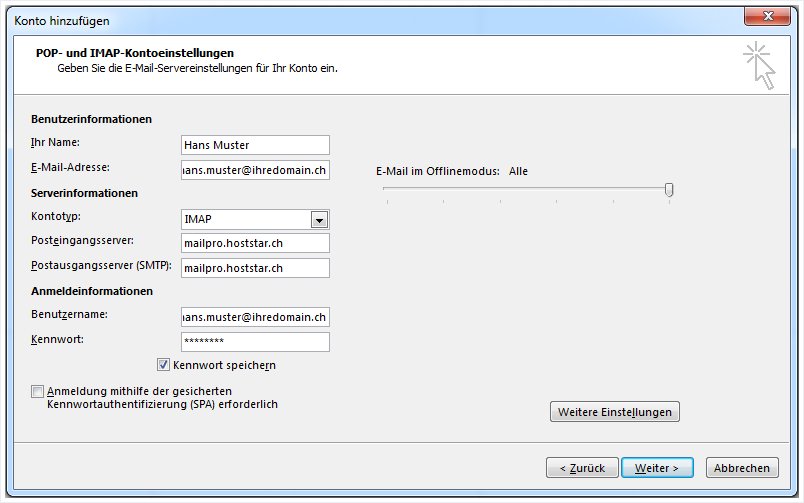
4. Internet email settings
Now enter your email details in the corresponding fields as shown in the following example.
Your name: Enter your name in this field. You can also leave this field blank if desired. If left blank, recipients will see your email address as the sender, otherwise they will see the name entered in this field.
Email address: Enter the email address you wish to configure. If you are unsure whether the address has already been set up on the server, refer to the guide to setting up an email address for MailPro in My Panel.
Account type: Select «IMAP» as the account type.
Incoming server: The name of the incoming mail server for MailPro is «mailpro.hoststar.ch».
Outgoing server: The name of the outgoing mail server for MailPro is also «mailpro.hoststar.ch».
User name: The user name is the email address you wish to configure.
Password: The password you selected for the email address in My Panel or supplied with your MailPro order.
After you have entered your details, click on «More settings».
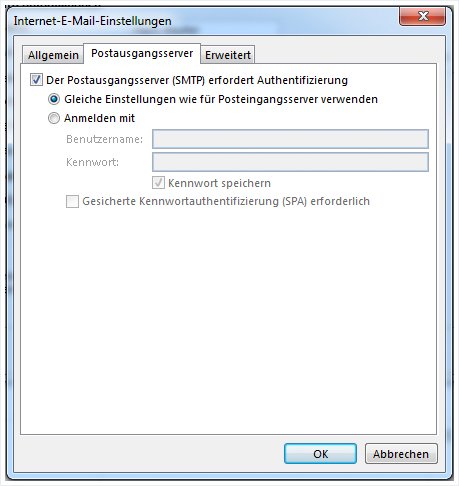
5. Outgoing mail server
Click the «Outgoing mail server» tab, then enable authentication for the outgoing mail server and the option to use the same settings as for the incoming mail server.
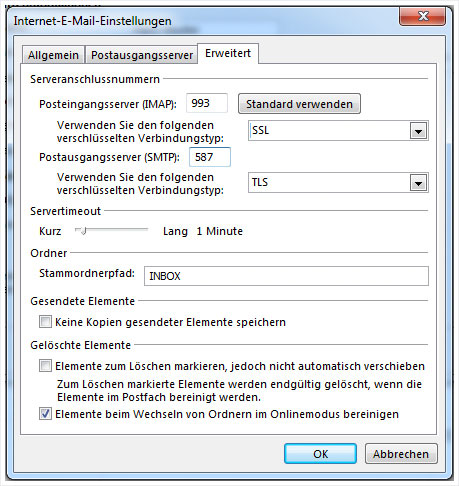
6. Advanced
In the «Advanced» tab, set the connection type for IMAP to «SSL» and for SMTP to «TLS». Change the SMTP port from 25 to 587 and ensure that the IMAP port is set to 993.
If you are using IMAP, enter «INBOX» (without quotation marks) in the «Root folder path» field. Otherwise, emails will not be displayed correctly.
Once you have configured the settings, confirm with «OK» and then click on «Next».
7. Test
The two subsequent tests carried out by Outlook should both run successfully (as indicated by the green ticks, left). Finally, click «Next».

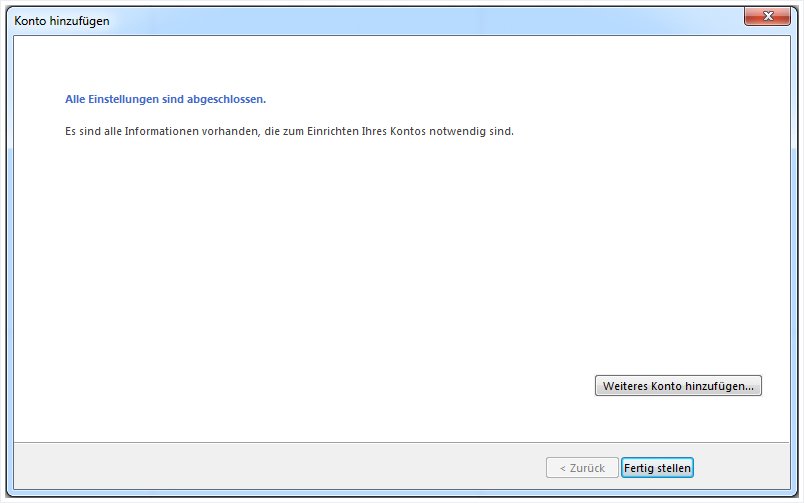
8. Account set-up complete
You have now finished setting up your account. If you do not wish to set up synchronisation of calendar and/or contact data, you can finish the configuration at this point. In either case, click on the «Finish» button to correctly complete the set-up of your account.
You can now start «Outlook 2013 - synchronisation» for calendars and contacts.