Install or remove software: New server generation
Software allows you to install the most popular web applications from different categories directly on your hosting with a mouse click. All listed applications are available in a current version. Any necessary settings on your hosting, such as the PHP version, are made automatically during installation.
If you would like to install or delete one of the applications in your hosting, you can proceed as follows:
Navigate
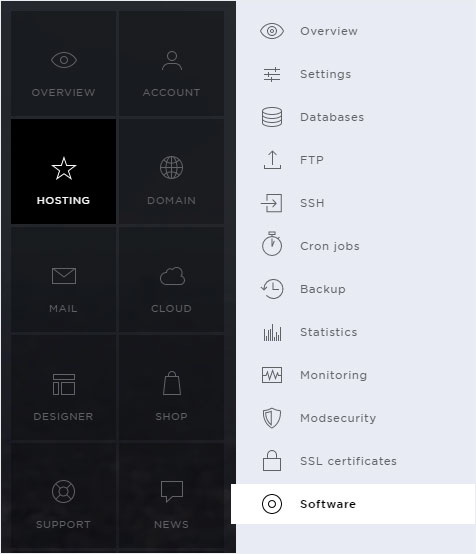
Click on the Hosting menu item and then on Software.
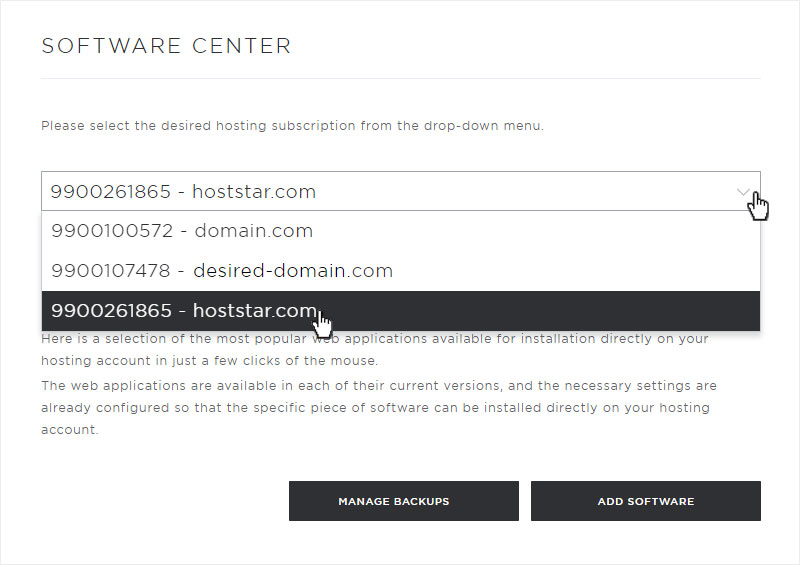
Select subscription
Select the hosting subscription on which you want to install or remove an application.
Overview
You will immediately be directed to the overview of the new server generation. Here you can make the following settings:
Depending on the software installed, further settings are available. Here are some of them:
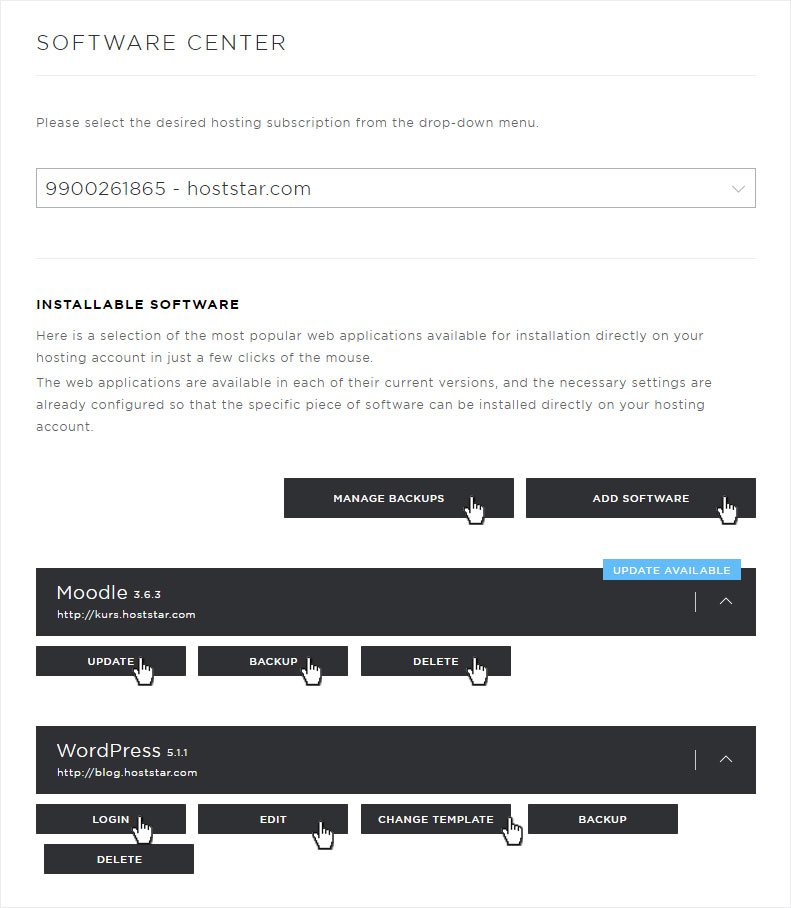
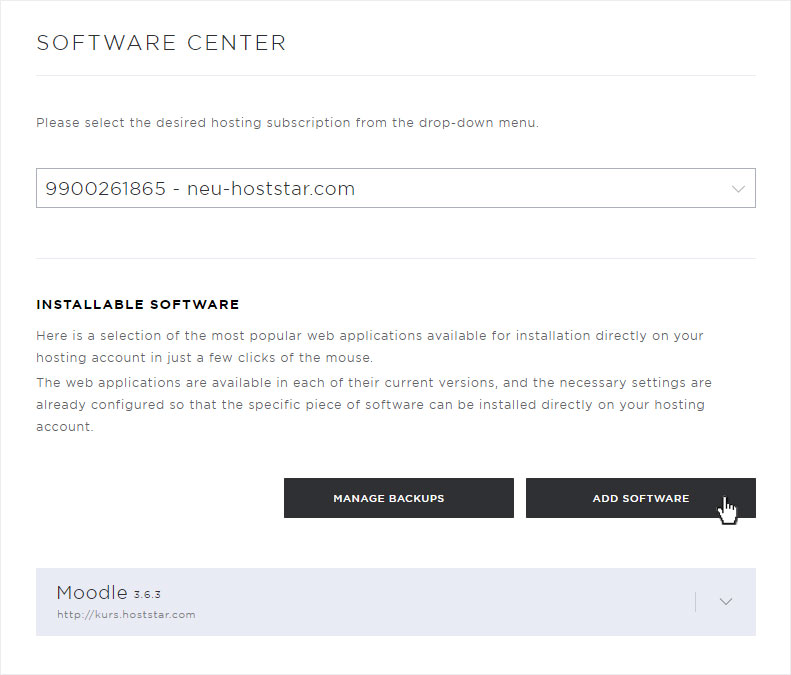
Add software
To install a new software or web application, click on the Add software button.
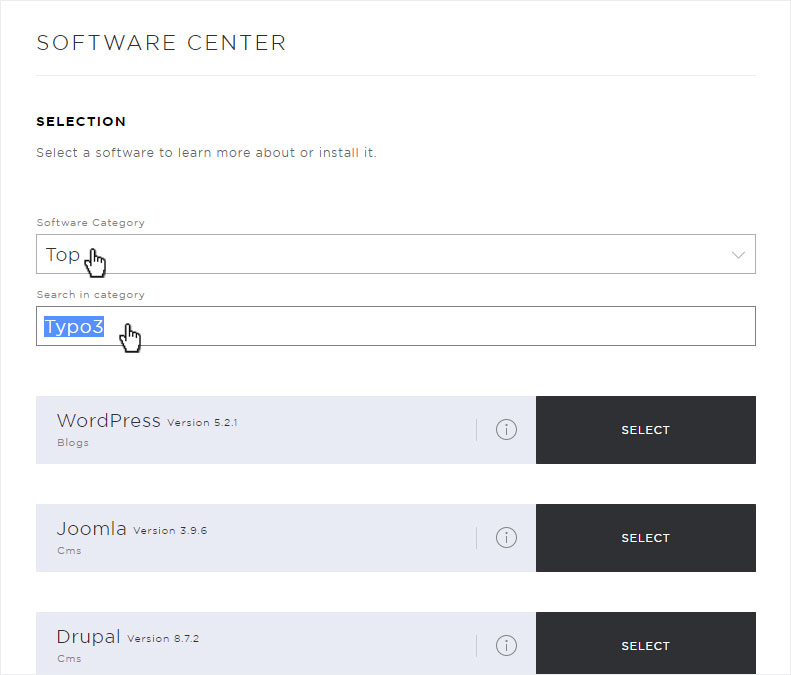
Selection
You are automatically redirected to the selection overview. Here you have countless web applications at your disposal.
In the Software category area, you can reduce the selection view to different category groups or display all of them. Everything is available to you from blogs, CMS and galleries to guest books.
Under Search in category, you can search for a specific or desired software. To be sure that all possibilities are searched, select the category All under Software category.
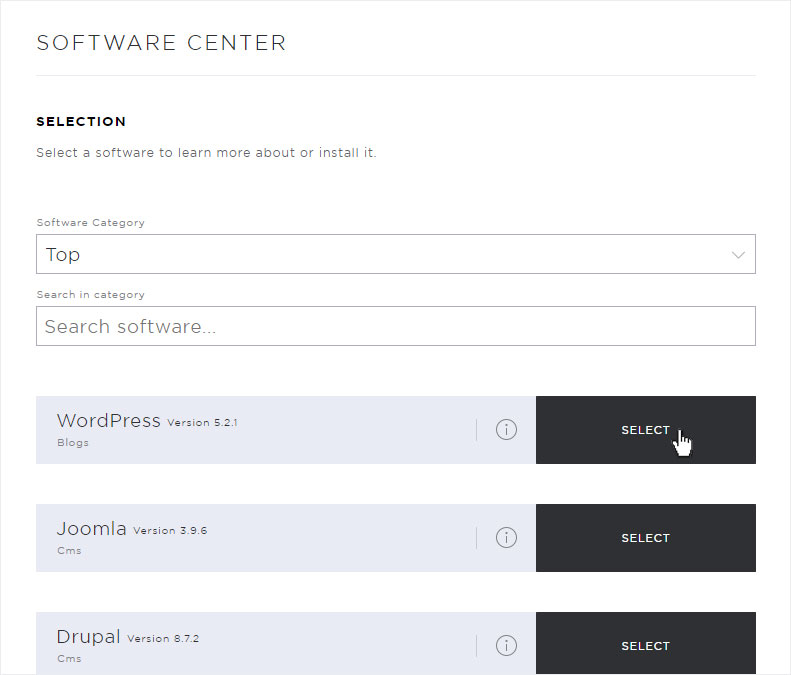
Start installation
You have decided on a software (here e.g. WordPress), then click on the Select button at the corresponding software.
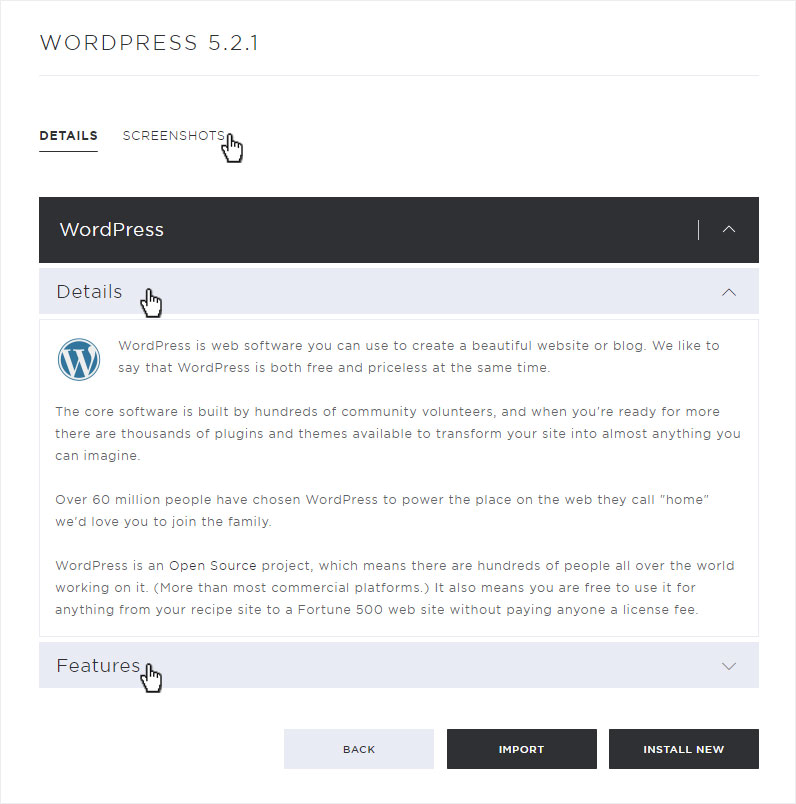
Details
The detail view of the corresponding software (here WordPress) is displayed here. The following information is usually available for each software:
- Details: Brief description
- Features: Enumeration properties
- Screenshots: Some screenshots
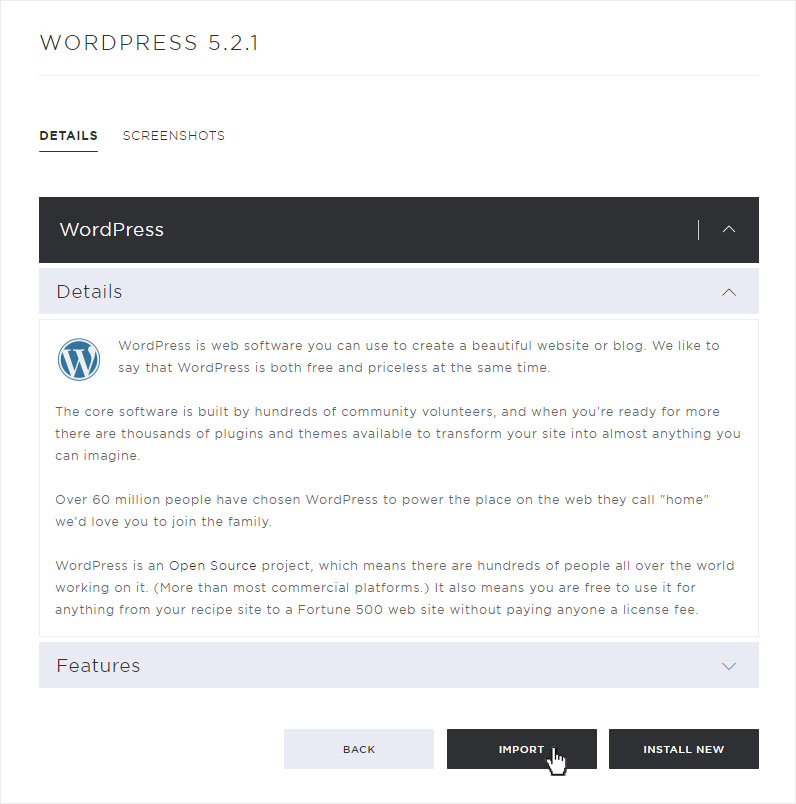
Import
You already have an existing WordPress installation on one of our servers. If you want to transfer it to a new domain, click on the Import button.
Then select the Domain and the Directory on which the software has been installed so far. Then click on the Import button. It may take some time during the import. If the software and the data have been transferred correctly, you will see a green Success message.
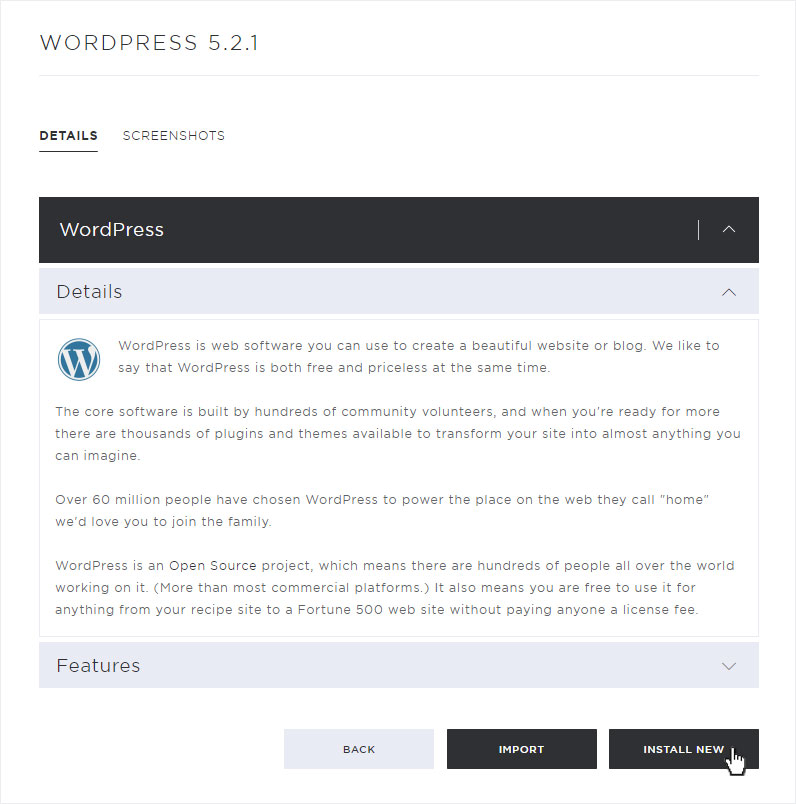
Install New
To reinstall the software (here WordPress) on the selected domain, click on the Install new button.
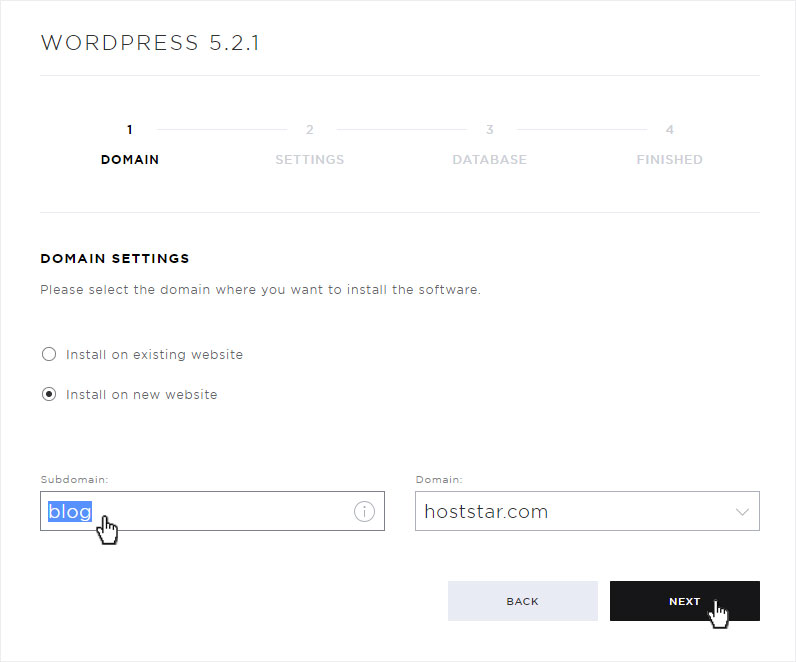
Installation process: Domain
The first step of the installation process is started. Select here whether you want to install the software on the existing website or on a new website.
- Install on existing website: Here you can select the desired domain from the already installed domains.
- Install on new website: Here you can create a subdomain and select the corresponding domain.
Then click on the Next button.
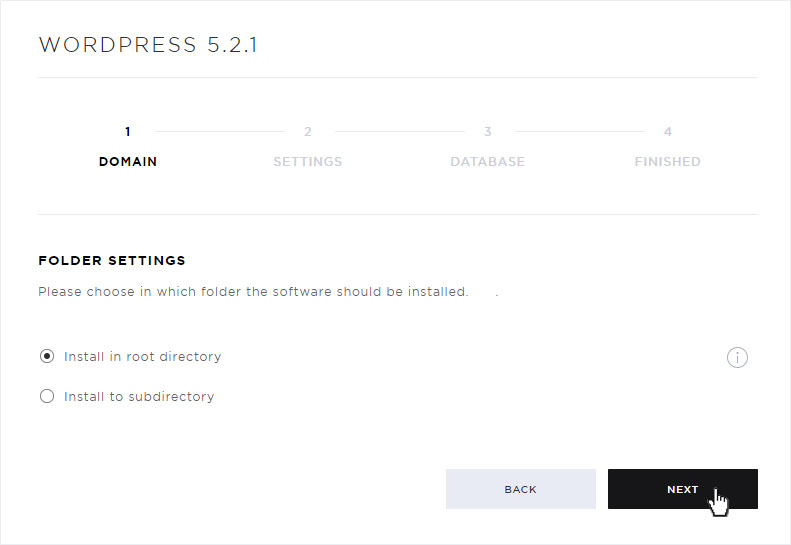
Installation process: Directory
Now select the Directory in which the software is to be installed. You can choose between the Root directory or a Subdirectory (create a new one according to your wishes).
Then click on the Next button.
Installation Process: Settings
All relevant settings like page name, admin account, language and some plugins are displayed here. You can customize, select and/or activate them according to your needs.
Please note that the plugins provided here can be installed later directly in the Wordpress admin area, but are not available by default.
Then click on the Next button.

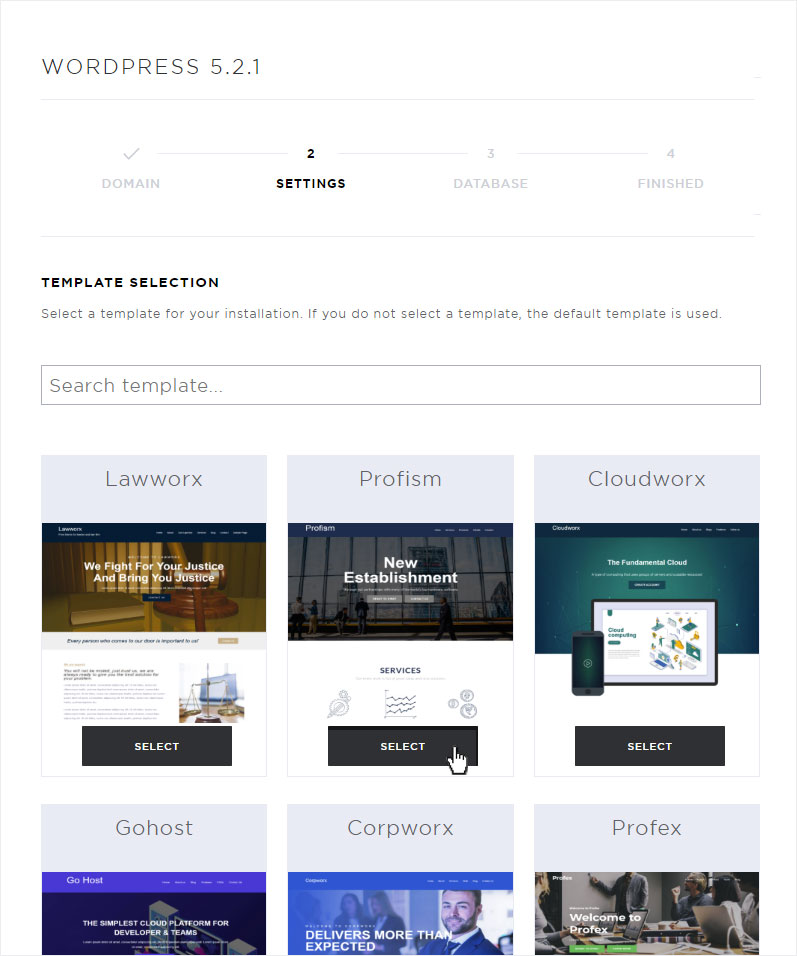
Installation Process: Template
In the next step, you can select the desired design (template). You can later replace the selected template with another one at any time.
Please note, however, that various settings and areas are divided differently, or can be completely missing in other designs.
Click on the Select button for the desired template.
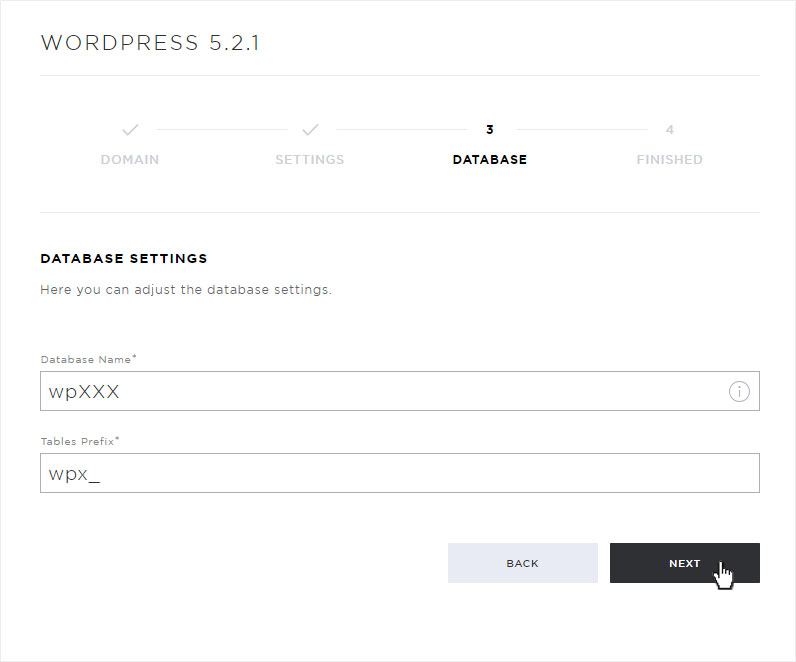
Installation process: Database
Here you can adjust the database settings if required. Otherwise, simply click on the Next button.
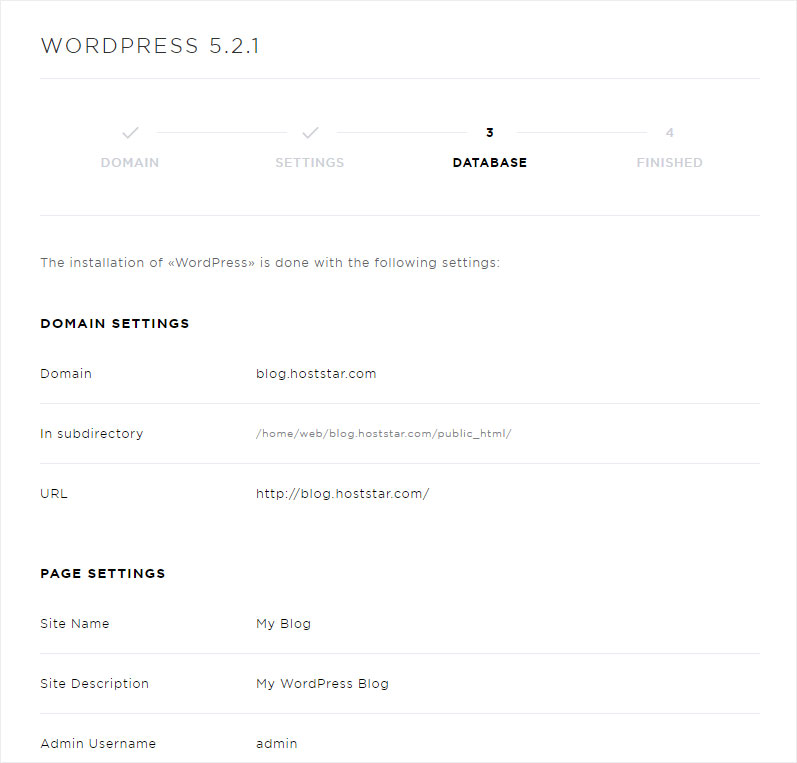
Installation Process: Listing
You will now be redirected to the Done page, where all the settings you have made will be listed again. If this corresponds to your wishes, click on the Install button.
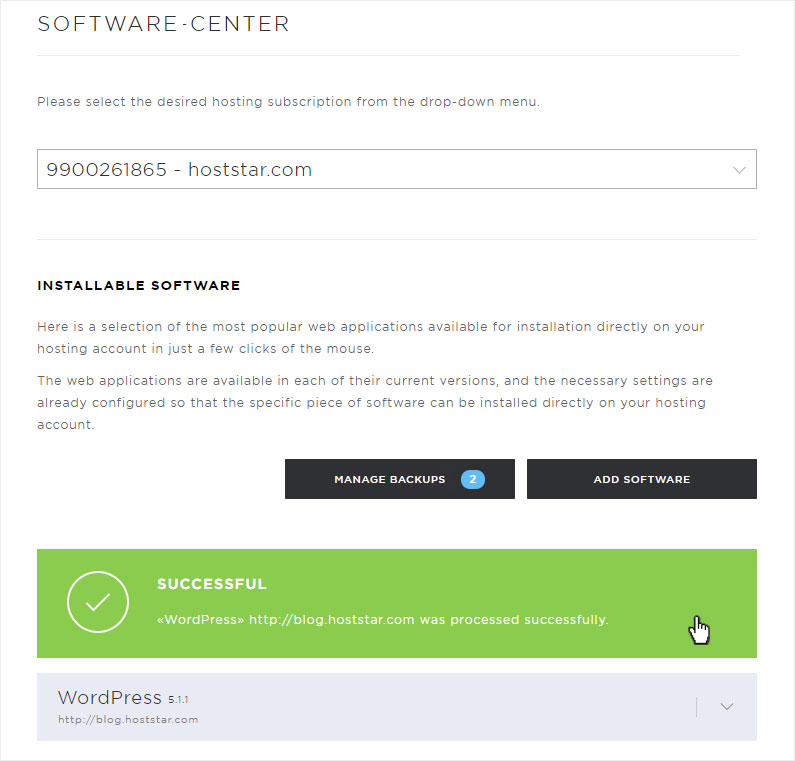
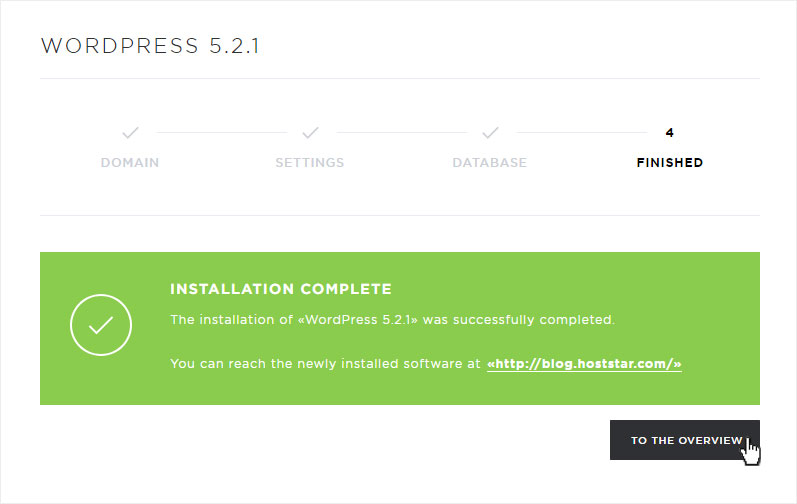
Installation Process: Successful
The software will be installed immediately and after a short moment (shorter or longer depending on the software) the successful installation will be indicated by a green Success message.
To return to the Software overview, click on the Overview button.
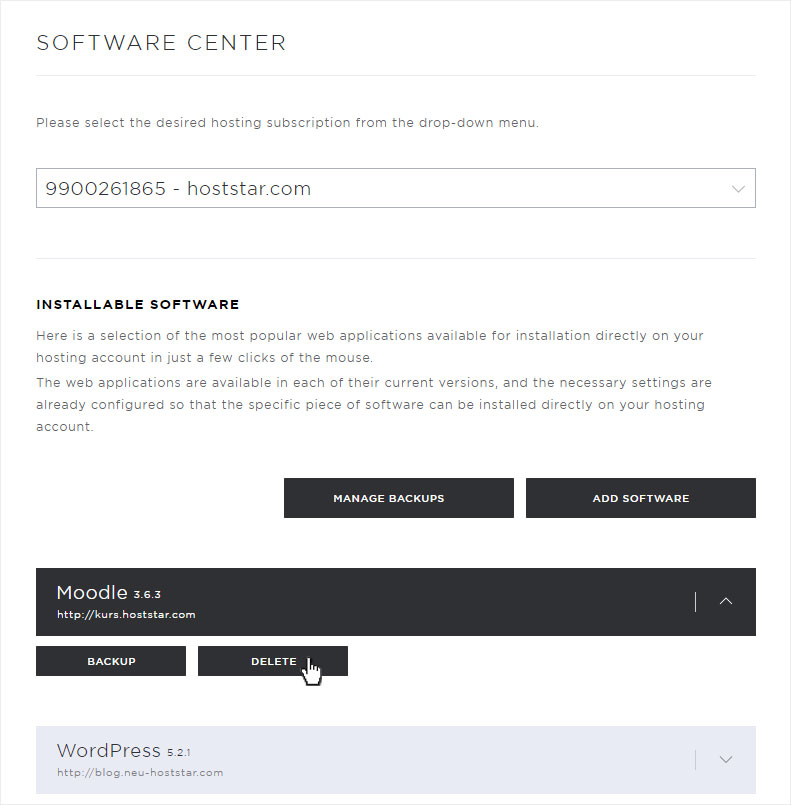
Remove software
To irrevocably and permanently delete an already installed software, click on the Dropdown arrow next to the corresponding software and then on the Delete button.
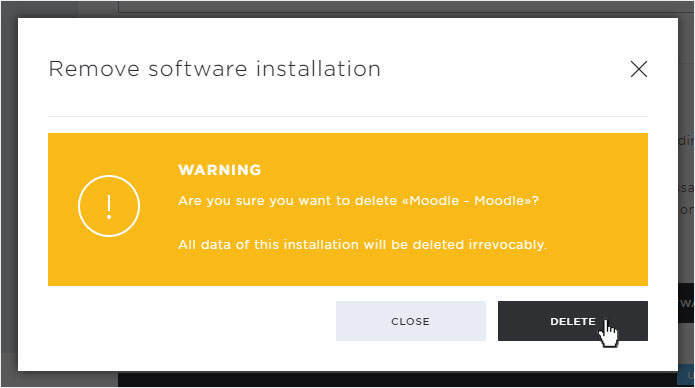
Warning message
A warning message will appear in the pop-up that now opens, informing you once again that all data of this software installation will be irrevocably deleted.
If you are sure that you want to permanently delete this software and all its data, click the Delete button.
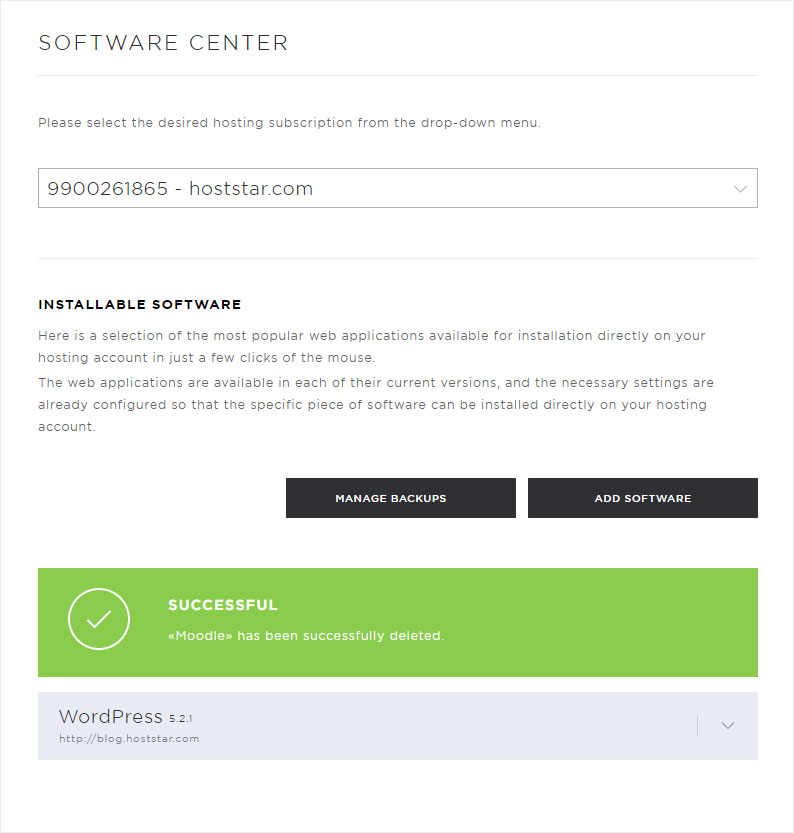
Successful
The deletion may take some time, depending on the amount of data. If the installation was successfully removed and all data deleted, a green success message appears.
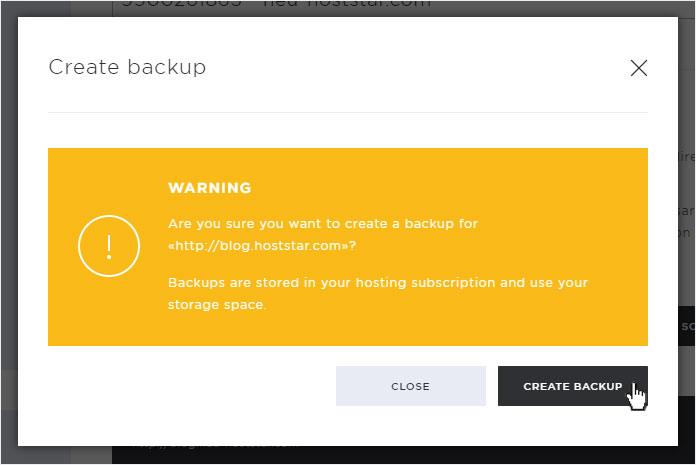
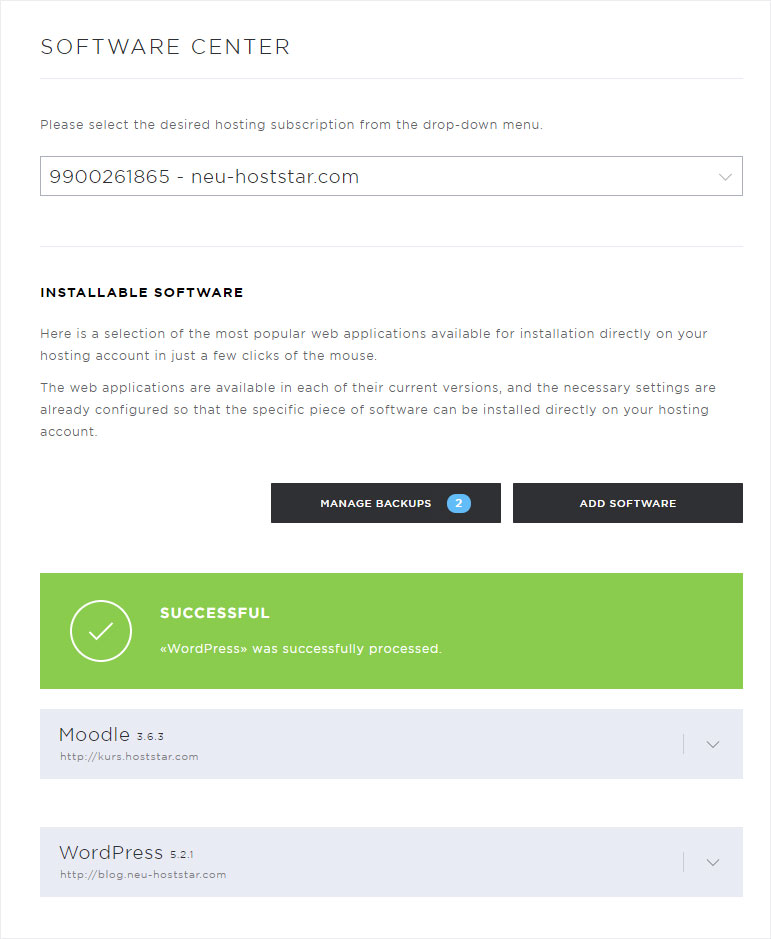
Create Backup
To create a backup of the installed software and the data it contains, click on the Dropdown arrow next to the corresponding software and then on the Backup button.

Warning message
In the pop-up that opens, you will see a warning message indicating that are taking up a certain amount of space on your hosting.
If you are sure you want to create a backup, click the Create Backup button.
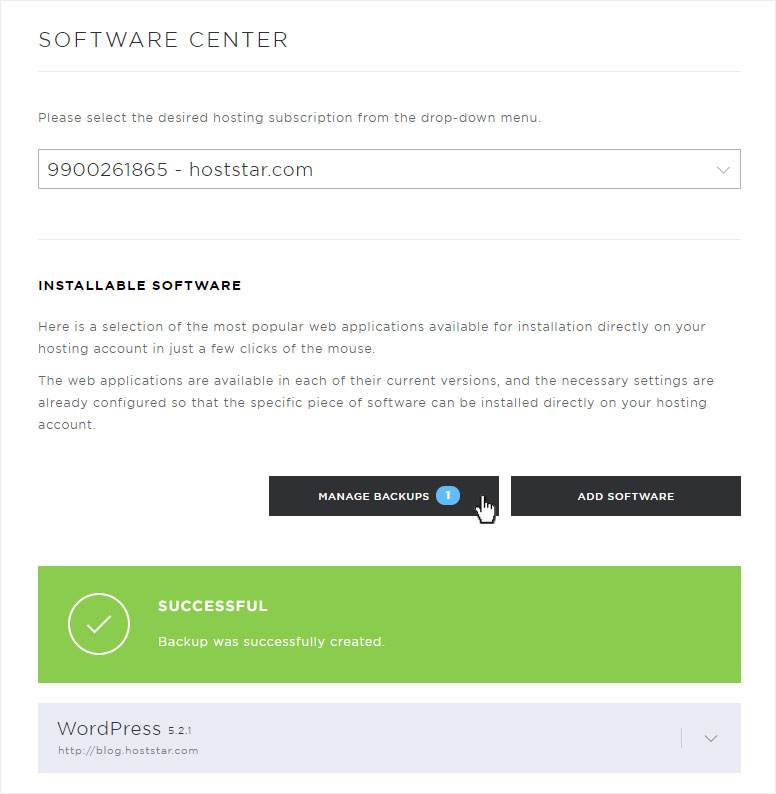
Successful
After some time, the successful creation of the backup is indicated by a green Success message.
And in the section Manage Backup you will now see that a backup is available.
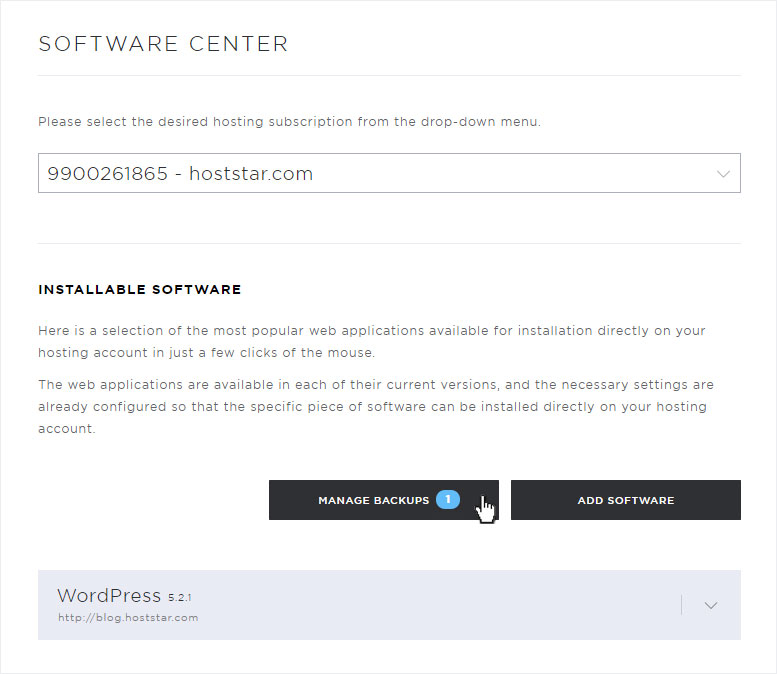
Manage Backup
To manage an already created backup, click on the Manage Backup button.
Manage
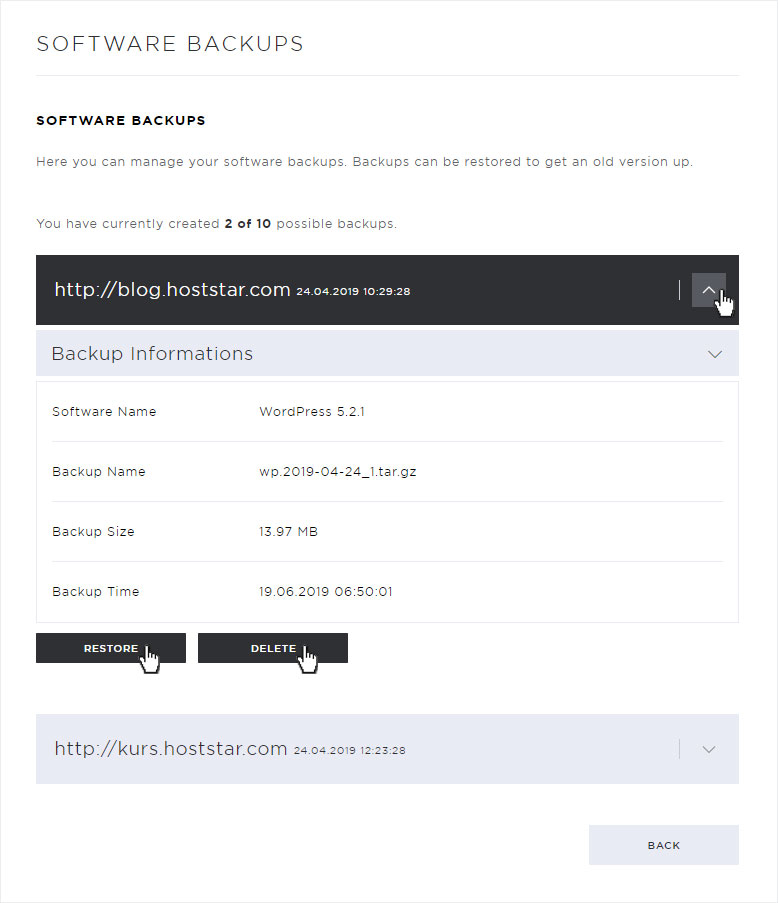
You will be taken to the Software Backup Overview page. All backups that have already been created are listed here.
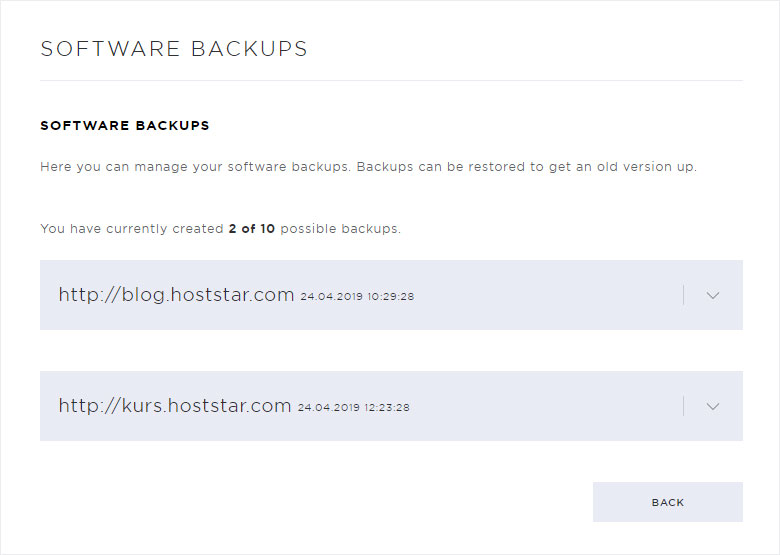
Details
To view the details of the corresponding backup, click on the Dropdown arrow. The details will be listed.
The buttons Restore and Delete are also visible.
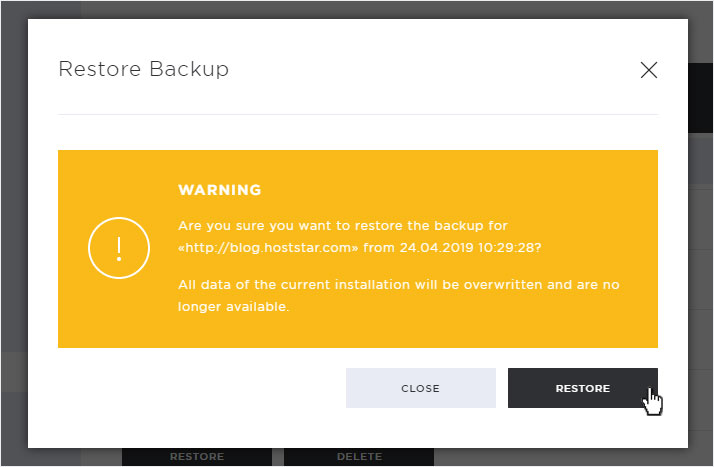
Restore
To restore a backup, click the Restore button. A pop-up with a warning message will open immediately.
If you are sure you want to restore this backup, confirm by clicking the Restore button.
Please note that the current installation data will be overwritten by the backup and will then be irrevocably lost.
As soon as the backup has been successfully restored, a green success message will appear.
Delete
To delete a backup, click the Delete button. A popup with a warning message will open immediately.
If you are sure that you want to delete this backup, confirm this by clicking the Delete button.
Please note that the backup will be deleted irrevocably.
As soon as the backup has been successfully deleted, you will see a green success message.

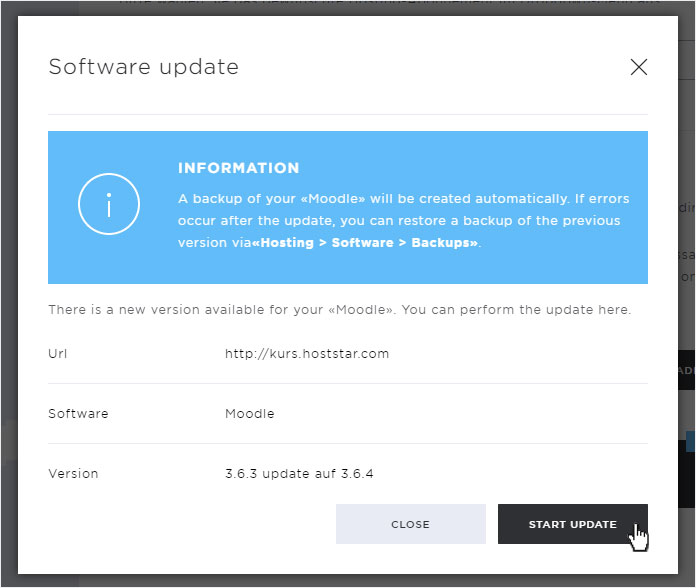
Update available
If an Update is available, this is indicated with a blue hint above the software. Click on the Drop-down arrow at the corresponding software and then on the Update button.

Update popup
A pop-up window opens immediately with detailed information about the corresponding update. You will also be shown which version the update is carried out from.
If you agree, click on Start update.
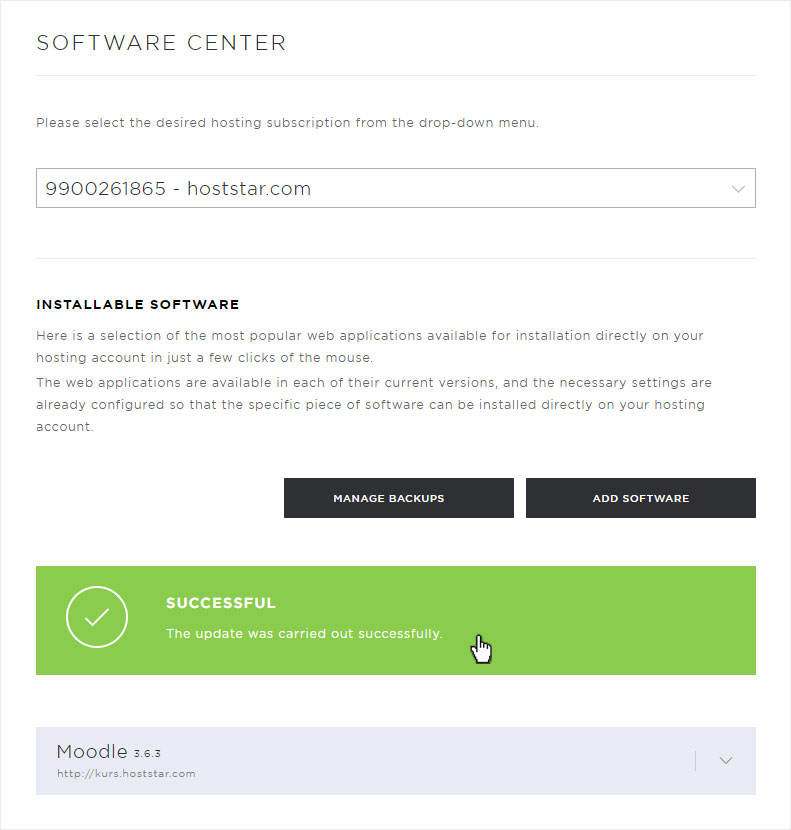
Update successful
The update may take a few minutes. However, if the update was successful, the display will be reloaded and a green success message will appear.
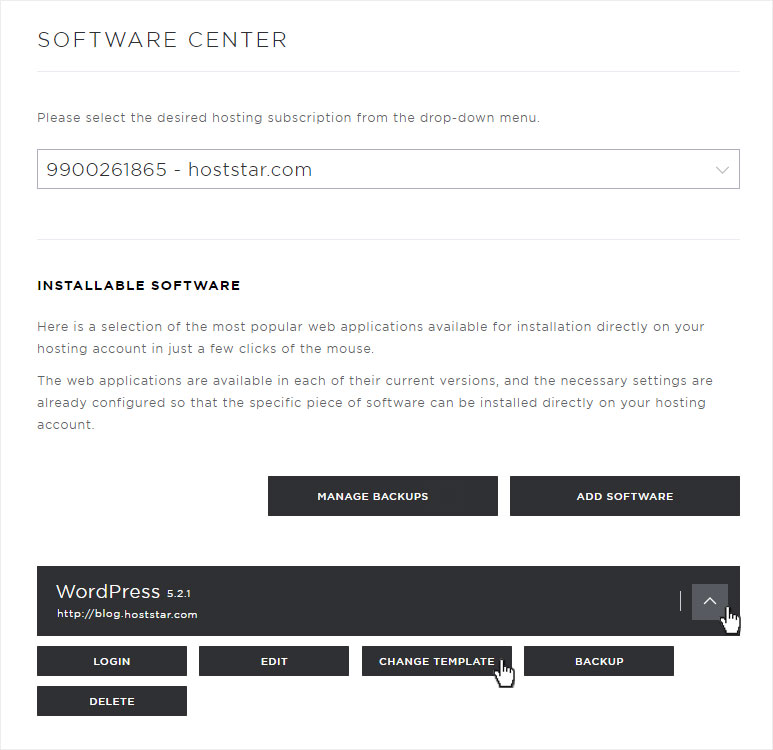
Direct login in admin area
You can go directly to the admin area of the corresponding application via the Software area by clicking on the dropdown arrow next to the corresponding software and then on the Login button.

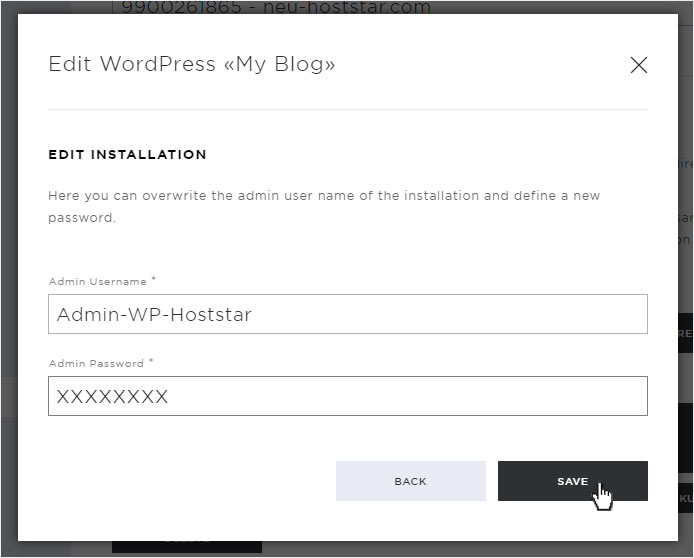
Edit Access Data Admin Area
You can change your access data for the admin area of various software at any time by clicking on the dropdown arrow next to the corresponding software and then on the Edit button.

Details
In the pop-up that now opens, you can either change the administrator's user name OR the user password.
Please note that you can only change either OR. You must therefore have the previous access data ready. If you change the user name, this will only work if you can enter the correct password. The other way round.
Then click on the Save button.
Successful
As soon as the data has been saved, the successful change is indicated to you by a green success message.
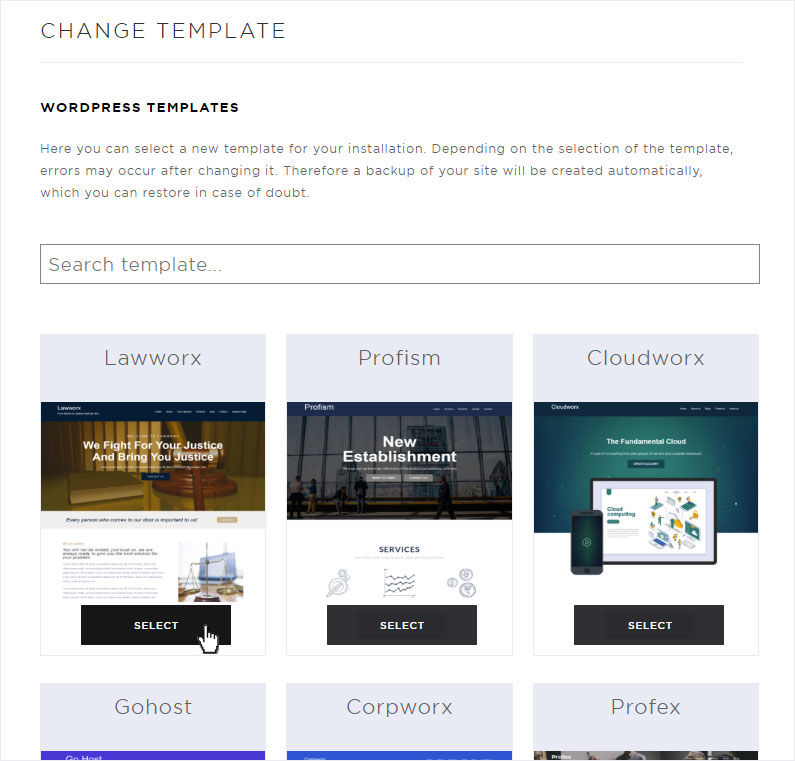
Change template
For some applications, you have the possibility to change the template by clicking on the dropdown arrow at the corresponding software and then on the Change template button.
Template Selection
The Selection Overview template appears automatically. By clicking on the Select button the new template will be installed.
Please note that certain settings you may have already made in your previous template may not be adopted by every other template.
Successful Installation
After a short time, the successful modification of the templates is indicated by a green success message.