Products – Add product
Enter products (number depends on your hosting plan) and their variants.
After logging into Designer, follow these steps:
1. Navigate
Click on the menu item «Store» at the left.

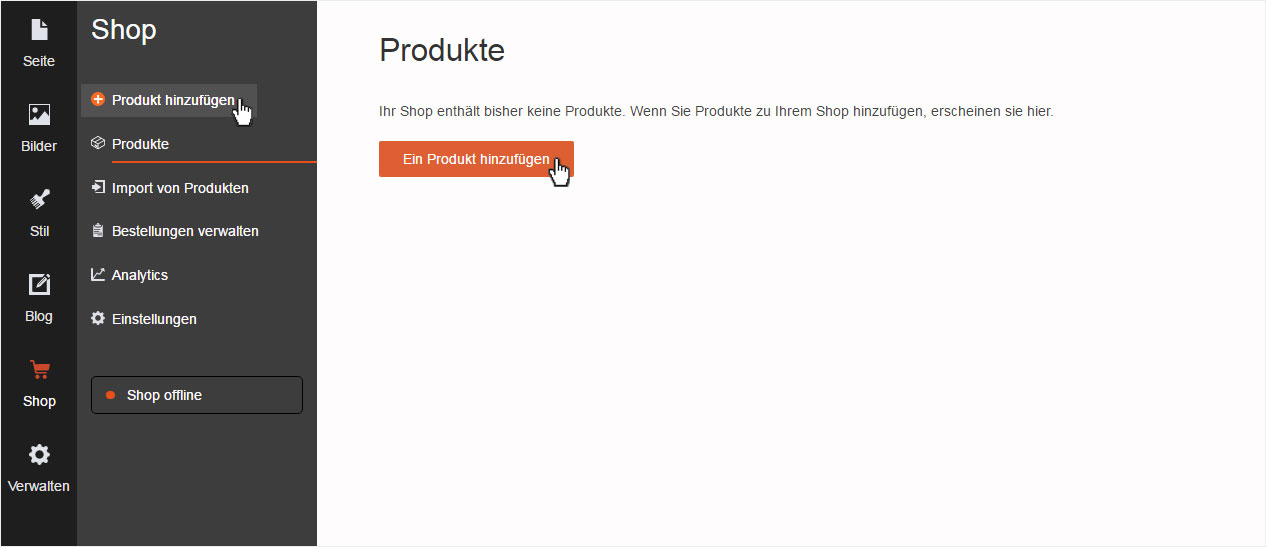
2. Products
You will automatically be taken to the product overview page. If no items have been entered, you can click directly on the orange «Add product» button here. Otherwise, you will see a list of items that have already been entered. In the grey menu section at the left, now click «Add product».
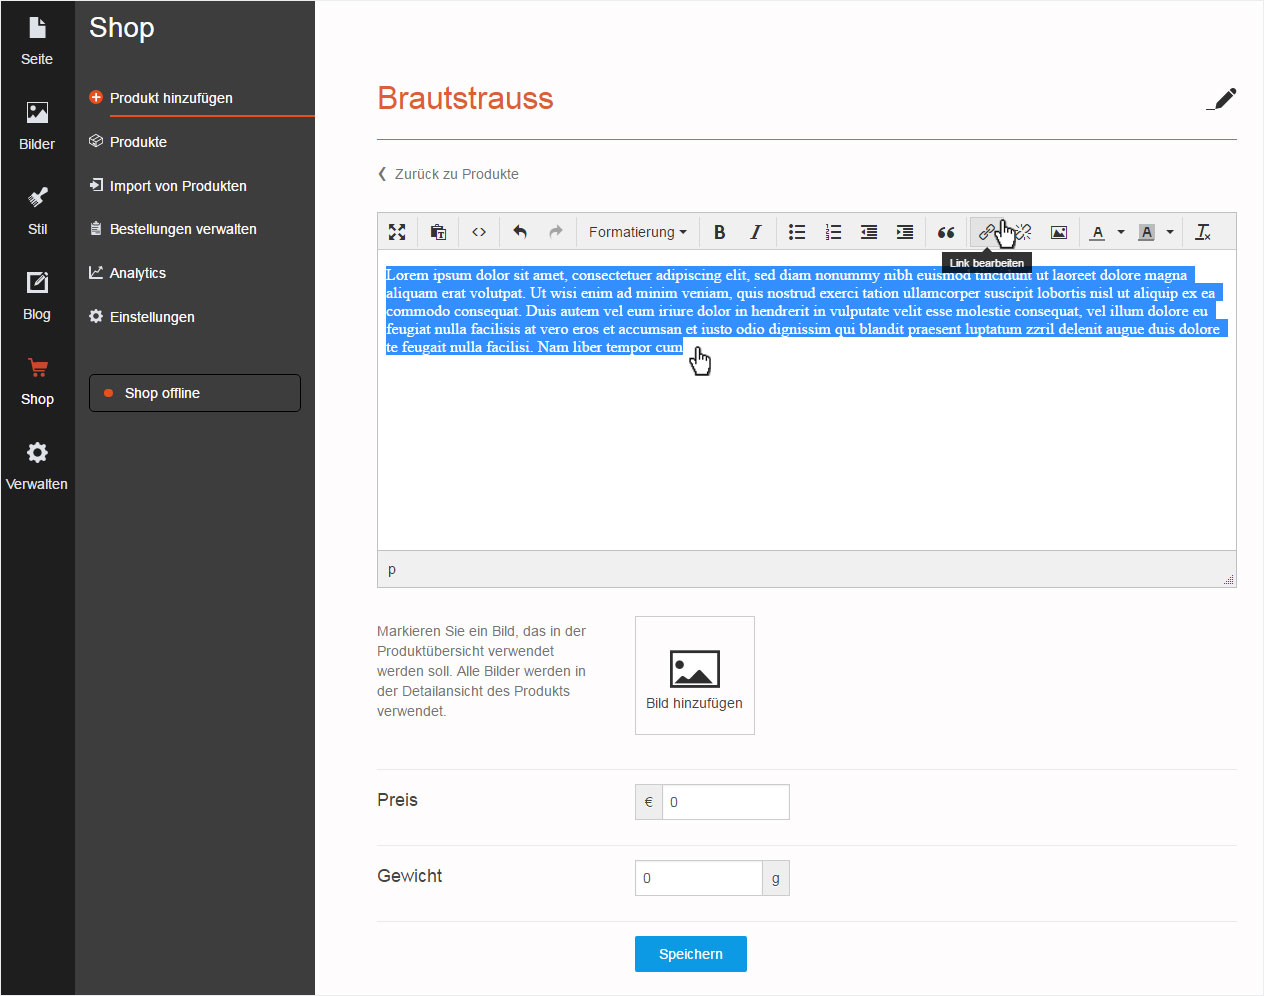
3. Add product
The first field on the page is «Create a product». Enter the desired product name in this field.

Then add the description or product information in the text box. There are several buttons above the text box where you can format and edit your text, insert pictures and links, etc.
Upload the relevant pictures by clicking the «Add image» button. In the pop-up that appears, you can select an image that has already been uploaded or upload a new one. Repeat this step until you have added all images for this product.
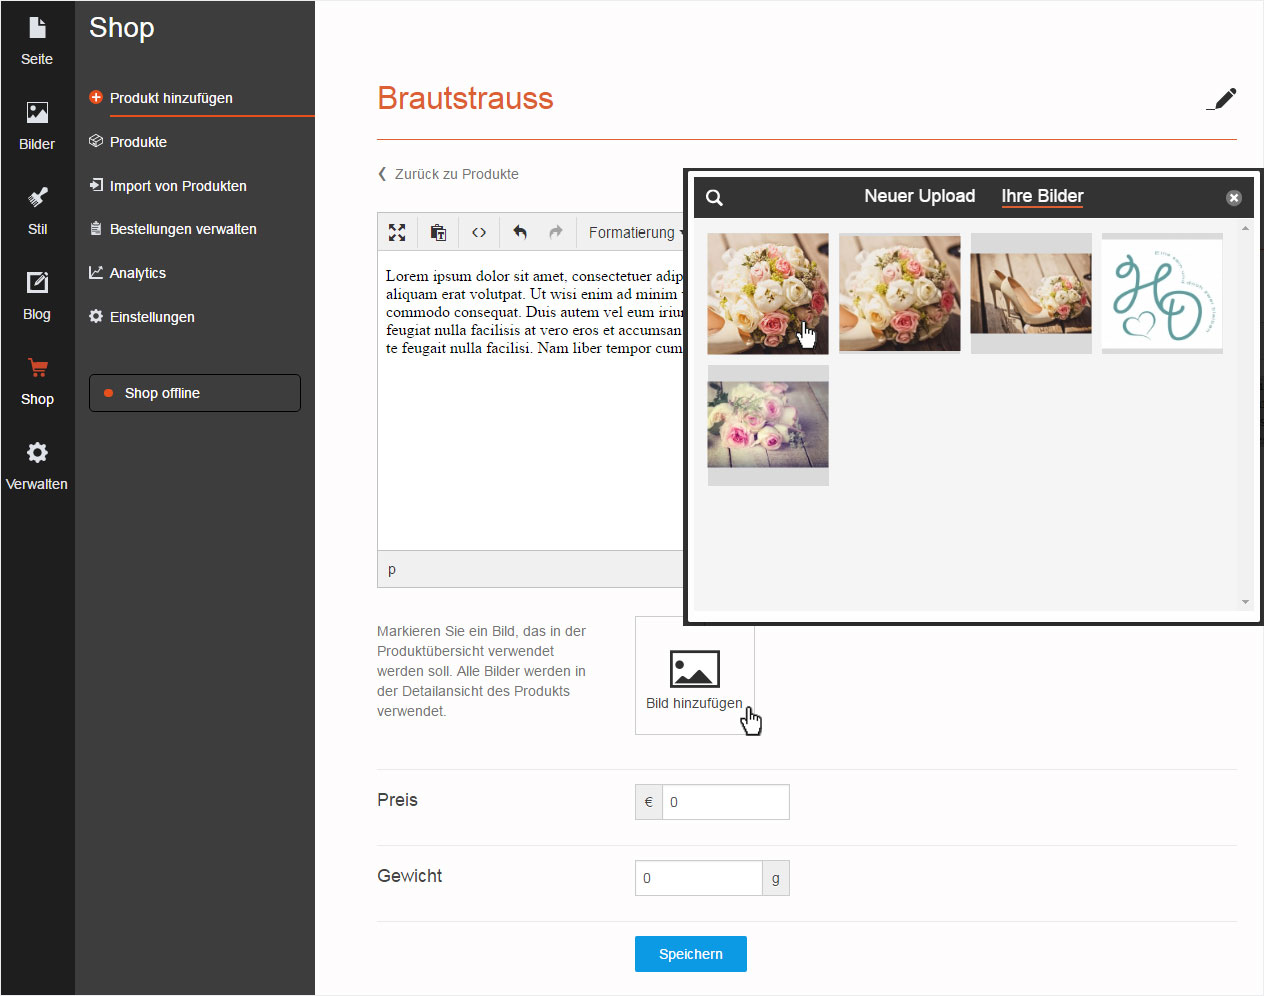
Click one of the images to use it in the product overview. The image is now shown with a yellow border and yellow star.

Now enter the price. If the currency is incorrect, you can change it by selecting «Currency and formats» under «Settings».
If desired, enter the weight. If the weight unit is incorrect, you can change it by selecting «Currency and formats» under «Settings».
Then click the «Save» button.

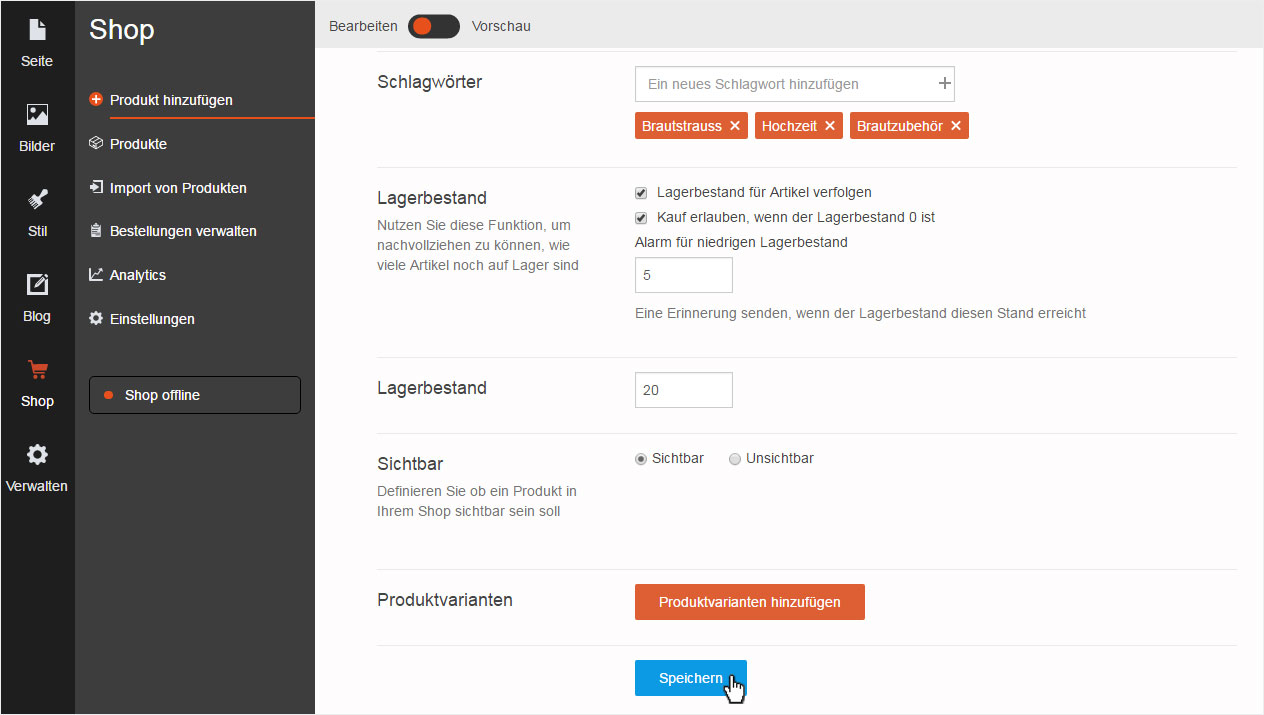
4. Additional product information
You will then see additional product information at the bottom of the view. Select a «Category». If none have been created, click the «Add» button. Enter a category name and confirm it by clicking the «Create» button.

Under «Tags», you can enter any desired tags or key search terms for this product. Clicking the plus icon adds the individual words.
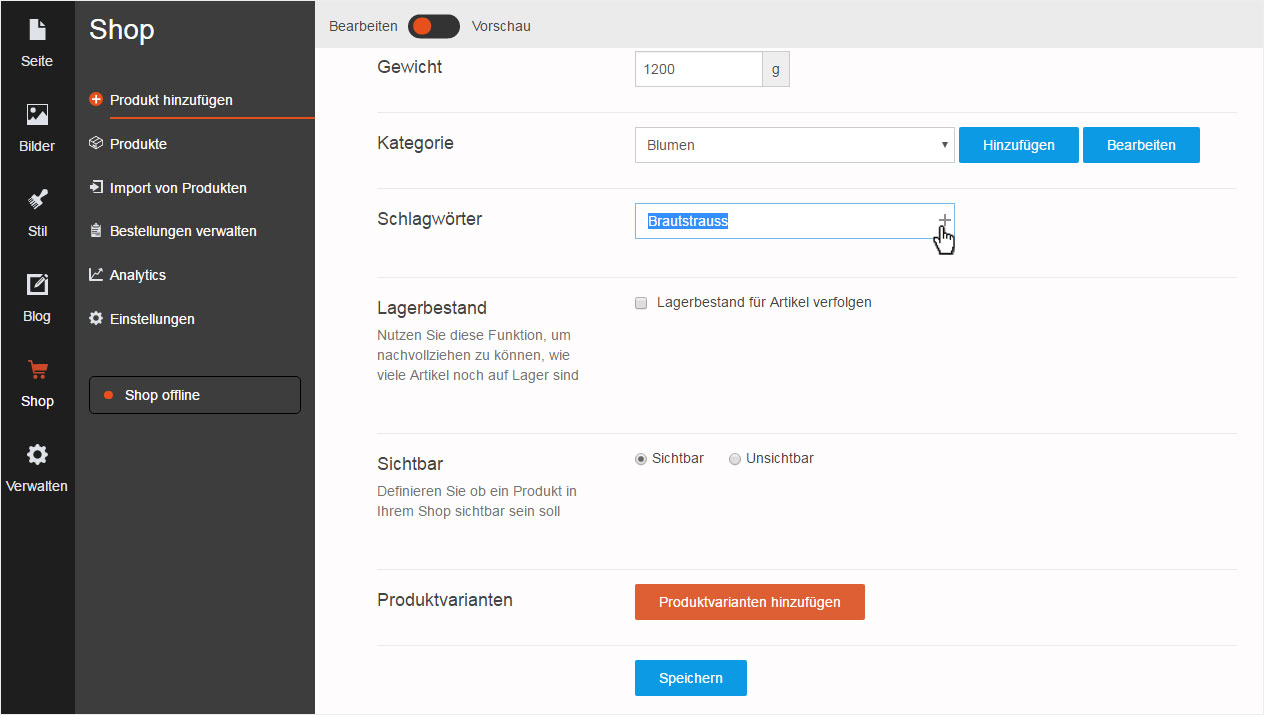
Under «Inventory», you will see the option «Track inventory for this item», which offers a basic inventory management system.
If you would like to offer your customers the option to purchase items even when there is no inventory, enable the option «Allow purchase when stock level is zero».
You can enter a value in the field «Send a reminder when stock reaches this level». When the stock level reaches this value, you will receive an email reminder.
Next, enter the actual in-stock value for the item.
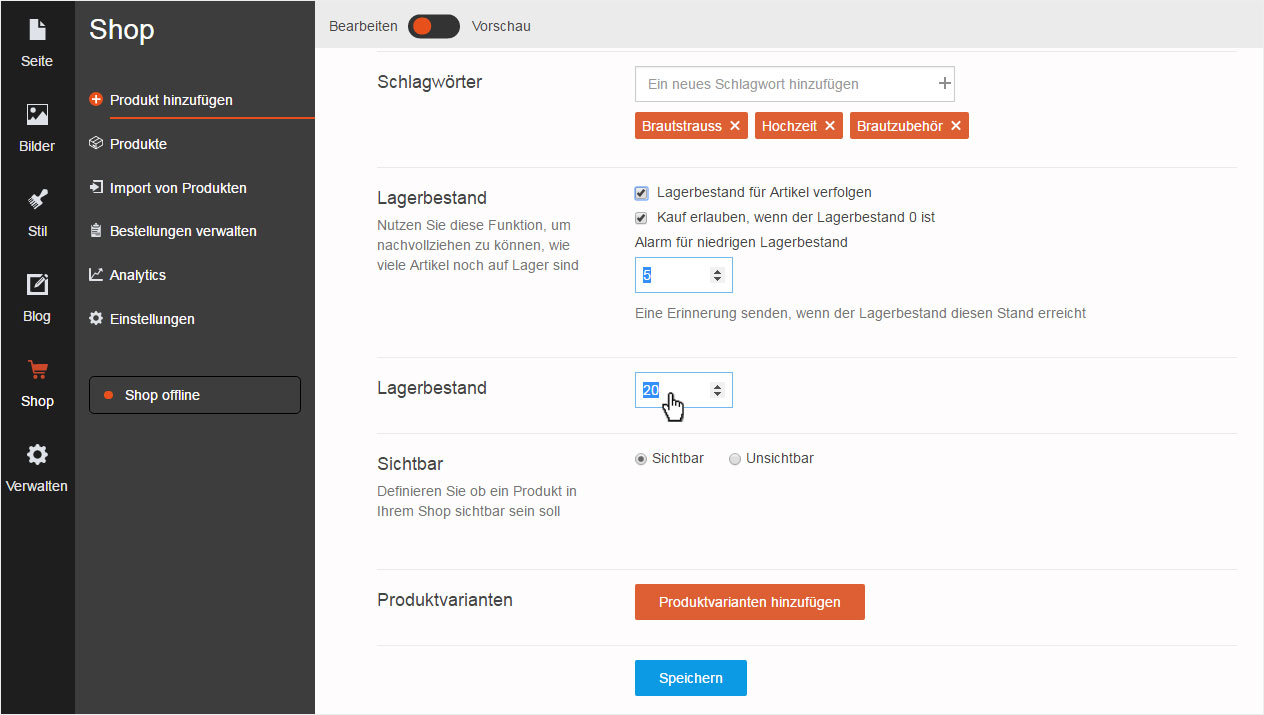
Under «Visible», you can select whether or not to display this item in your store.
You can also click the button «Add product variants» to add the appropriate variants for the product. Follow the procedure described here.
Click the «Save» button to save all entries.