Email addresses
The Mail section includes the subpages E-mail address, E-mail settings, Autoresponder, Catch-all, Spam filter, Newsletter, MailPro and Webmail.
The following functions are available to you in this area:
E-mail addresses
Here you get an overview of the stored email accounts and forwarding addresses and can add more if required. With the standard hosting offers from Hoststar, you have the option of creating an unlimited number of email addresses.
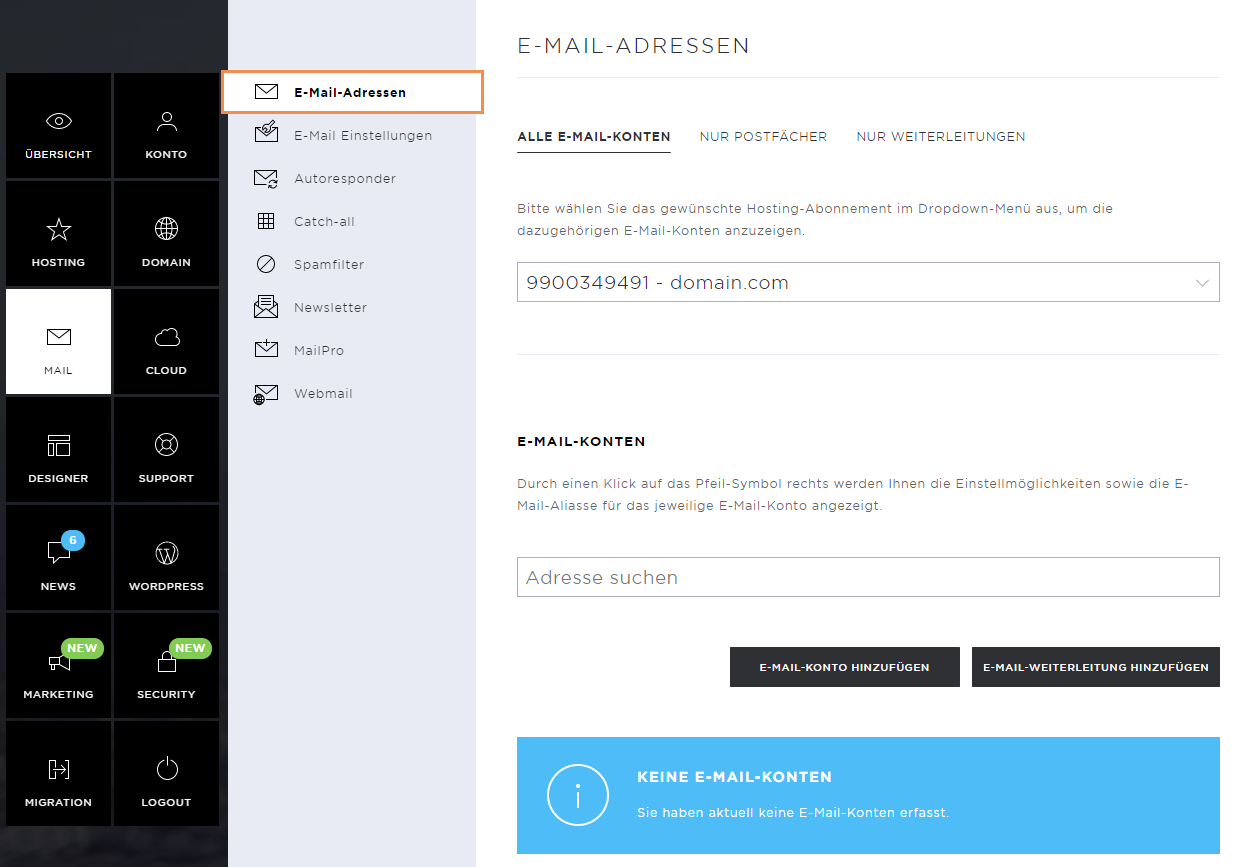
Add email account
To add an email account, click the Add Email Account button.

Enter the local part and the desired password in the pop-up window. If necessary, you can choose between different domains which have been activated for your hosting.
Finally, enter the mailbox storage space and click on Save.
The mailbox storage space can be defined to a maximum of 5000 MB, 15'000 MB or 20'000 MB depending on the subscription.

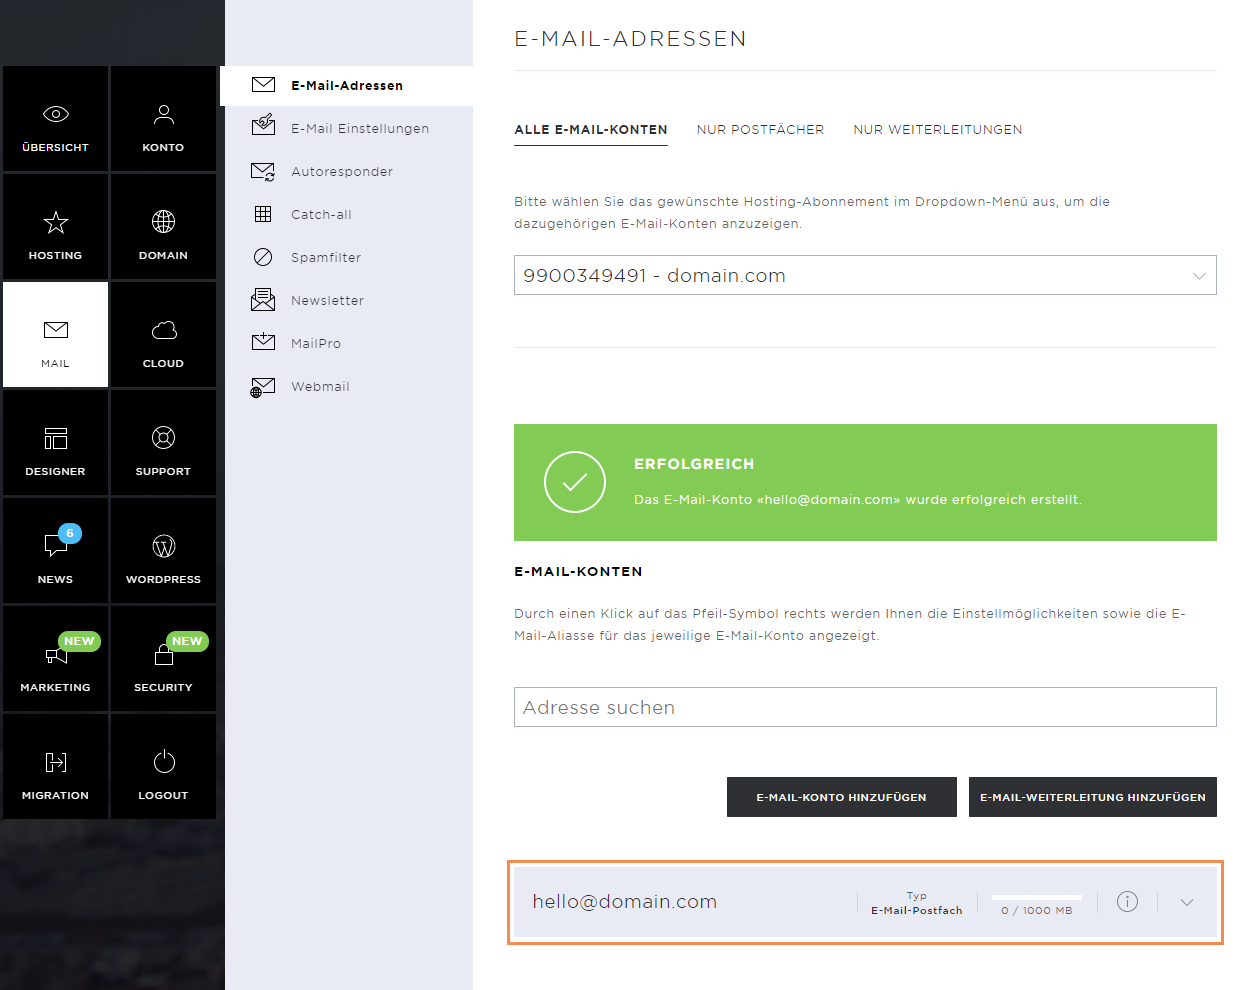
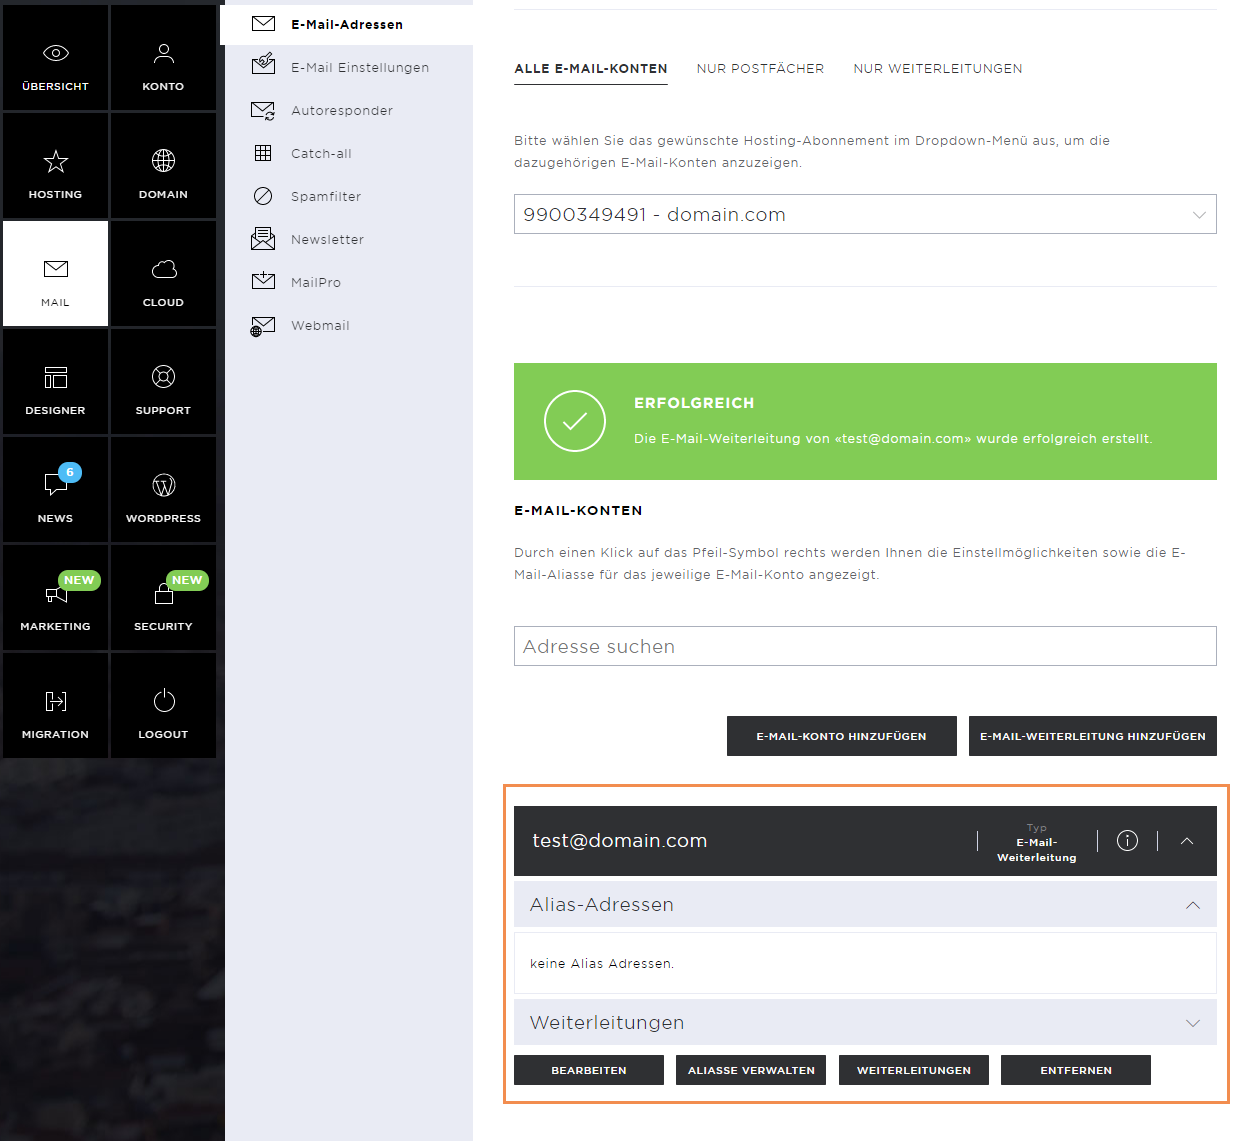
As soon as the e-mail account has been set up, a success message appears.
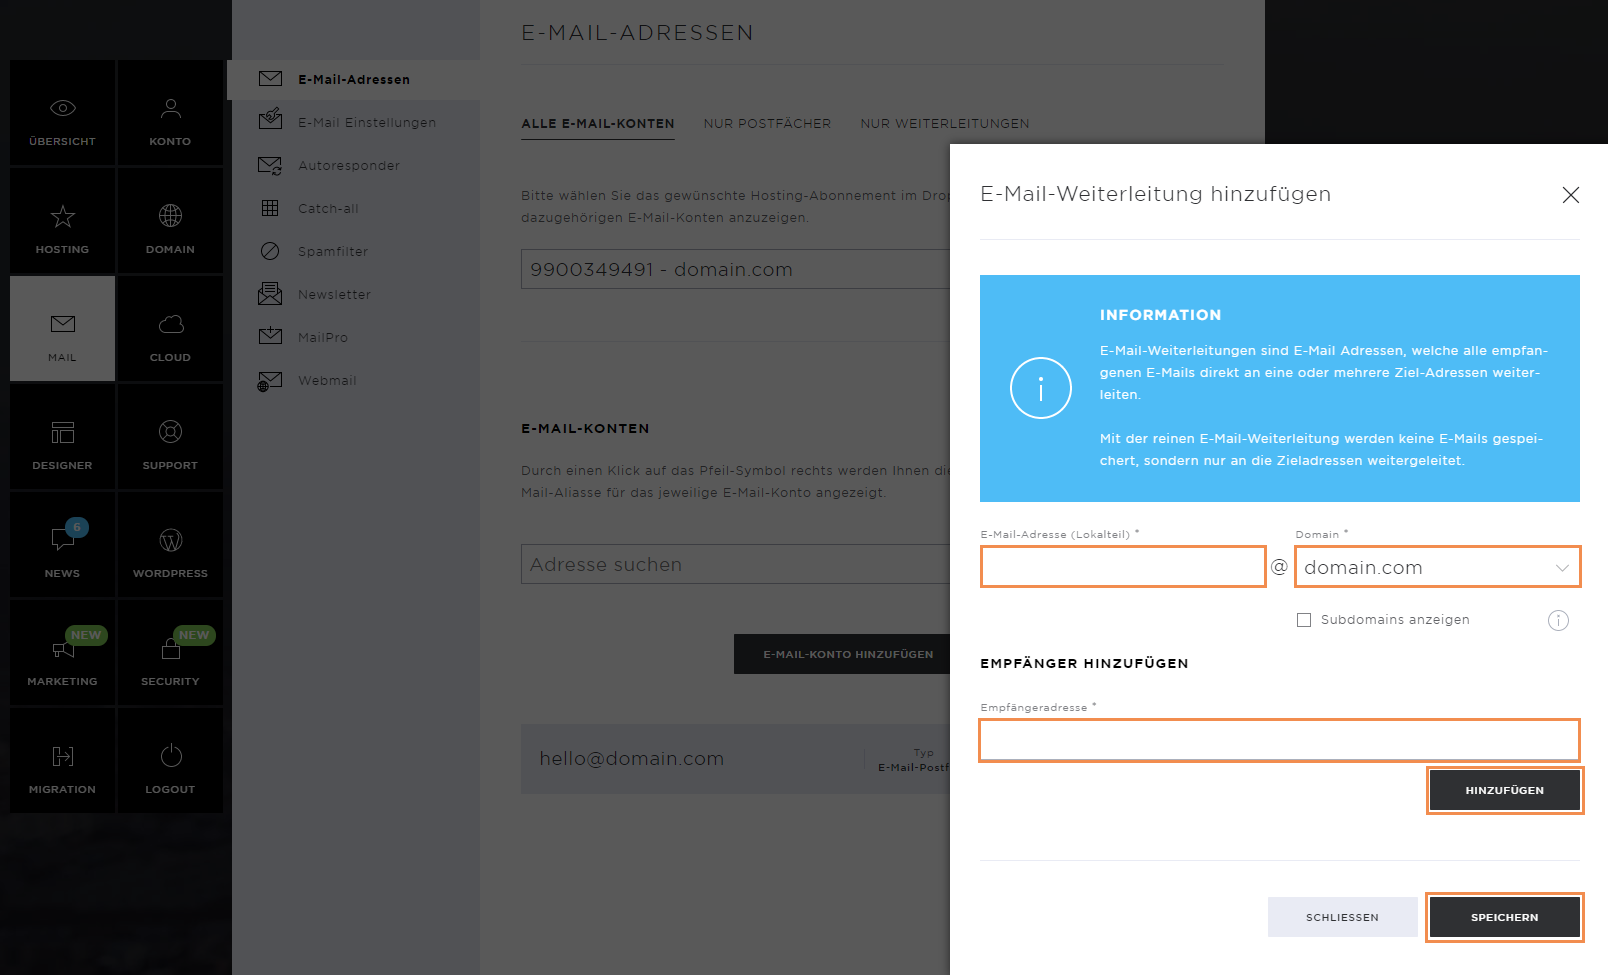
Add email forwarding
Click Add Email Forwarding to enter a new forwarding.

Select the preferred domain and enter the local section. As soon as you have added the recipient address, click on Add.
The recipient address then appears in the list. If you do not want to enter any more recipients, save the settings by clicking on Save.
Once the email forwarding has been added, a success message appears. Click on the forwarding to edit it, enter an alias address or forwarding address or remove the forwarding.
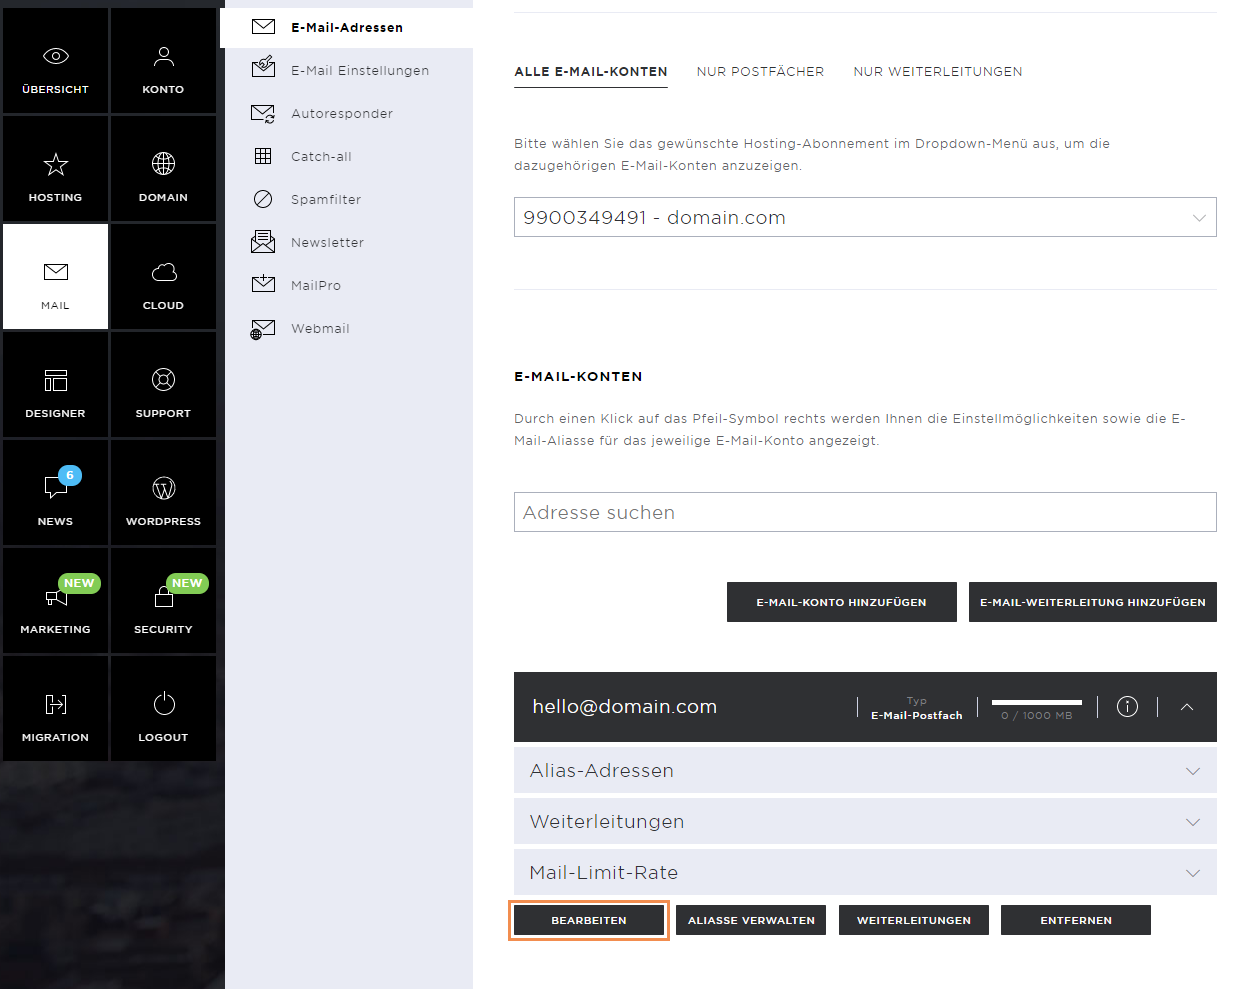
Edit email account
To manage an email account, click on the email address concerned. By clicking on Edit, you can change the password or the mailbox storage space.
Please always keep an eye on the memory load. If the storage capacity is 100%, no new emails can be stored.
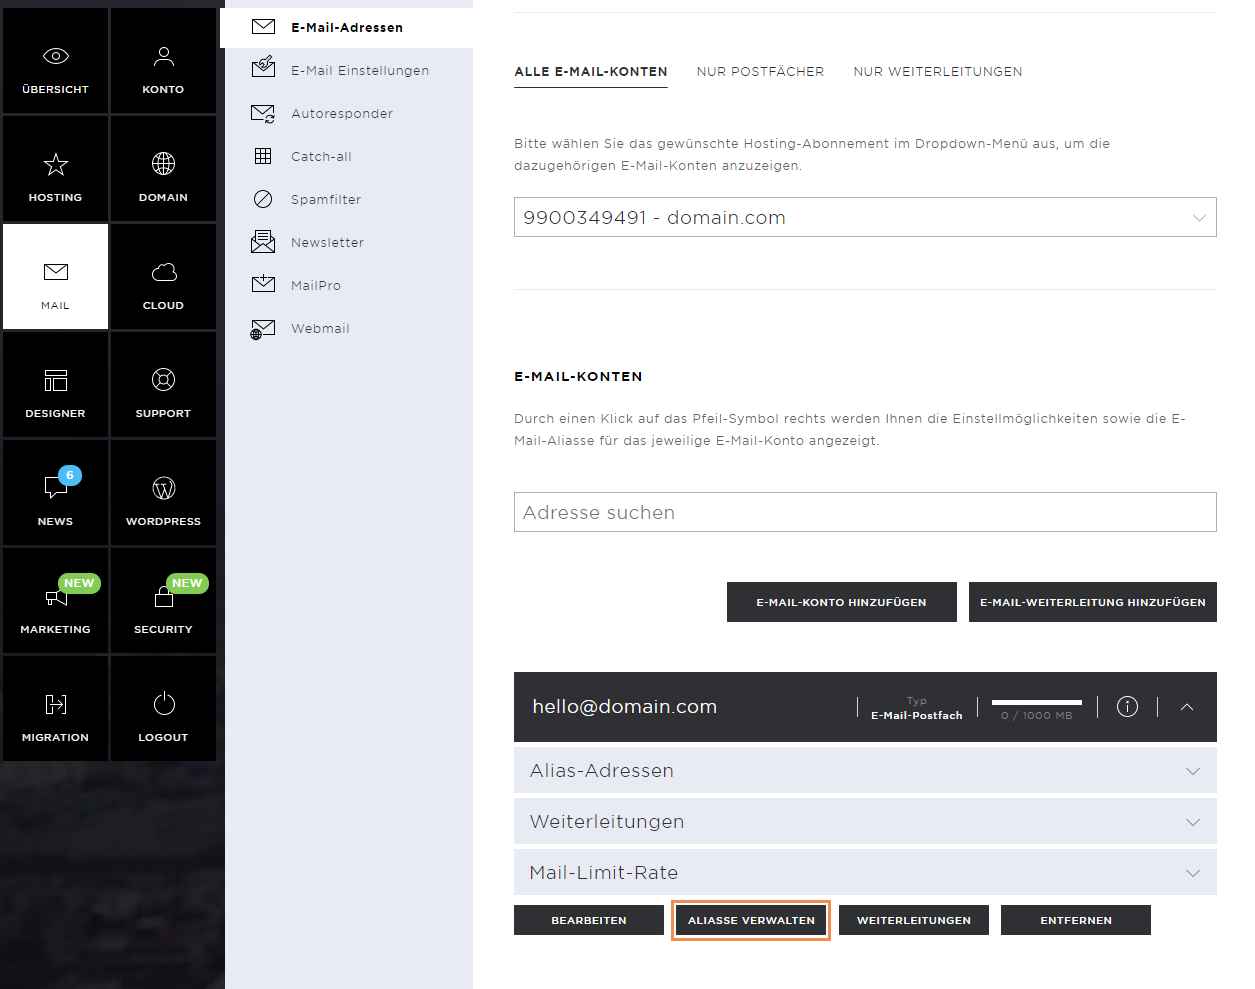
Alias address
If you want to add an alias address, click on the Manage Aliases button. Enter the preferred e-mail address and click on Add.
To save the changes, click on Close.
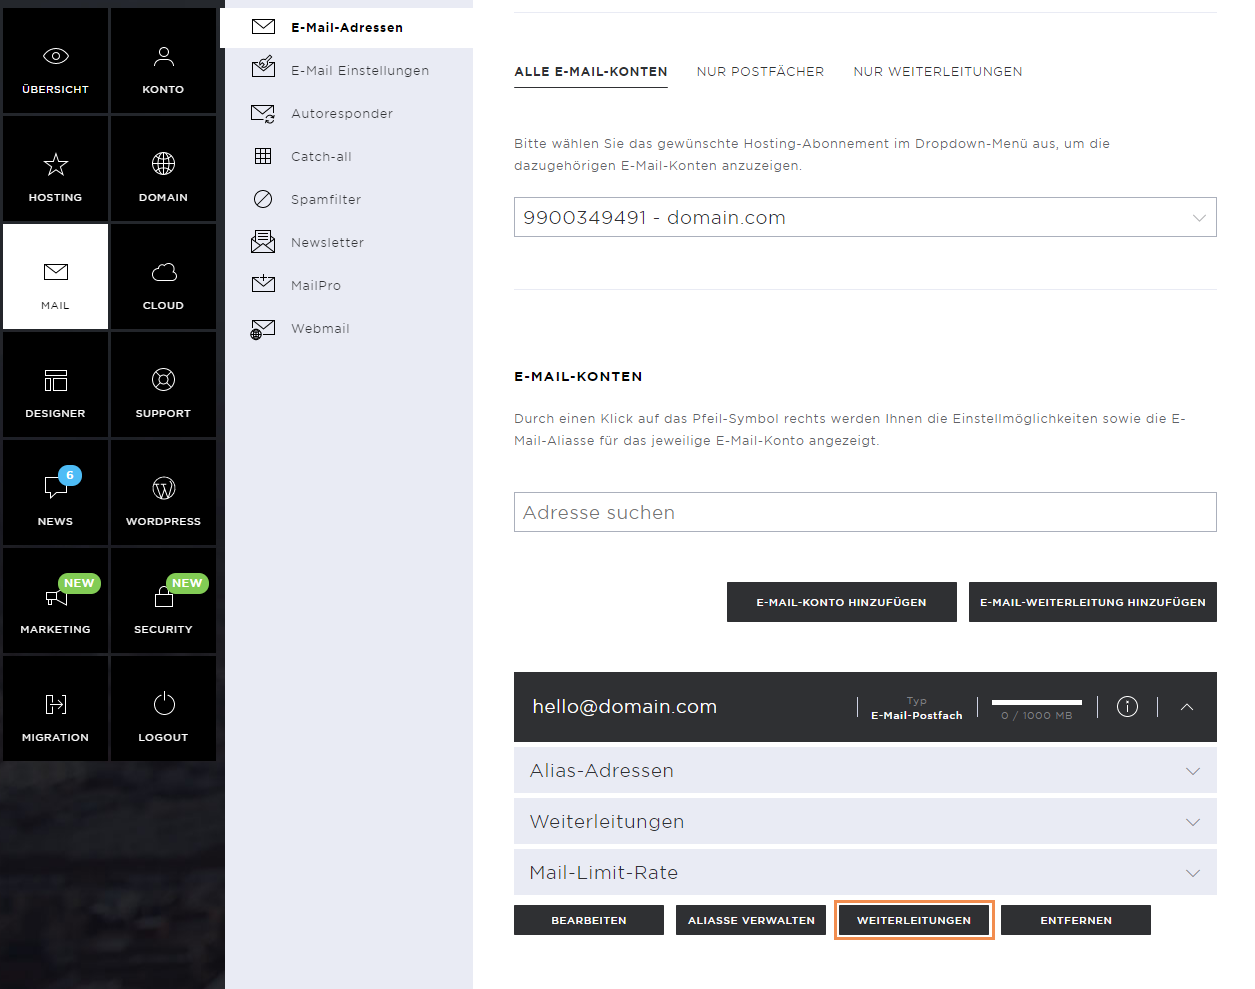
Forwarding
Each e-mail address has a forwarding option that can be used. In this case, the e-mails are first filed in the inbox of the e-mail account and then sent to the stored forwarding option.
To set up such a forwarding, click on the Forwarding button and add the address you want to use. Save the changes by clicking on Close.
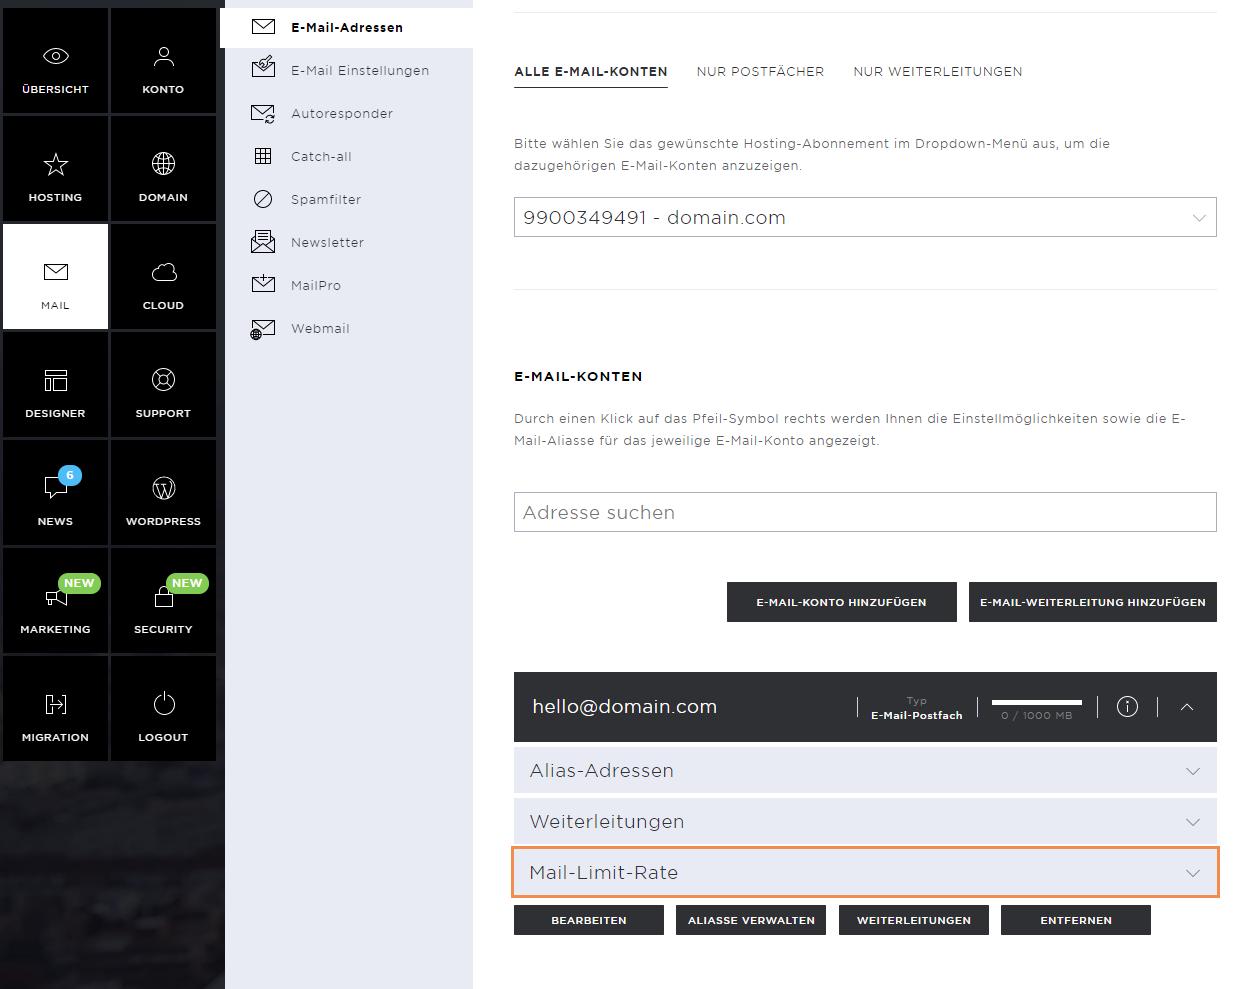
Mail limit rate
In order to guarantee you stable and secure e-mail traffic, the maximum number of e-mails per mailbox and hour must be limited. This protective mechanism prevents the server's IP address from ending up on an IP blocklist if spam is sent from an address. The sending limit per hour can be temporarily increased for 24 hours at a time.
To do this, click on Increase Mail Limit Rate. Now set the rate to the wanted number. Note that these rates depend on your hosting subscription. Complete the changes by clicking on Save.
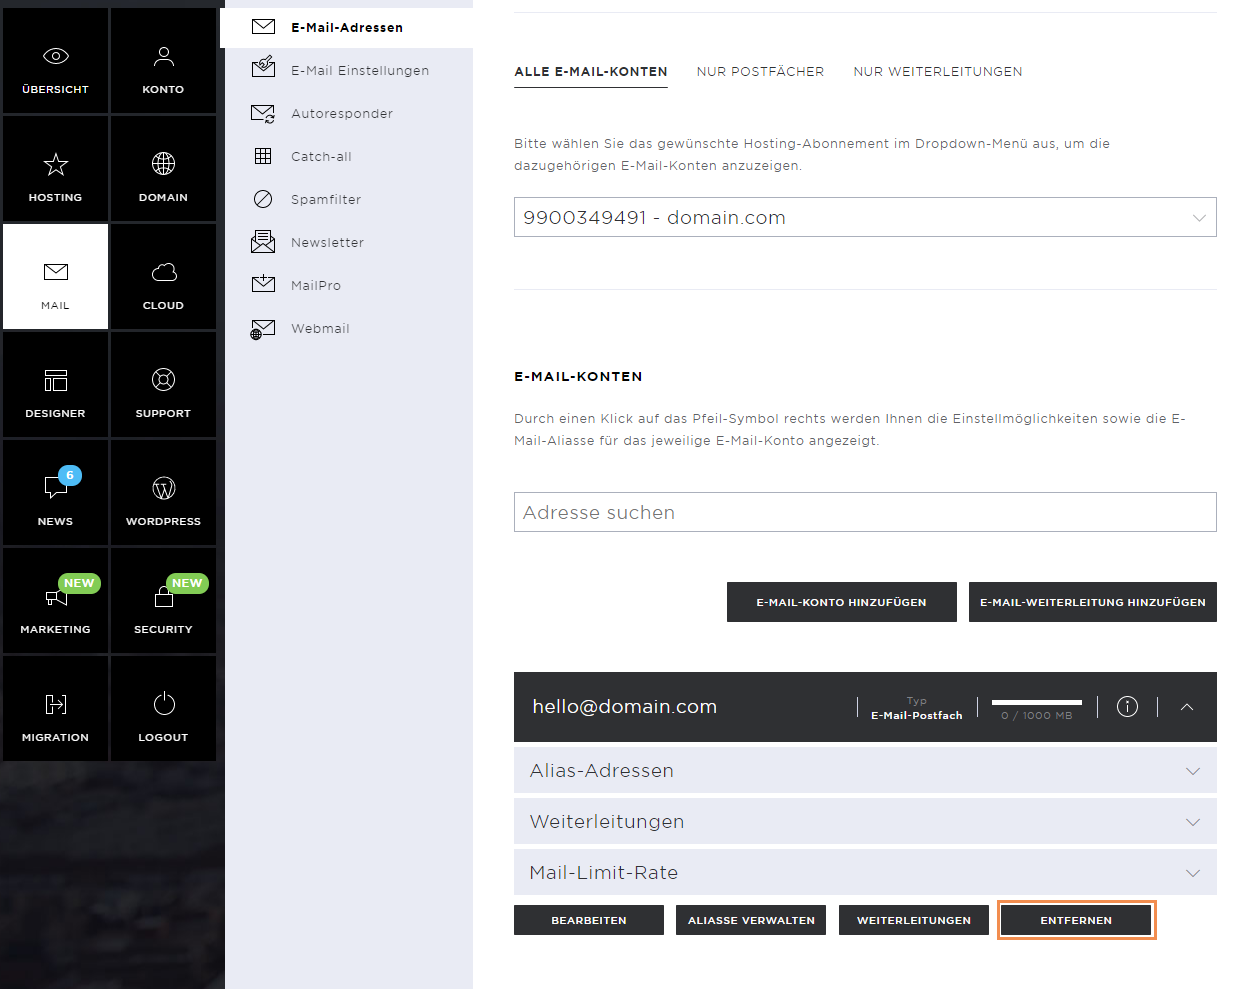
Remove email account
To remove the email account, click on the Remove button and confirm the removal. This deletes the email account and the data it contains from the server.
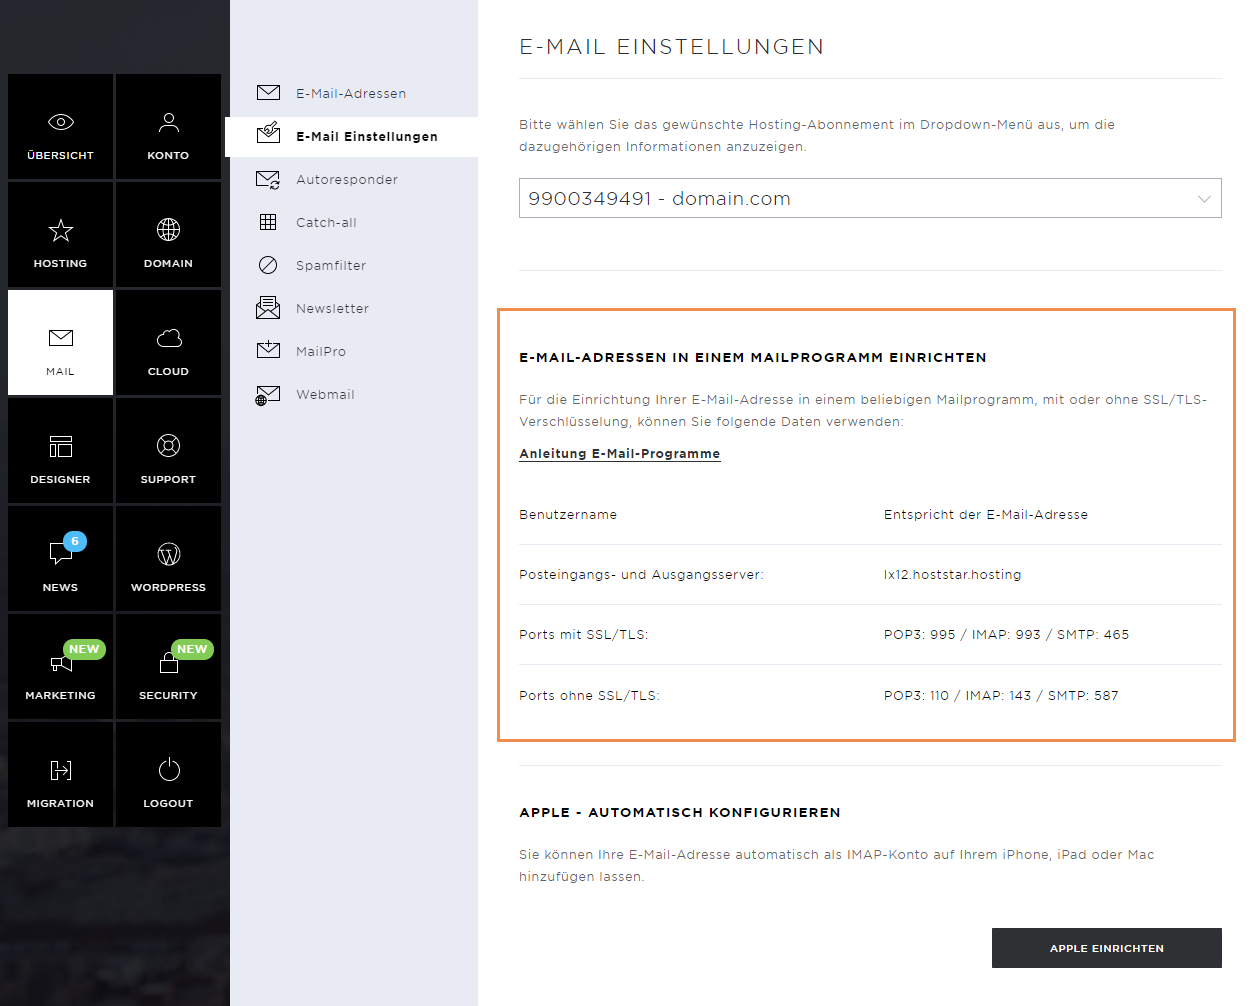
E-mail settings
In the E-mail Settings section, you will find the setting information that must be used to set up the e-mail client. With these settings, you can send and receive e-mails without having to access the webmail.
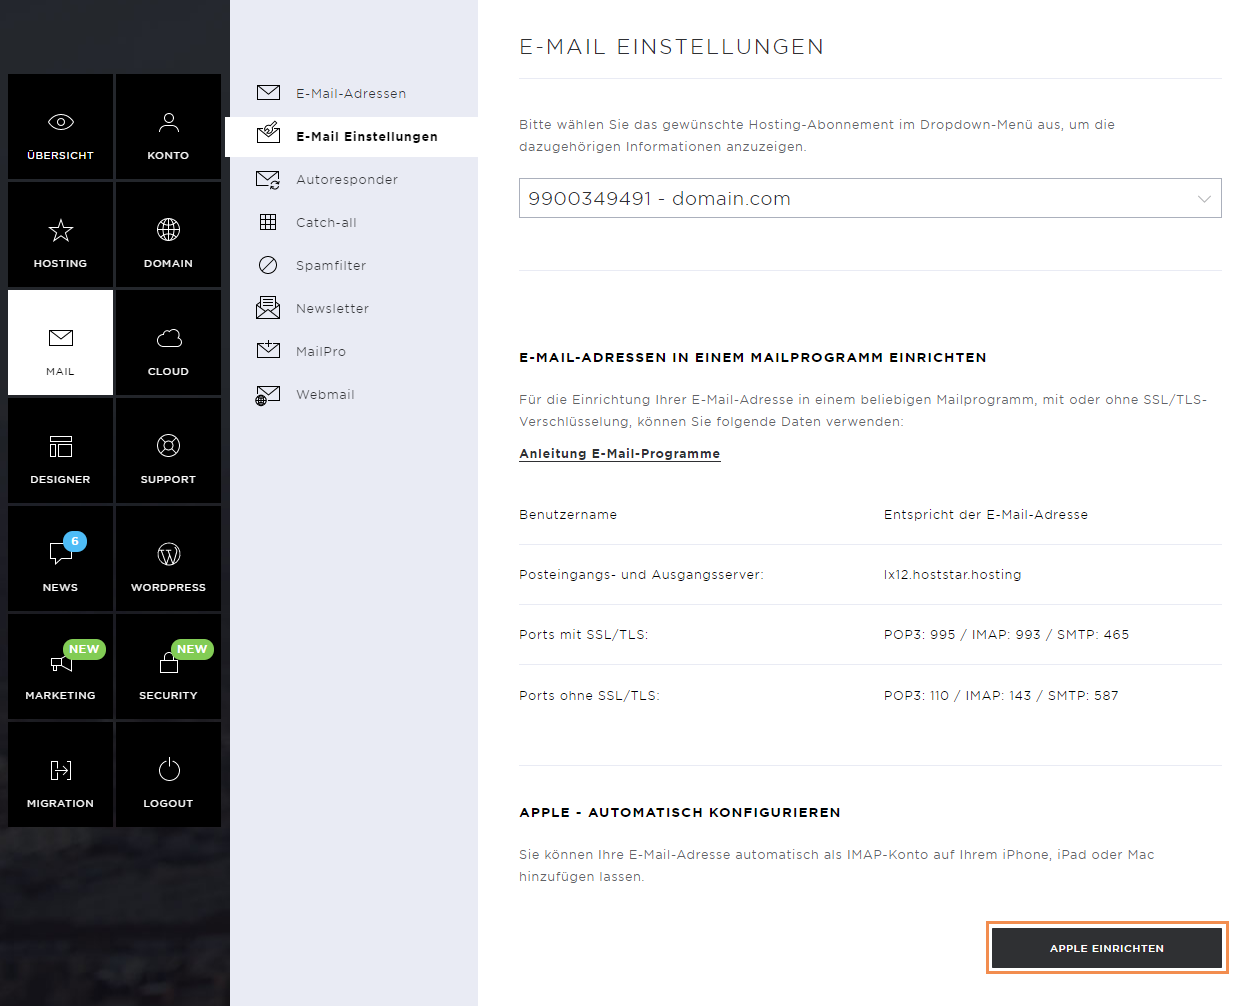
Apple Configurator
If you use an Apple device, you can use the automatic configurator to automatically install the e-mail account. An Apple profile is downloaded, which is read directly into the e-mail program.
To do this, click on Set up Apple and continue with the next steps.
Autoresponder
An autoresponder automatically sends a reply to the senders of each incoming e-mail (max. one e-mail per day to the same sender). Use autoresponders, for example, in case of holiday absences.
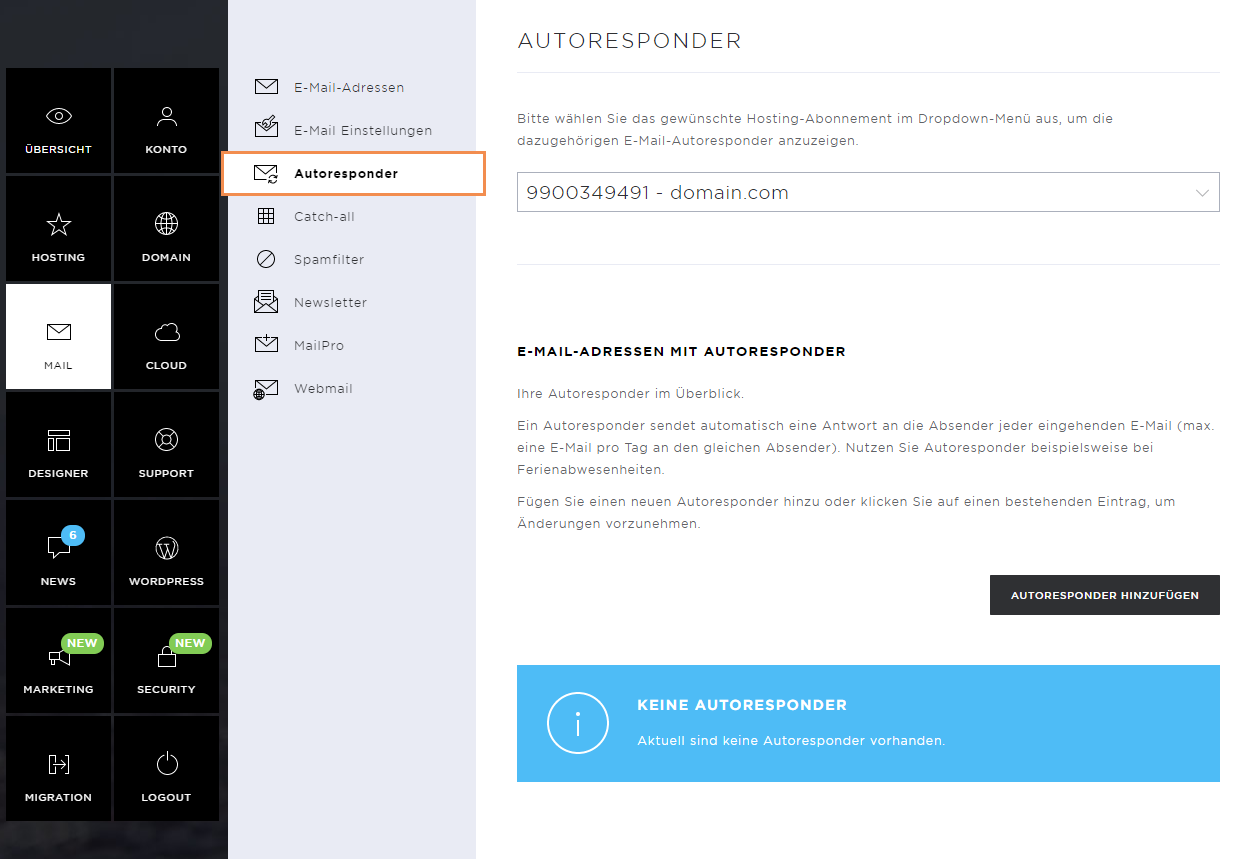
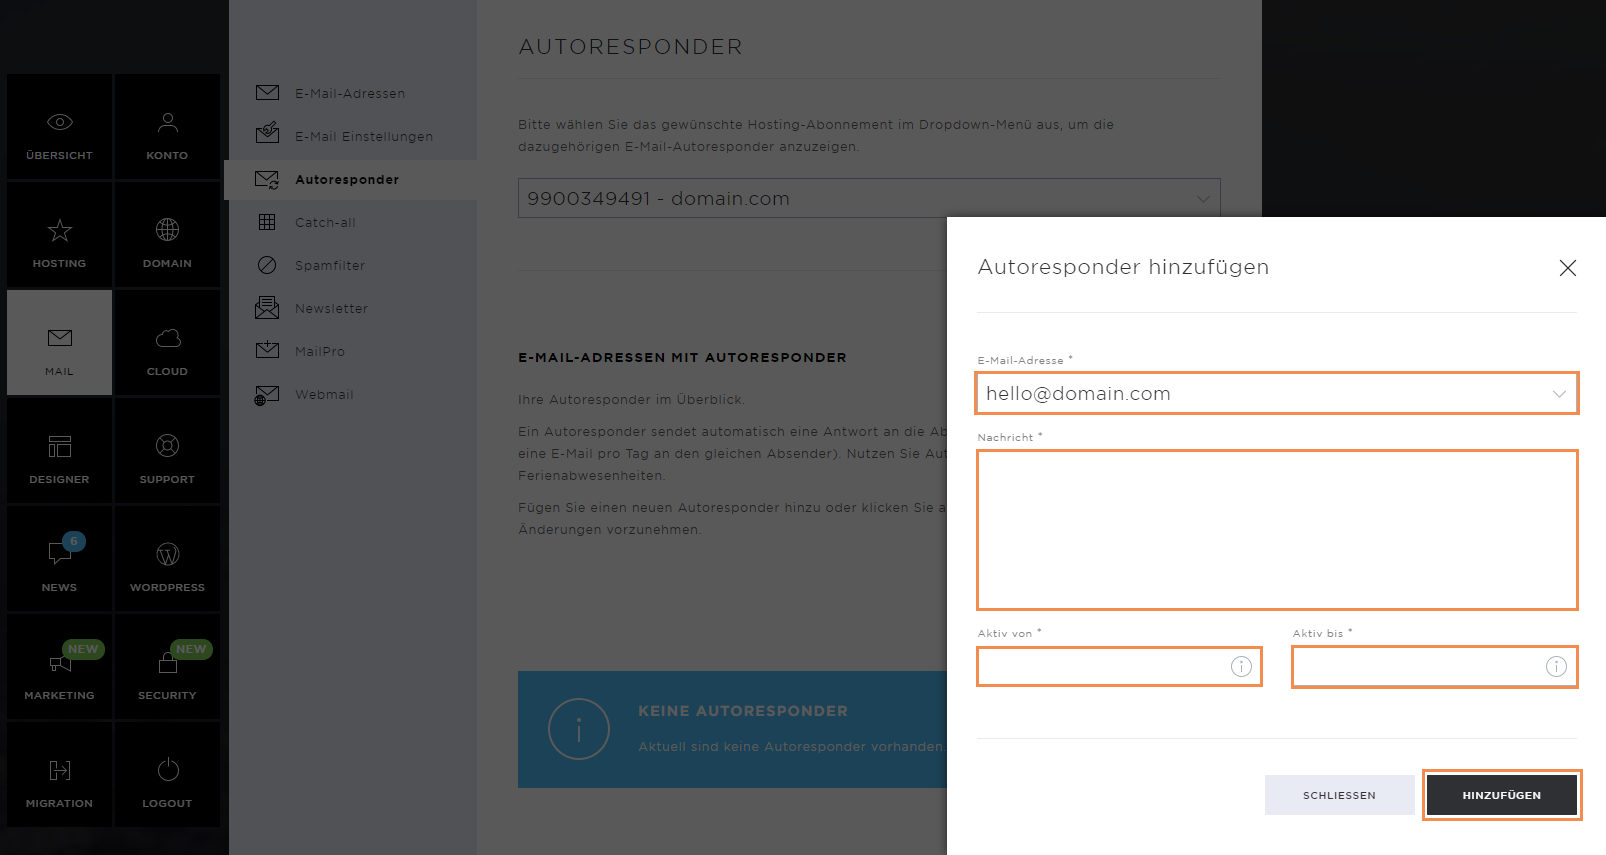
Click on Add Autoresponder and select the required e-mail account. Enter the text that should be sent automatically, and specify the activation period (from when to when) for the autoresponder to be active.
Save the autoresponder by clicking on the Add button.
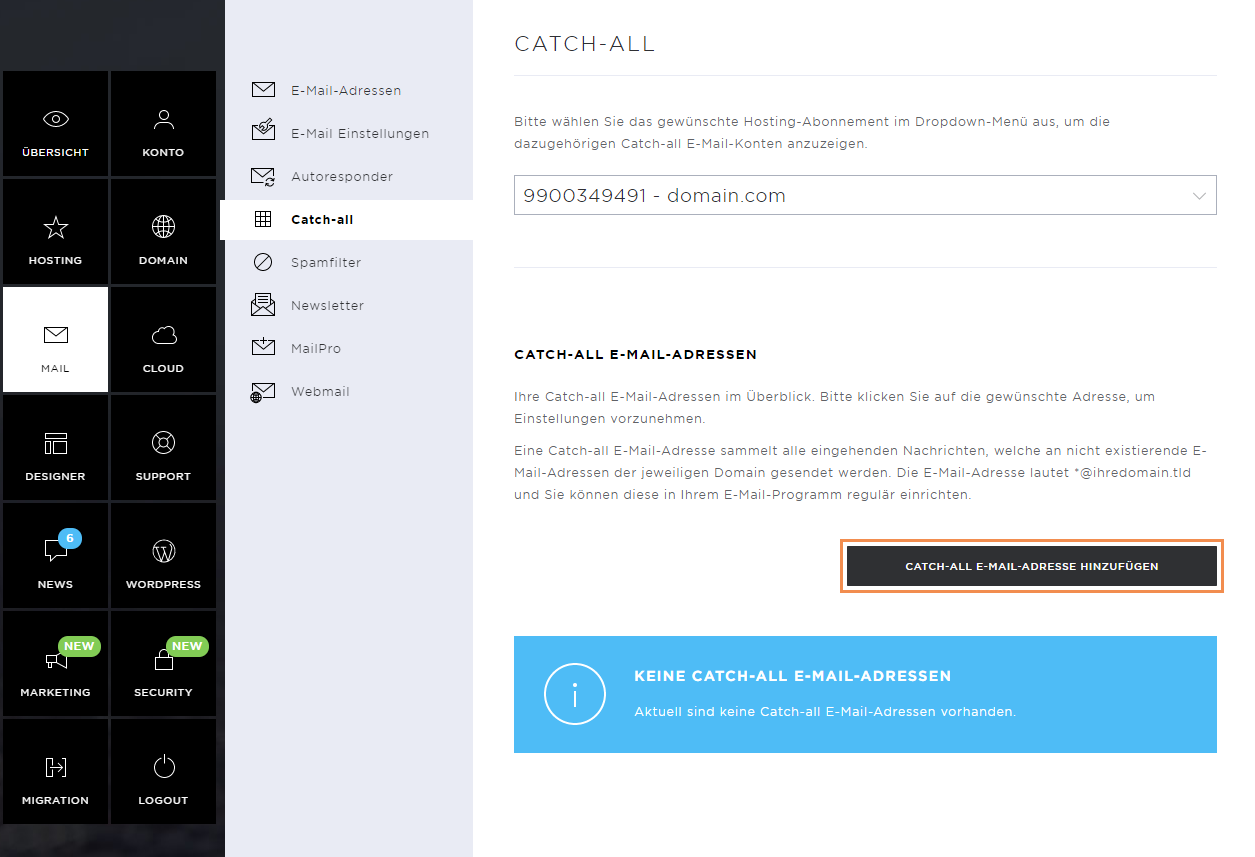
Catch-all
A catch-all e-mail address collects all incoming messages that are sent to non-existent e-mail addresses of the respective domain. The e-mail address is *@ihredomain.tld and you can set it up regularly in your e-mail programme.

To start setting up the catch-all address, click on the Add catch-all email address button.
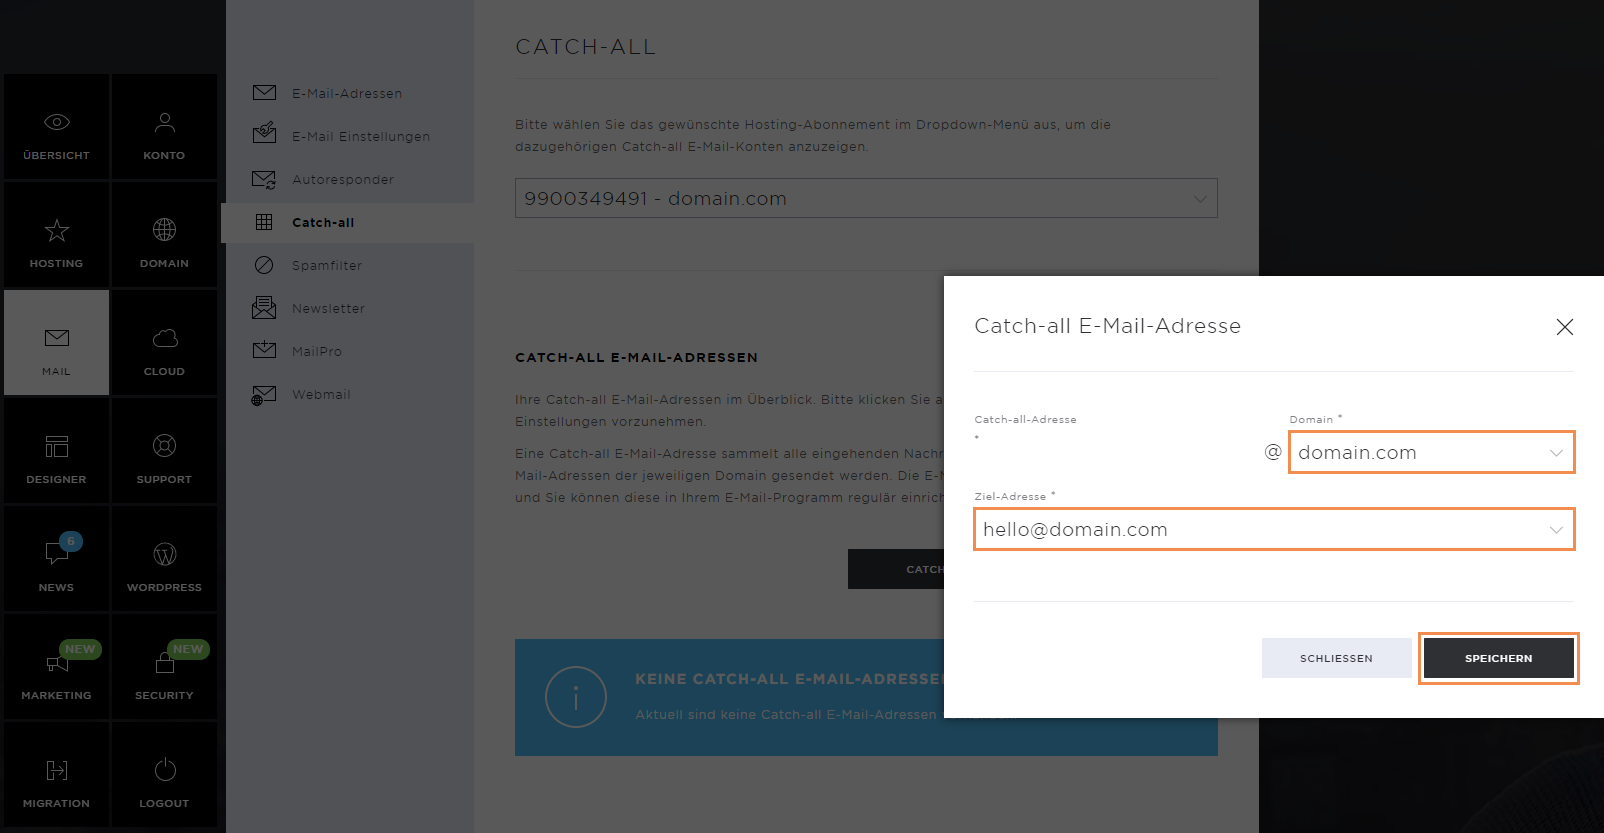
Now select the preferred domain and decide on a destination address. Please note that no external e-mail addresses can be used for this. You can only select the e-mail addresses that you have set up in the My Panel.
Then click on Add so that the address is created.
Spam filter
The spam filter sorts out unwanted e-mails (advertising, fraud) from your inbox.

Global Blacklist
If you repeatedly receive spam or other unwanted e-mails from a certain sender or domain, you can enter the respective senders in the blacklist. E-mails from senders in the blacklist are always classified as spam and irrevocably deleted!
Please note that the global settings apply to all e-mail addresses in your hosting.
To edit the blacklist, click on the Global Blacklist button.

Enter the e-mail address or domain you wish to block. To block an entire domain, you can enter it as follows:
*@domain.tld
This entry will block all senders of a specific domain. Then click on Add and save the settings by clicking on Close.

Global whitelist
If emails you want are wrongly classified as spam, you can add the sender addresses of these emails to your whitelist. Emails from senders in the whitelist are automatically classified as good and the emails from these senders always end up in the inbox as a result.
Note that the global settings apply to all email addresses in your hosting.
Click on Global Whitelist to edit it.

Enter the e-mail address or domain concerned, which should no longer be marked as spam. The input options also apply here:
*@domain.tld
Click on Add and save the settings by clicking on Close.

Spam filter settings
You can adjust the spam filter configuration per e-mail account. To do this, click on the Spam Filter button.

The spam filter can be disabled if necessary, but this is not recommended. As long as the configuration is defined via the Simple Settings, you can adjust the sensitivity of the spam filter in the filter level. To do this, drag the slider to the left or right to increase or decrease the sensitivity.
If you want to configure the spam filter settings manually, you can do this in the Advanced Settings. In addition, you can choose whether the spam report of a message should be deposited in the e-mail header or not.
Once you have completed the configurations, confirm them by clicking on Save.

Blacklist
Unlike the Global Blacklist, the rules set here only apply to the email account concerned.

Whitelist
You also have the option to manage a whitelist for a single email account, which will have no effect on the other accounts.
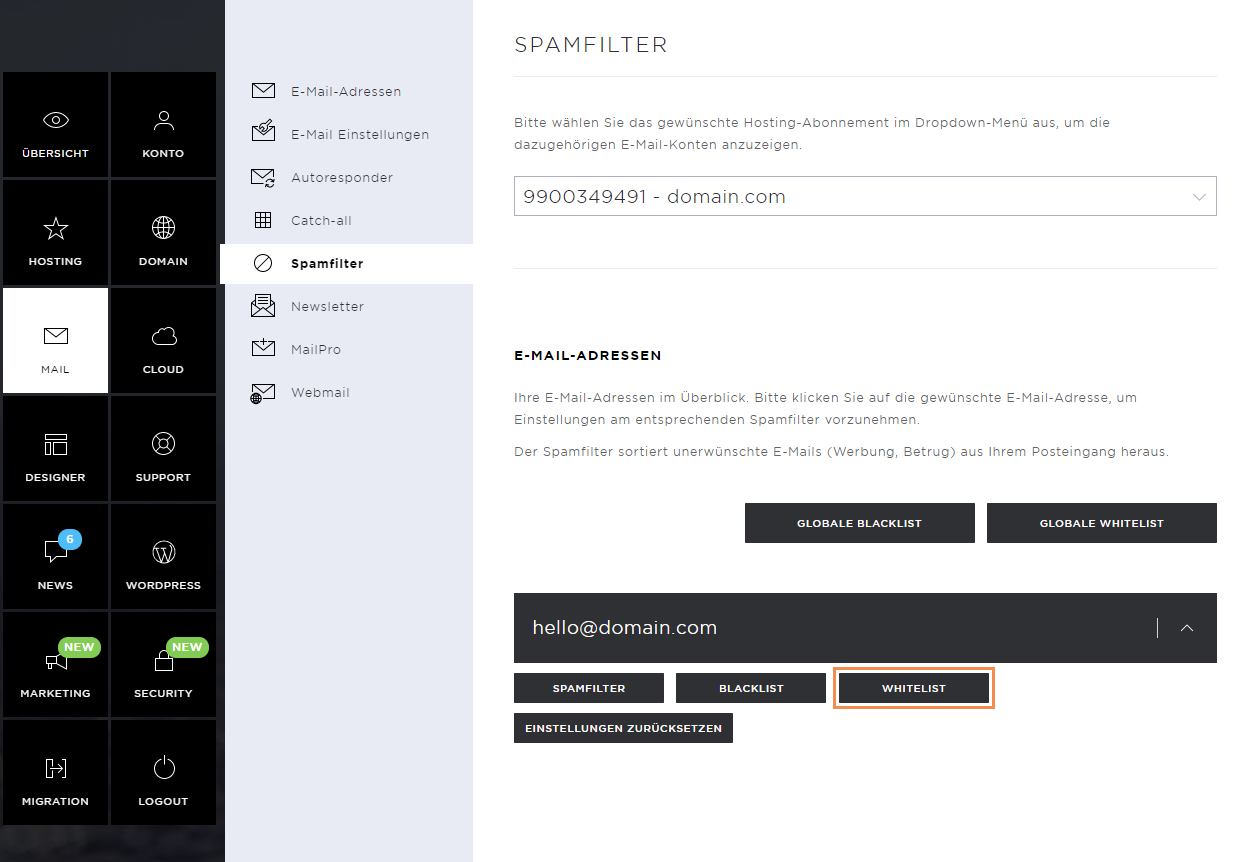
By clicking on Reset settings, all spam filter settings, blacklist, and whitelist entries of the affected email account are reset to the default values. This cannot be undone.

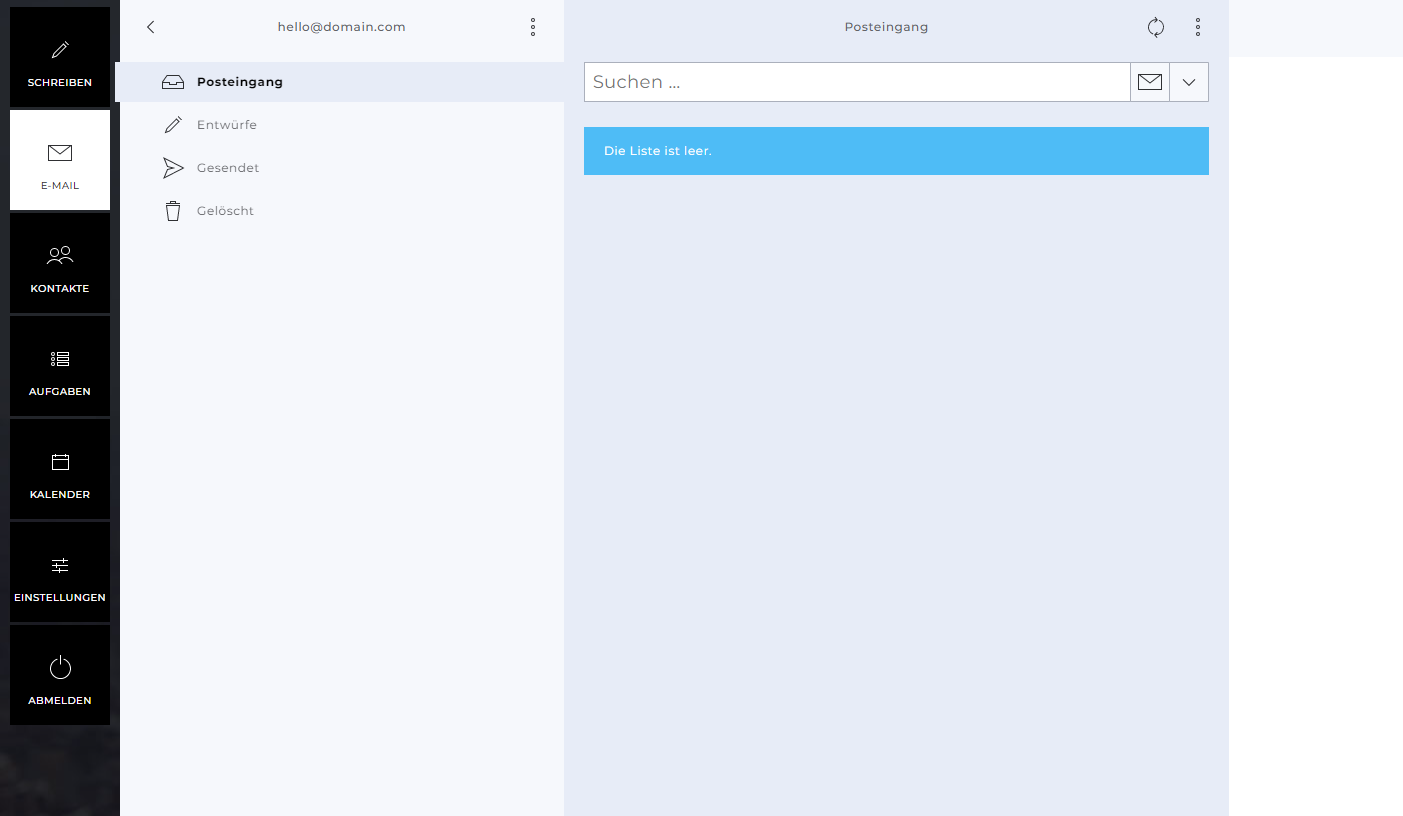
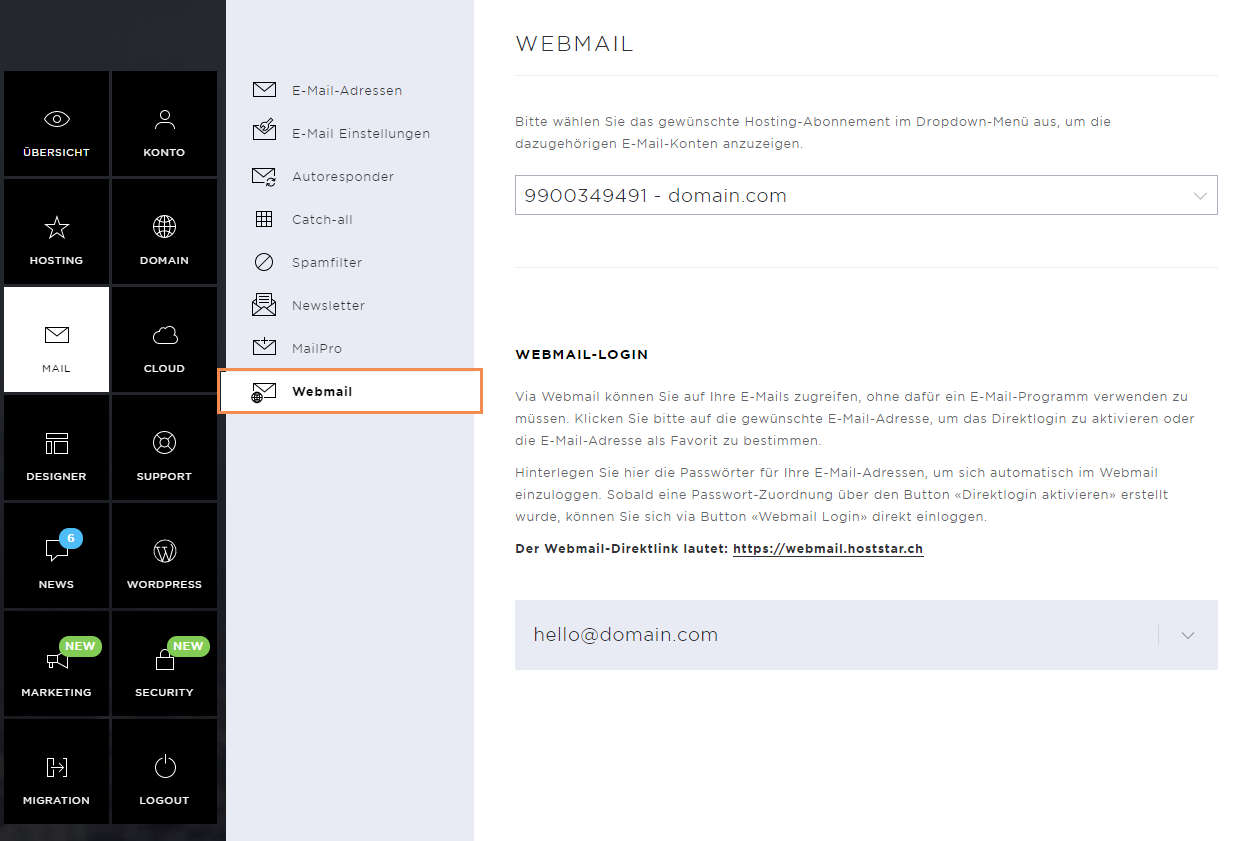
Webmail
Via webmail, you can access your e-mails without having to use an e-mail program.
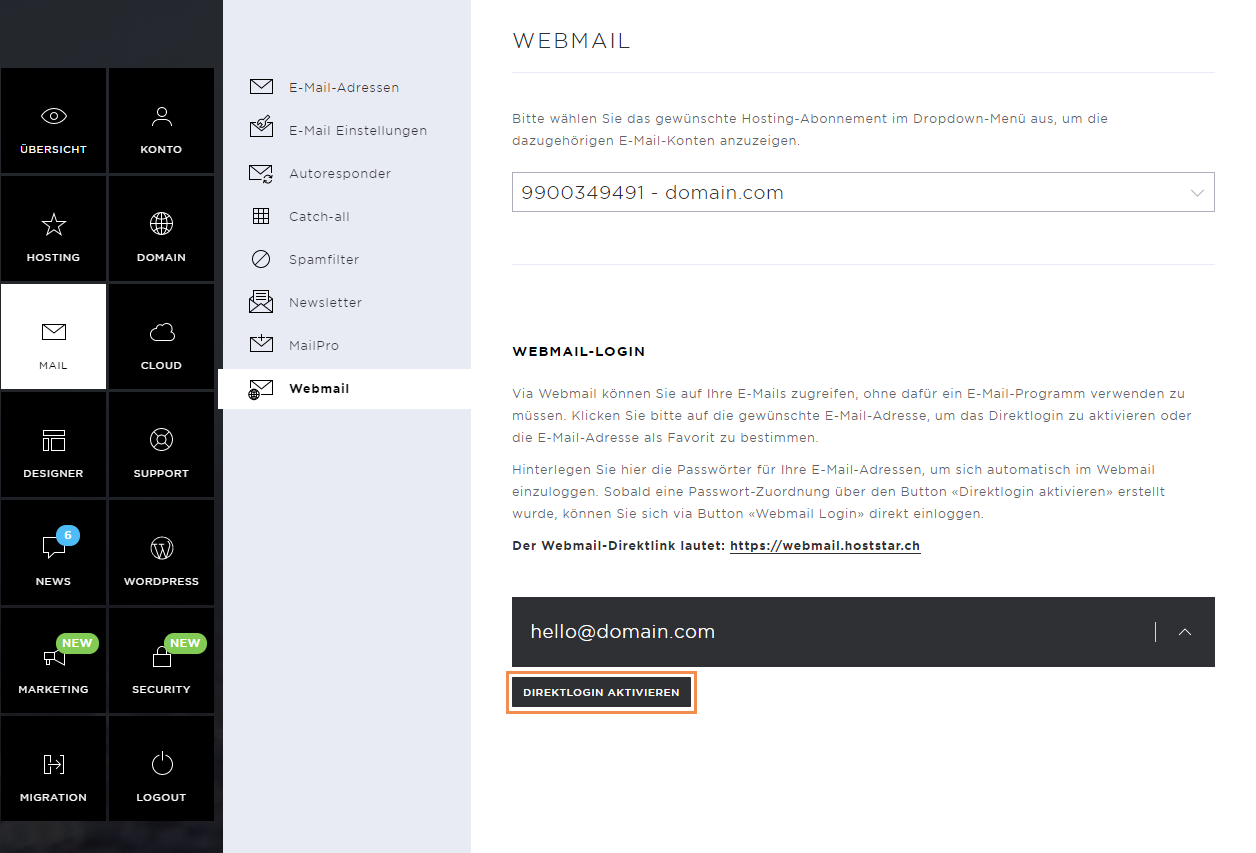
Click on Enable direct login to enable direct webmail access and enter the password of the email account. Confirm the activation.
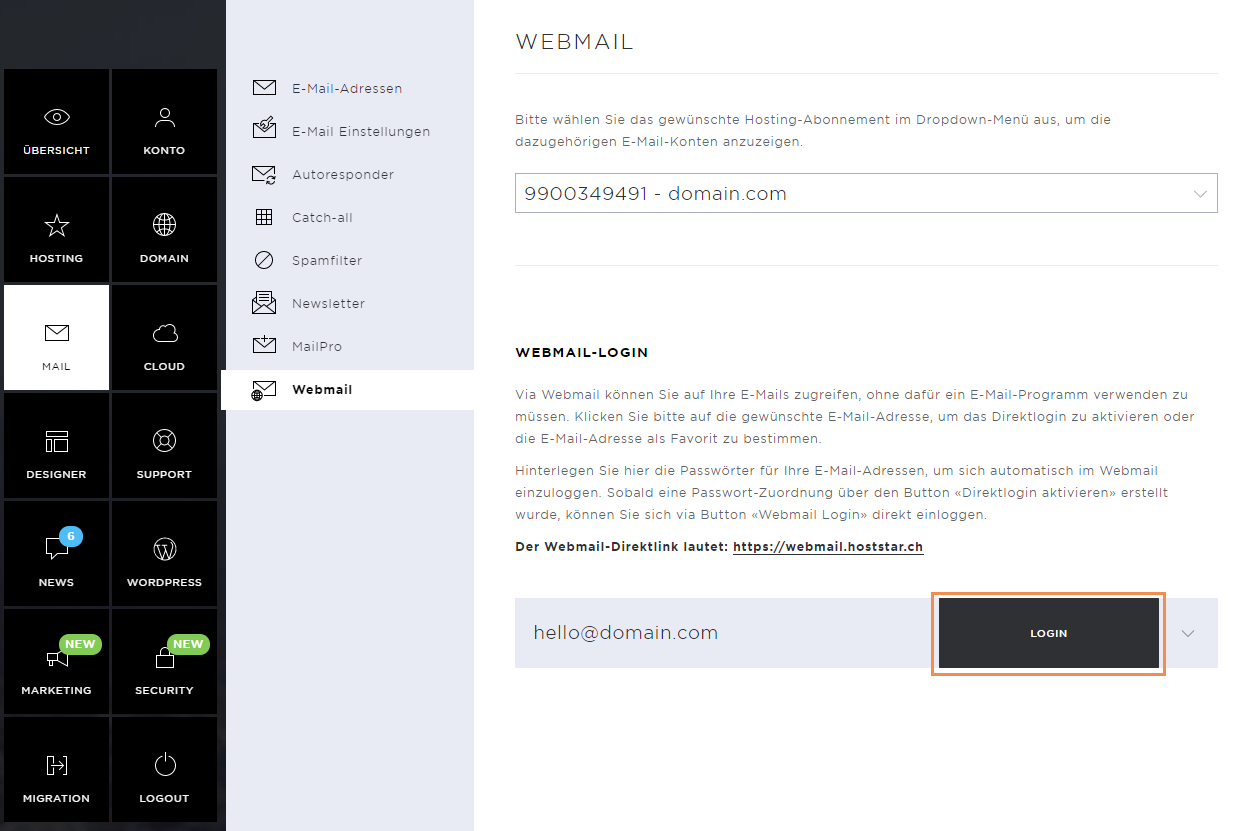
After enabling the direct login, you can click on the Login button to be connected to the webmail immediately.
Within the webmail, you can manage your messages and folders. You can send new e-mails and make other settings.