Add content
There are many elements available to you for designing your websites. You can drag and drop these elements to position them wherever you want in the content area.
After «logging into Designer», follow these steps:
1. Navigate
You begin on the «Site» page of Designer's editor. Click the desired page. It is then marked with an orange line. Next, click the menu item «Add Content».
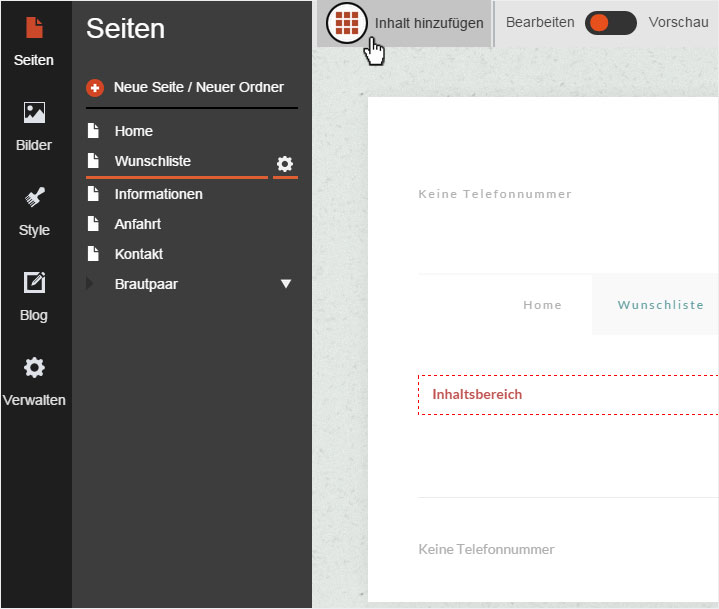
2. Display page content elements
A drop-down menu with a scroll bar appears. Here you will see several elements depending on your Designer subscription.
You can drag & drop the desired elements into the «Content area». The elements are grouped as follows:
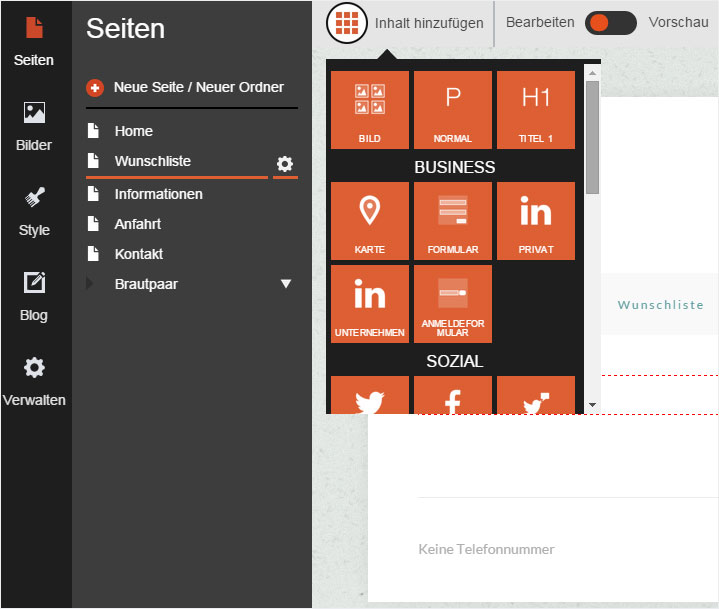
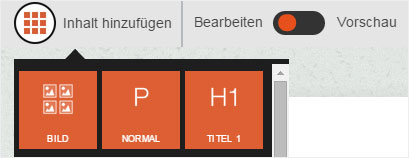
General
The following page elements are available in the «GENERAL» group and can all be freely positioned within the content area of the page:
- Image: A graphic.
- Normal: A paragraph of text (corresponds to an HTML
tag).
- Title 1: A large heading (corresponds to an HTML
tag).
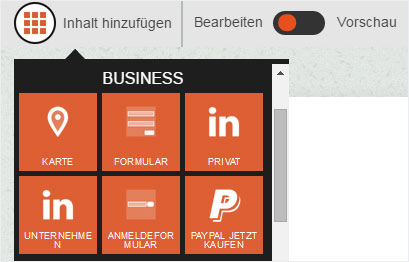
Business
The following page elements are available in the «BUSINESS» group:
- Map: a map section from Google Maps. You can change the address, zoom factor and the element’s height when you click it. You can also select whether or not to include the «zoom-control element».
- Form: a simple form. You can specify the email title, the text of the submit button, the recipient address and the success page.
- Personal LinkedIn: a widget for your personal LinkedIn profile.
- Business LinkedIn: a widget for your business LinkedIn profile.
- Signup form: a form for entering an email address. This element can be used to sign up for a newsletter, for example.
- PayPal buy now2: adds a field that lets you can specify product names, product prices, delivery costs, button text, alignment and PayPal settings (email account and currency). You can then add the «PayPal buy now» button.
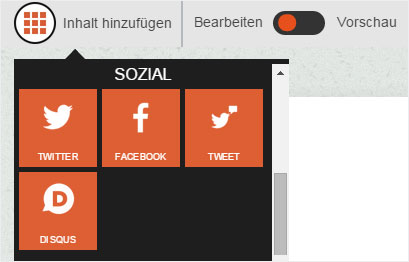
Social
The following page elements are available in the «SOCIAL» group:
- Twitter: a widget to embed the latest tweets from a Twitter profile.
- Facebook: a widget for recommending the relevant page on Facebook (share function).
- Tweet: a widget for recommending the relevant page on Twitter.
- DISQUS: a widget for adding a DISQUS discussion.
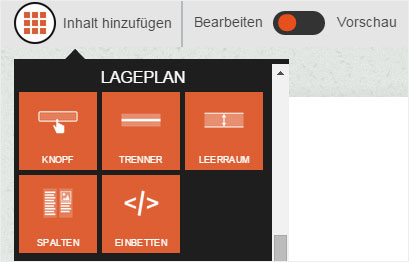
Layout
The following page elements are available in the «LAYOUT» group:
- Button: a button can be used to link to an internal or external location or to an email address.
- Divider: a dividing line (corresponds to a tag in HTML) for visually separating site content.
- Spacer: freely editable space you can use to visually structure a site’s content.
- Columns: an element you can use to structure any type of content with any number of columns (corresponds to a tag in HTML).
- Embed1: an element you can use to add any HTML and JavaScript code, for example, to link to external widgets.
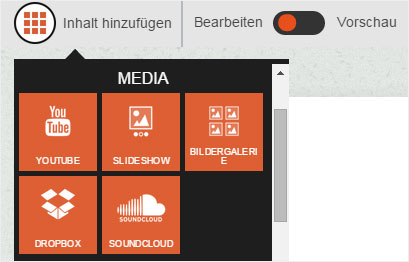
Media
The following page elements / widgets are available in the «MEDIA» area:
- YouTube: connect to any YouTube video from your site.
- Slideshow: creates a slideshow of uploaded images. You can upload the desired graphics from the menu to the left under «Images».
- Image gallery: creates an image gallery of uploaded images. You can upload the desired graphics from the menu to the left under «Images».
- Dropbox: link any Dropbox folder to your site.
- SoundCloud: embed any audio content from SoundCloud.
Blog
The following page elements are available in the «Blog» area:
- Post list: list of blog posts that can be created with the blog function.
- Blog search: a search function for blog posts you have created using the blog function.

3. Editing mode
You can change any content you have created by clicking an inserted element. It then opens in the corresponding editing mode (in this example, the editing mode for the «Map» element).

1 You can use this element with StarBiz or other higher-level subscription.
2 You can use this element with StarPlus or other higher-level subscription.