Profile
In the «Profile» section you can enter a variety of data such as company name, description, copyright information, PayPal account and contact details as well as a logo. Certain information will be used directly on the website.
After «logging into Designer», follow these steps:
1. Navigate
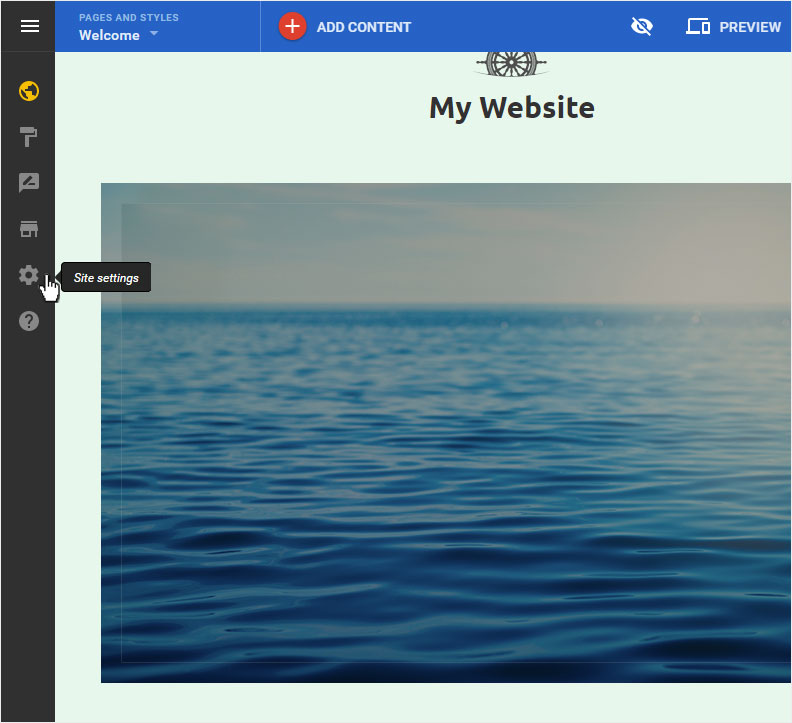
You begin on the home page of Designer's editor and are thus in the «Site editor» view. Click left on the menu item «Site settings».
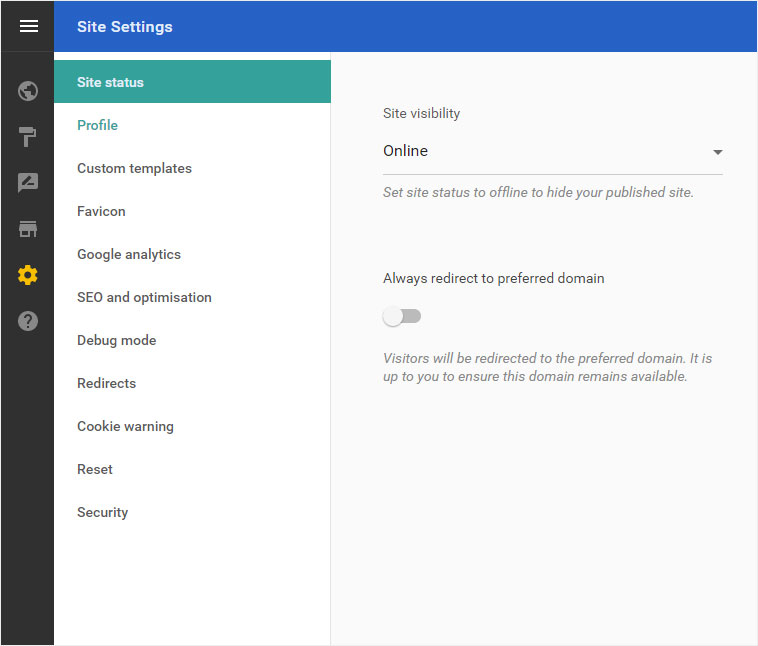
The «Site status» overview page of the «Site settings» area is now displayed. Click on «Profile» in the menu on the left.
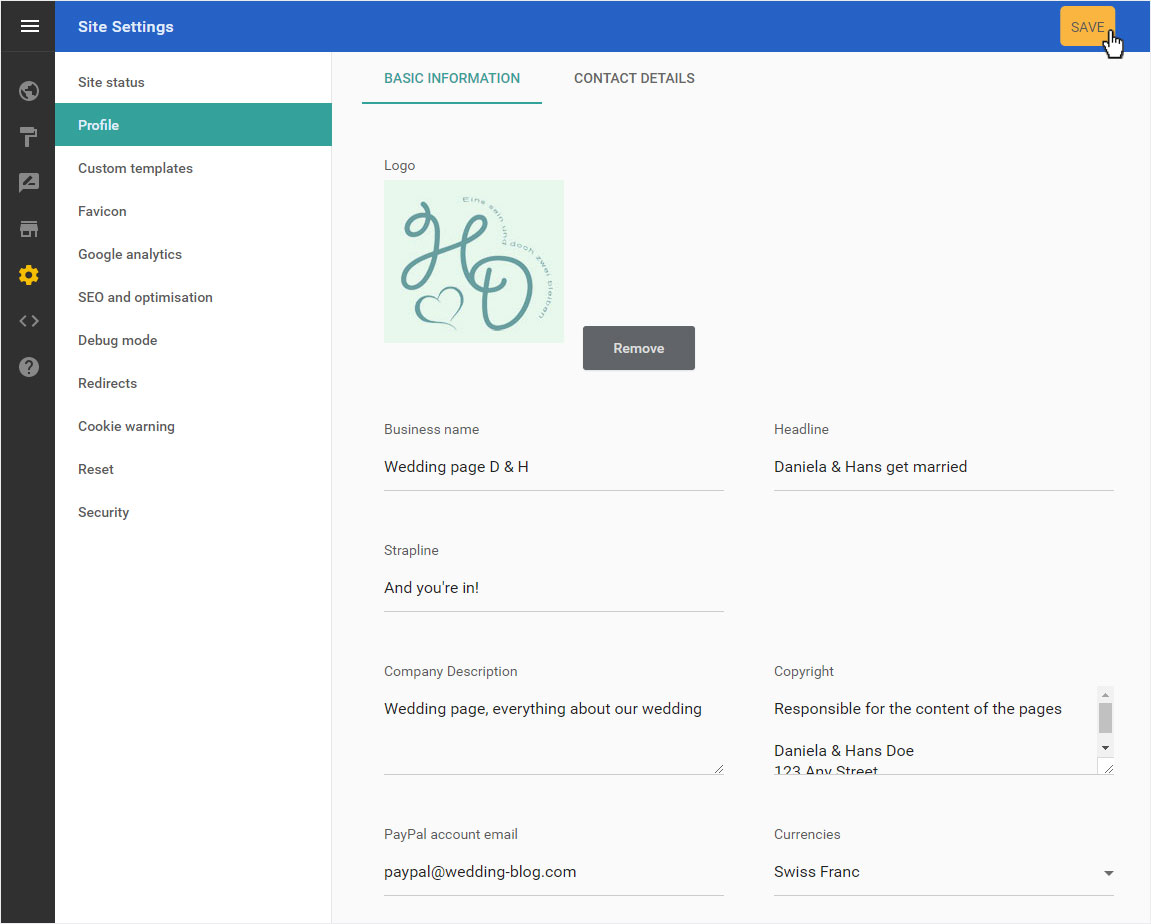
2. Basic informations
You will be automatically redirected to the «Profile overview page» geleitet, which is also the «Basic information» area. Another area would then be «Contact details».
Here you can store or define the following data:
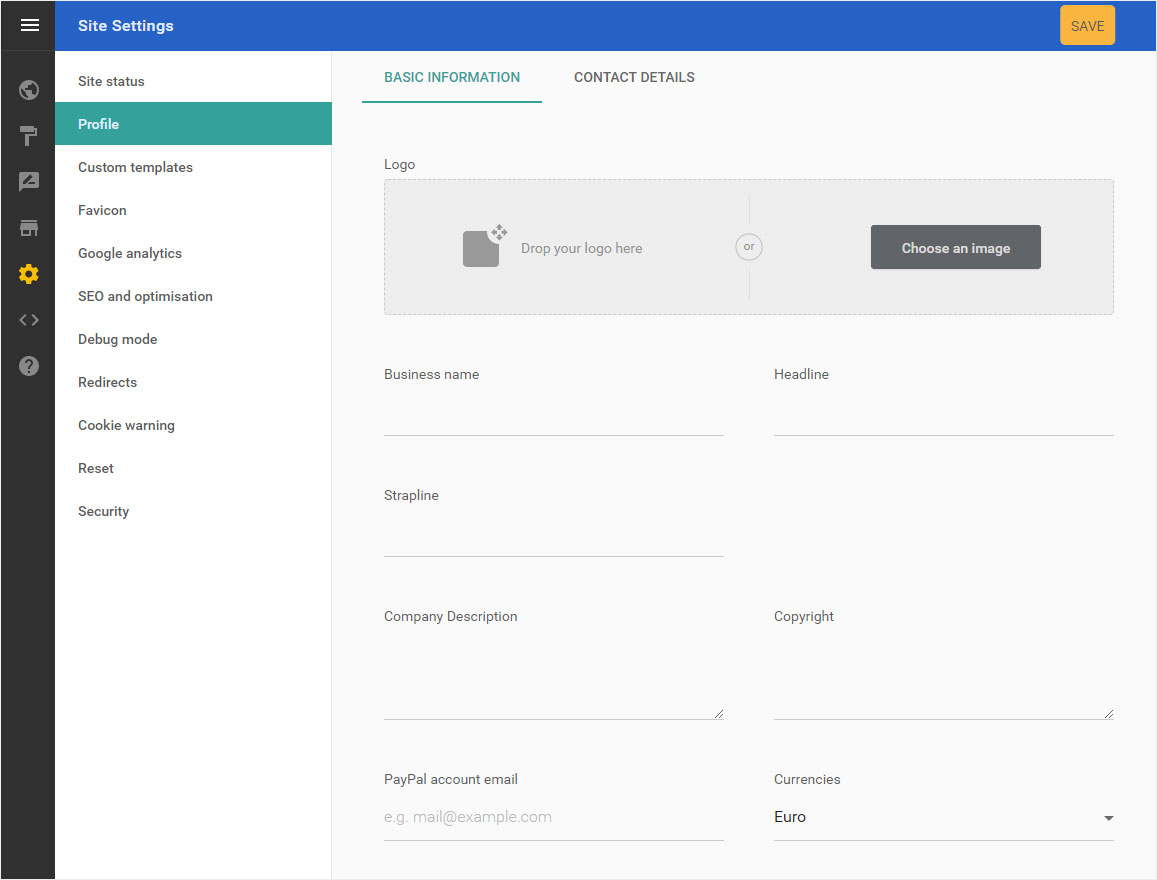
Add logo
Here you can first define a logo for your website. To do so, click on «Choose an image». Select the desired image from your folder directory.
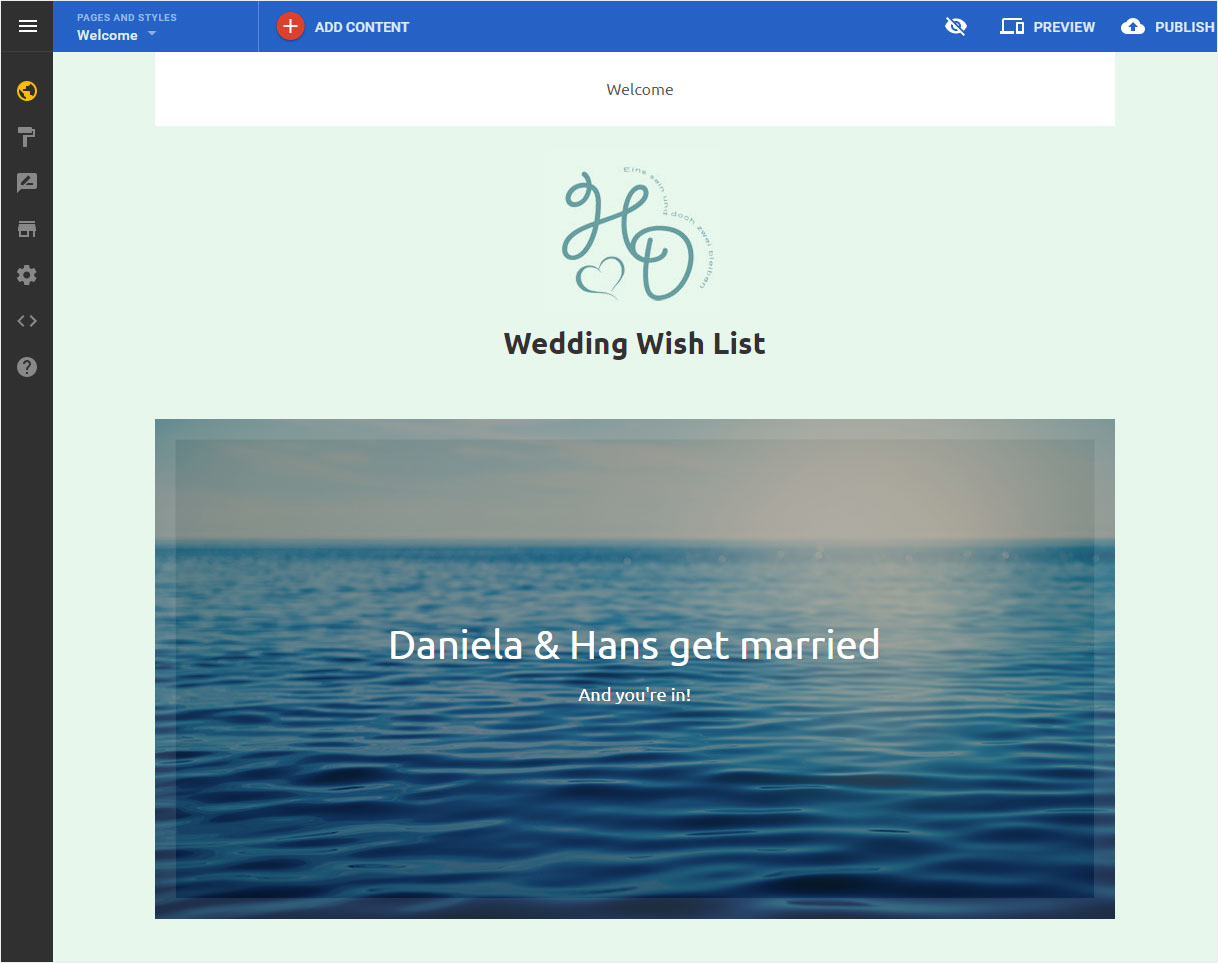
The «Logo» is immediately added and saved. If you now go to the view of the home or welcome page, you will see the «Logo».
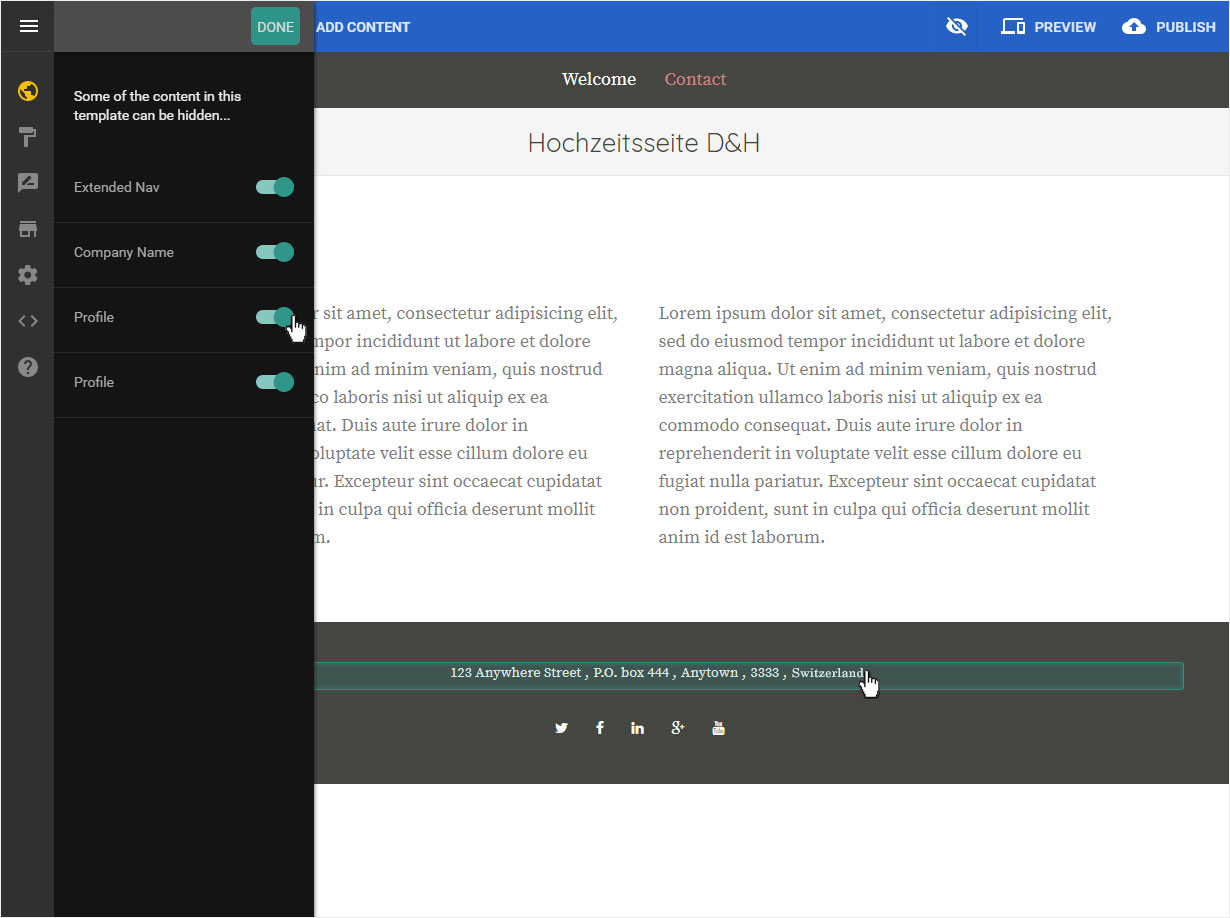
If this is not the case, click on the «hidden content icon» - the «crossed out eye icon» in the upper right corner and follow the instructions for «Edit hidden content».
Add informations
Next, you can enter the information from «Business name» to «Currencies». Then click on «Save».
The «Informations» are immediately added and saved. If you now go to the view of the home or welcome page, you will see the «Logo».
If this is not the case, click on the «hidden content icon» - the «crossed out eye icon» in the upper right corner and follow the instructions for «Edit hidden content».
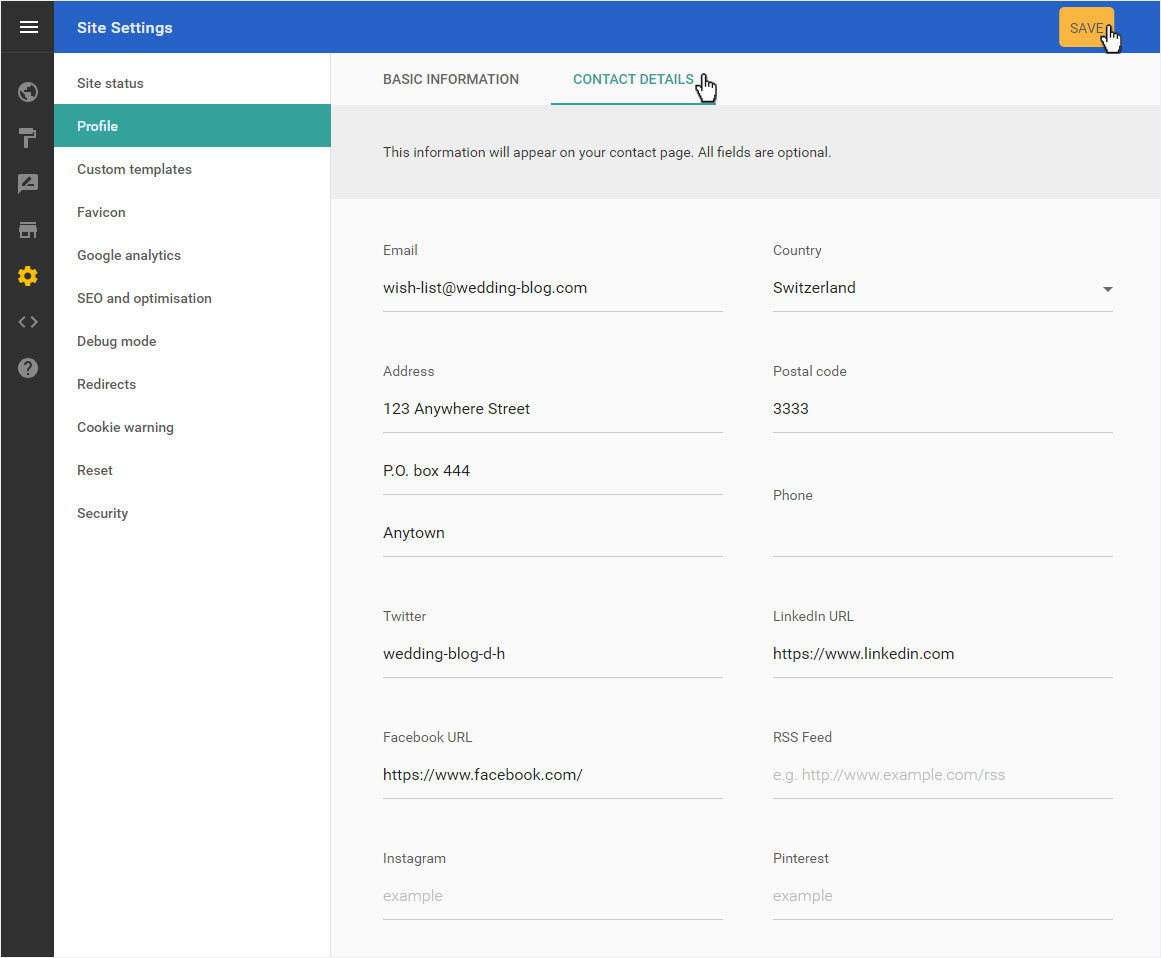
3. Contact details
Then click on «Contact details». Fill in the contact details, e.g. e-mail address, address, telephone number and all social media links and then click on «Save».
To check the data output, click on the «Site editor» menu item and then on the «Contact» page. Depending on the design template used, the «Contact Details» are displayed in the preview.
Or you can edit, define or select the contact data according to the design template.