Search-engine optimisation (SEO)
The term search-engine optimisation or SEO refers to measures taken to help ensure that a particular website appears high up in the organic (unsponsored) search results.
You can enter the necessary data in Designer.
After «logging into Designer», follow these steps:
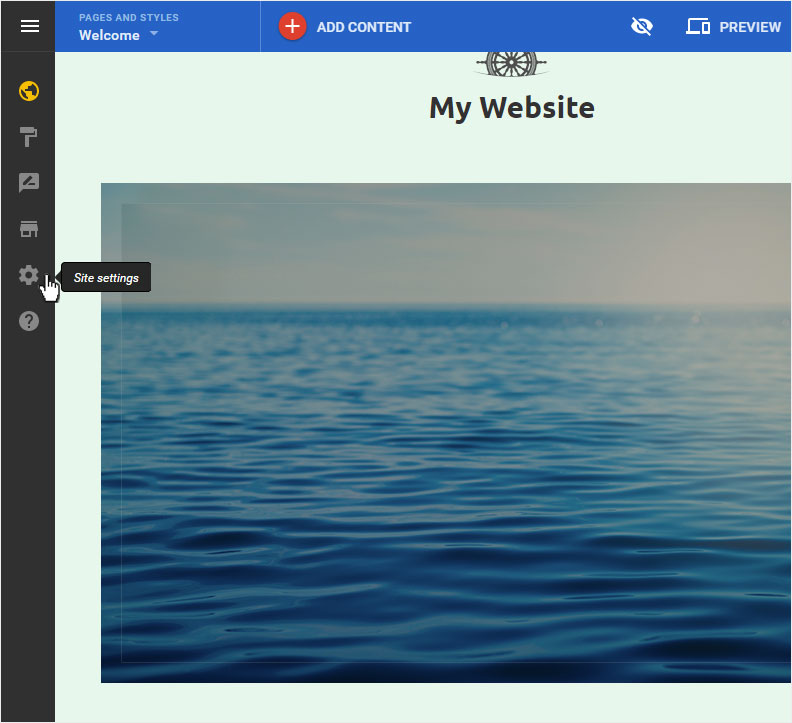
1. Navigate
You begin on the home page of Designer's editor and are thus in the «Site editor» view. Click left on the menu item «Site settings».
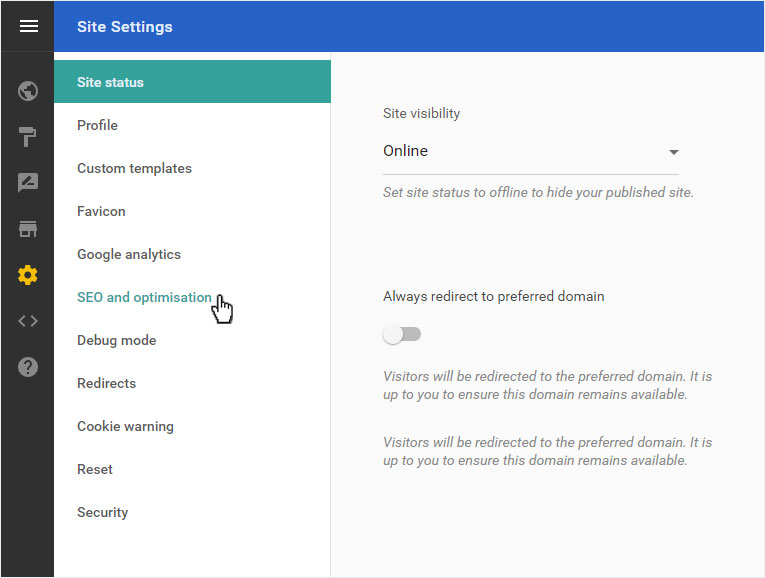
You can now see the «Site status» page of the «Site Settings» area.
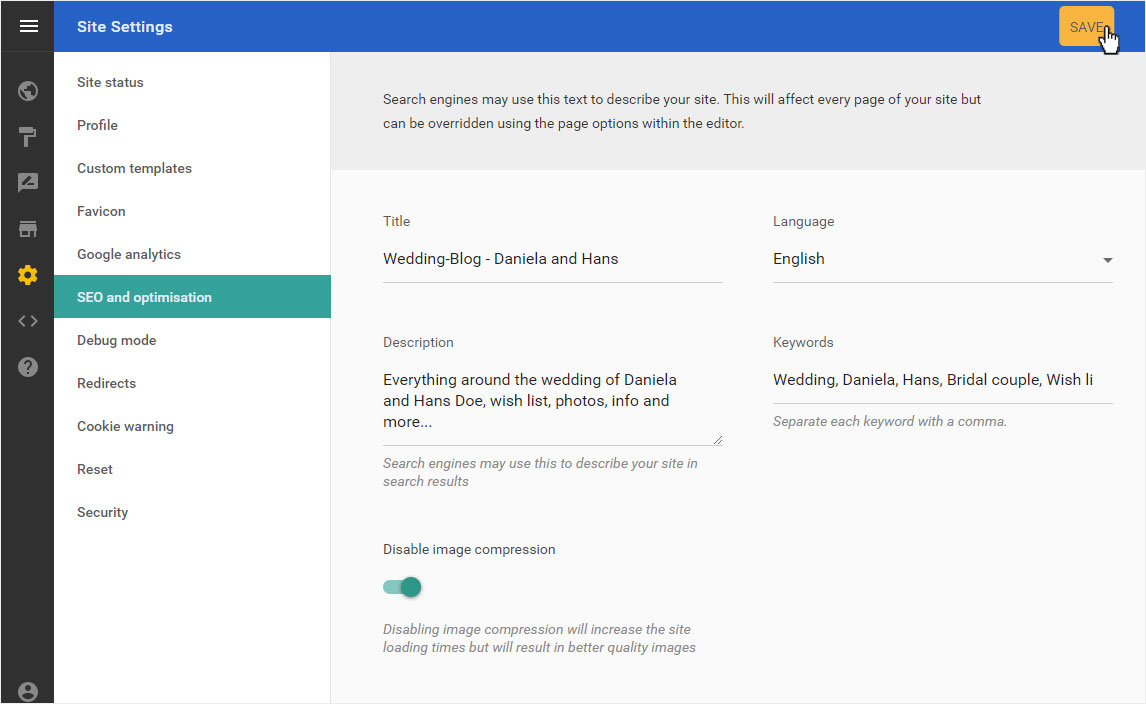
Click on «SEO and opimisation» in the menu on the left.
2. SEO overview
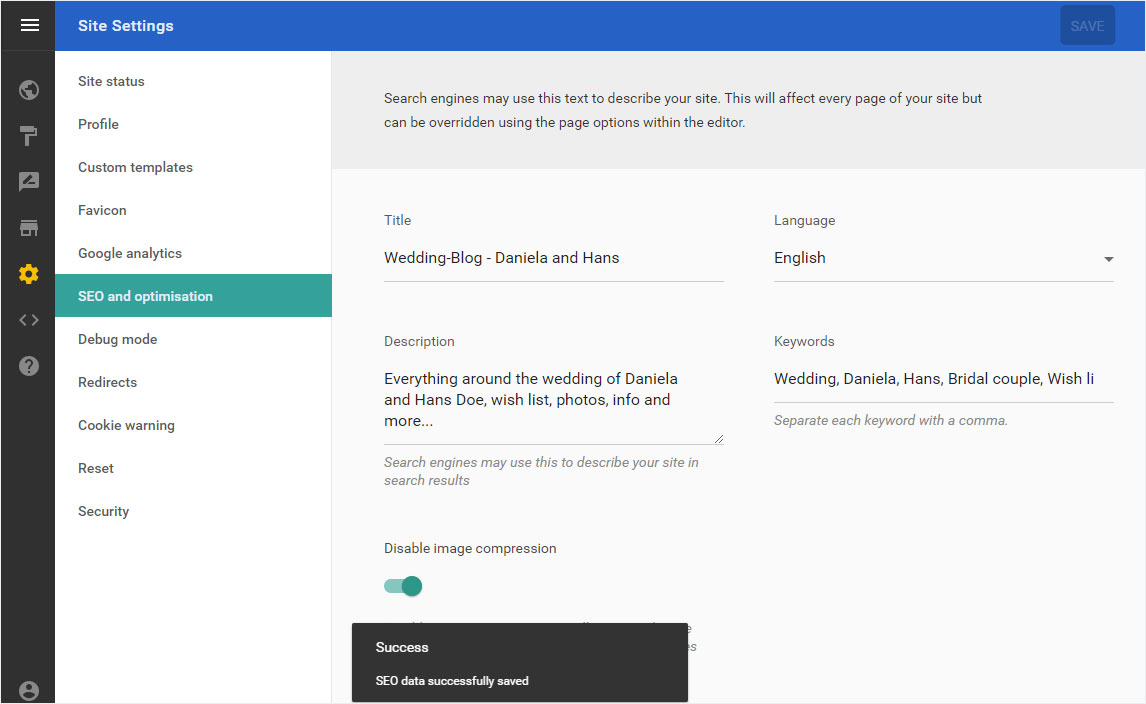
You will now see the overview page with the corresponding input fields for search-engine optimisation.
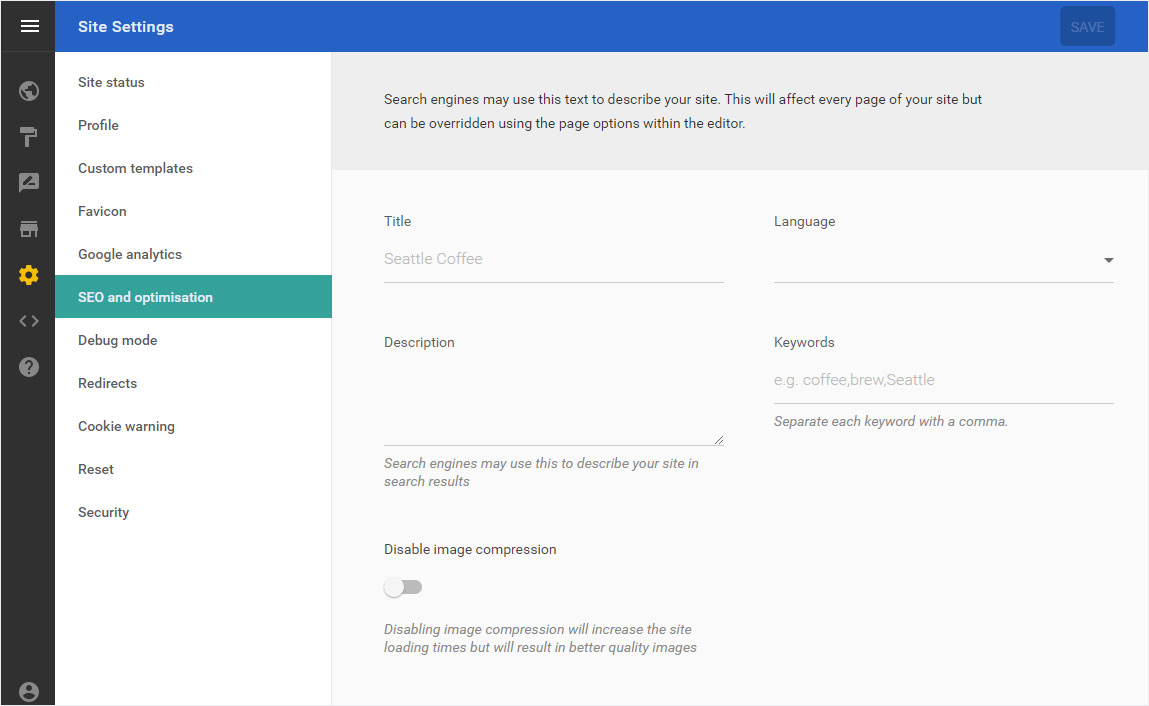
3. General data
Here you enter data that is relevant for search engines and that is generally applicable to your website.
Please note that if you have already entered data under «Page settings» for individual pages, it will be overwritten by the new data you enter here! For this reason, you should first enter generally relevant data here and then add specific information for each individual page under «Page settings».
Then click «SAVE».
4. Data saved
The successful backup of the SEO data is displayed below with a success message.
If you would now like to enter more detailed, page-specific data, you can do so under «Page settings».