Manage settings
You can manage the settings for your store at any time.
After logging into Designer, follow these steps:
1. Navigation
You begin on the home page of Designer's editor and are thus in the «Site editor» view. Click left on the menu item «Store».

2. Settings
Then click on «Settings» in the navigation at the left. You can customize the following areas:
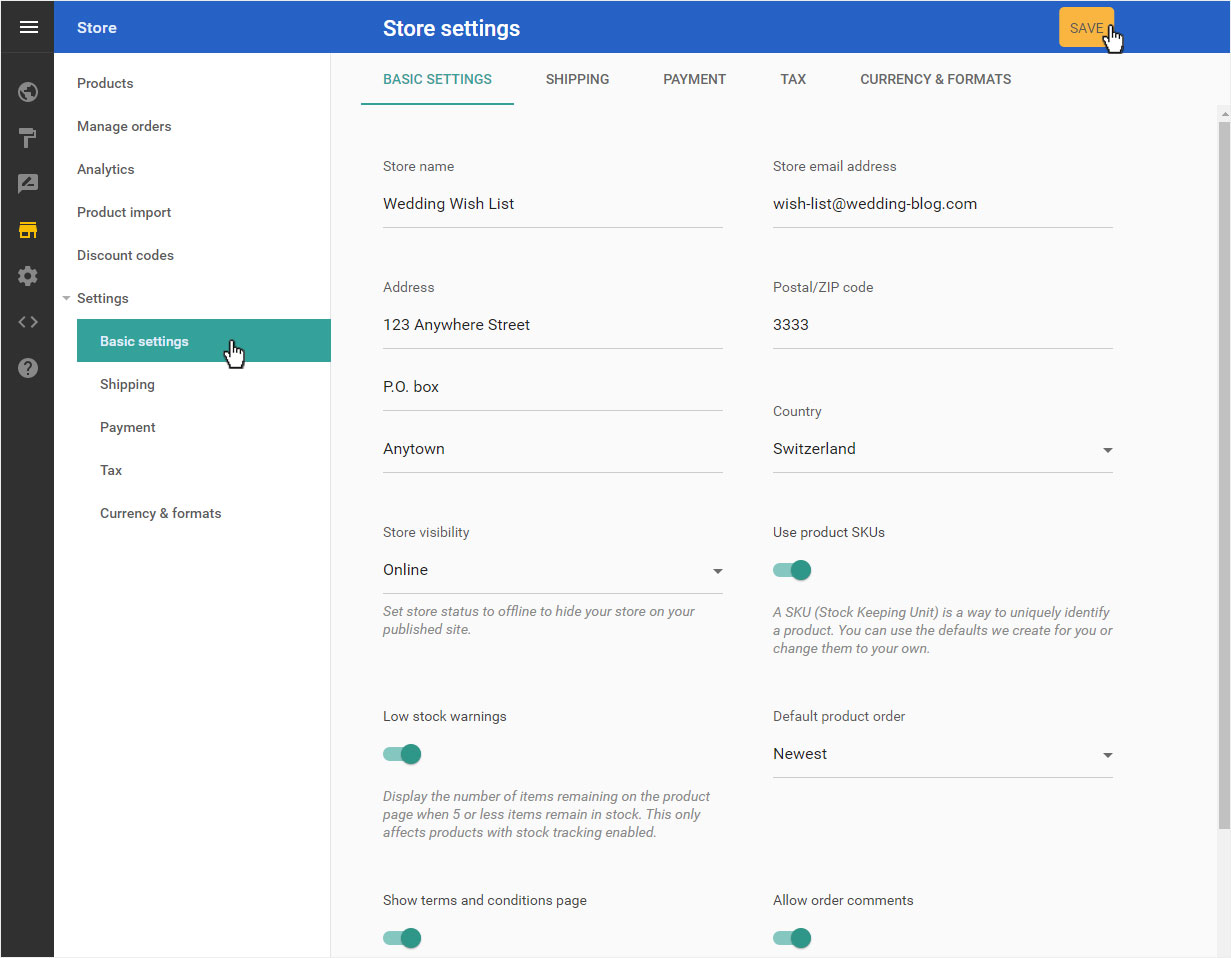
3. Basic settings
Select the «Basic settings» submenu item. Here you can make the following adjustments:
- Store name - clear and simple description of your business
- Store email address - where customers can contact you late
- Address, Postal/ZIP code, Country - Postal address of your shop or company
- Store visibility - choose whether the shop is visible (online) or not (offline) - Note that at least one payment method must be deposited so that you can put the shop online!
- Use product SKUs - (enable/disable)
- Low stock warnings - (enable/disable)
- Default product order - define the order in which your products are displayed in the shop (e.g. newest, title A-Z or Z-A, price ascending or descending)
- Show therms and conditions page - (enable/disable)
- Allow order comments - enable or disable a comment field for the customer during the order process
- Email footer text - This text is added to every email you send to your customers
- Send store emails from my email address - (enable/disable)
Confirm your entries by clicking on the yellow «Save» button.
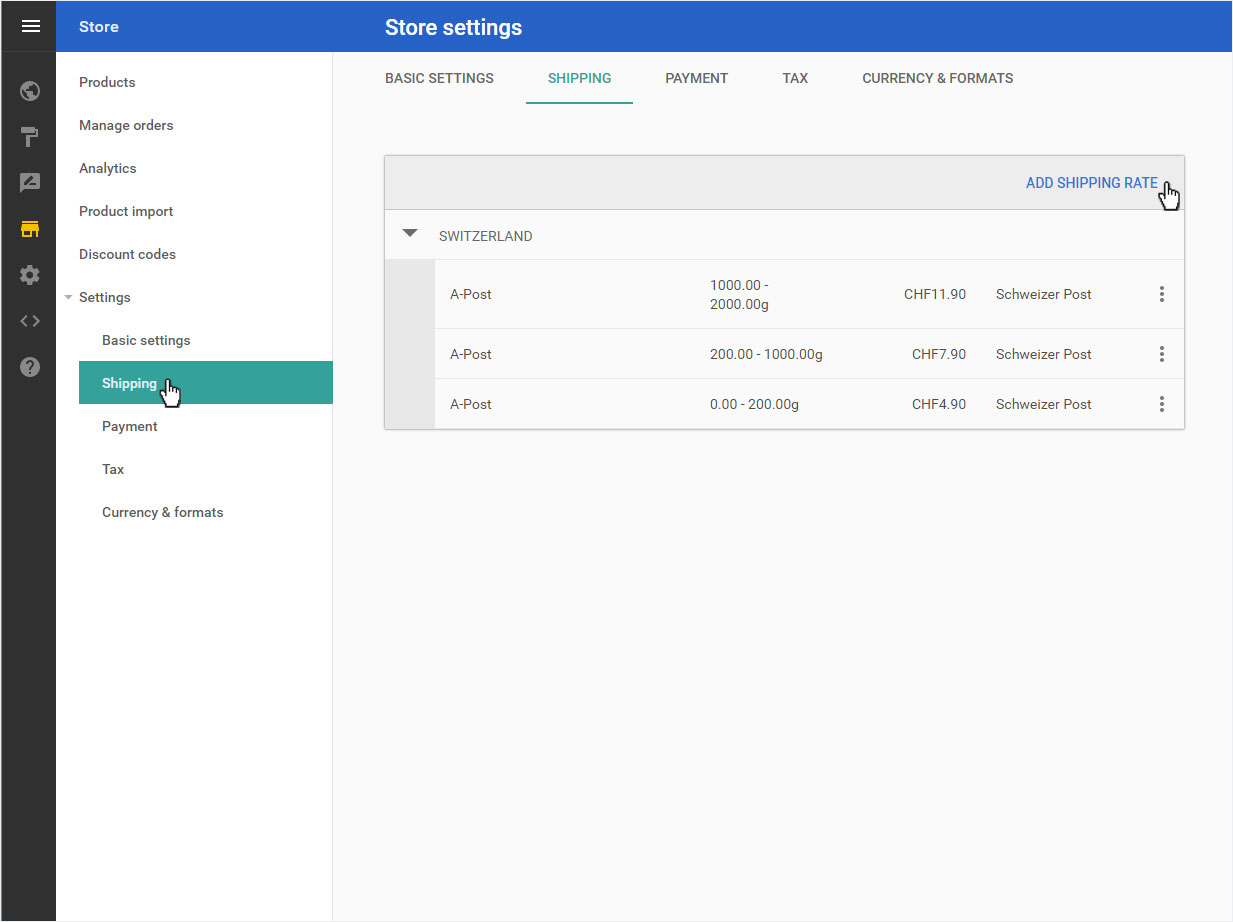
4. Shipping
Select the submenu item «Shipping». In this area you can edit existing «Shipping costs / options».
By clicking on «Add shipping rate» you can enter more at any time. Then enter the required data:
- Shipping rate name - clear designation
- Country - for which this shipping method can be selected
- Courier - name of the institution making the delivery
- Estimated delivery time - depending on shipping method and shipping company
- Shipping costs - Set Price (To adjust the currency of the shipping costs, select «Currency & formats» under «Settings».)
- Apply rate based on weight - activate or deactivate and add detailed information as required
Then click on «Save» (the yellow checkmark symbol in the upper right corner).
5. Payment
Select the submenu item «Payment».
Set up the desired payment providers with a click and enter the required information.
- Bank transfer - Account data for the bank transfer
- PayPal - Add account link
- stripe - Add account link
- 2CHECKOUT - Add account link
- worldpay - Add account link

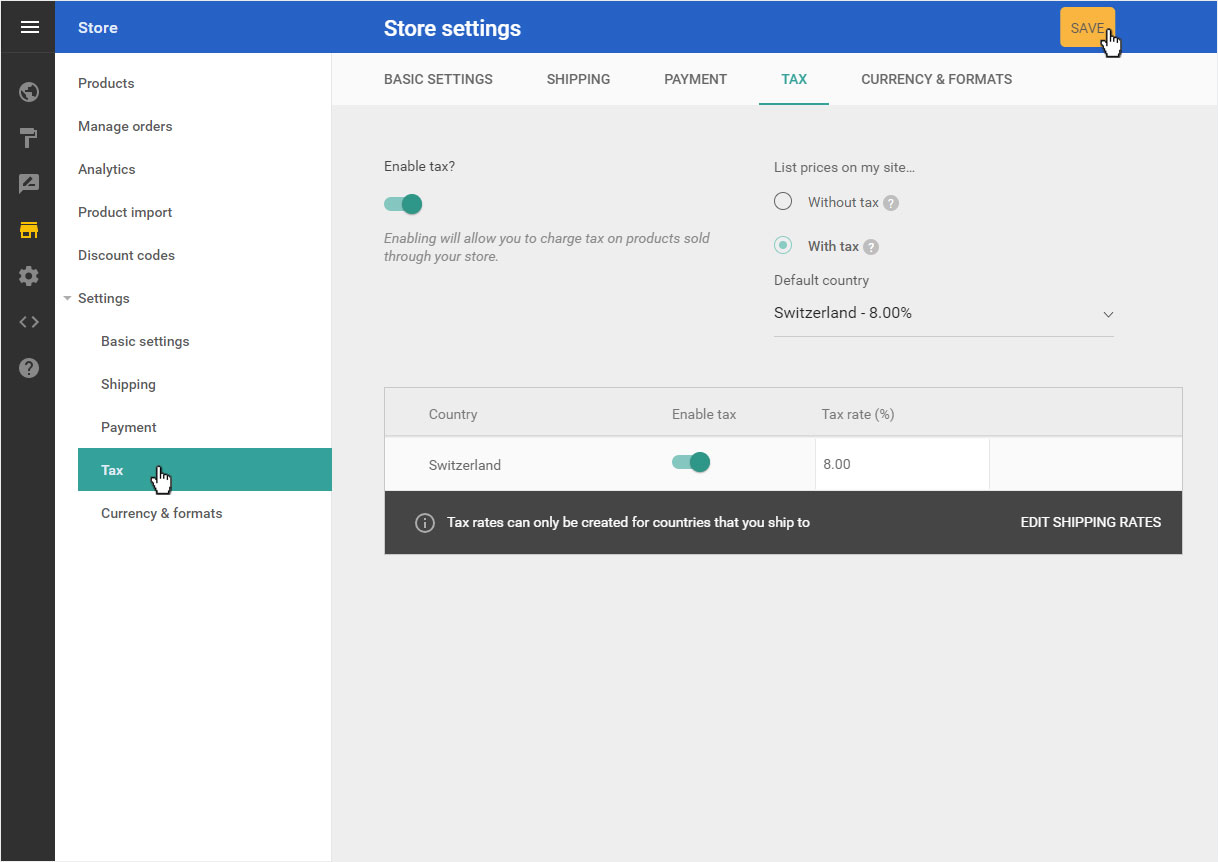
6. Tax
Select the submenu item «Tax».
Enable tax first (or disable). You can then define whether the prices on your shop page are displayed excluding or including tax.
To define the «Default country», you have to activate the country «Austria» in the lower area and insert the corresponding «Tax rate» einfügen (Can only be done if you have entered a shipping method for Austria or other countries under Shipping method.).
Then click on the yellow «Save» button.
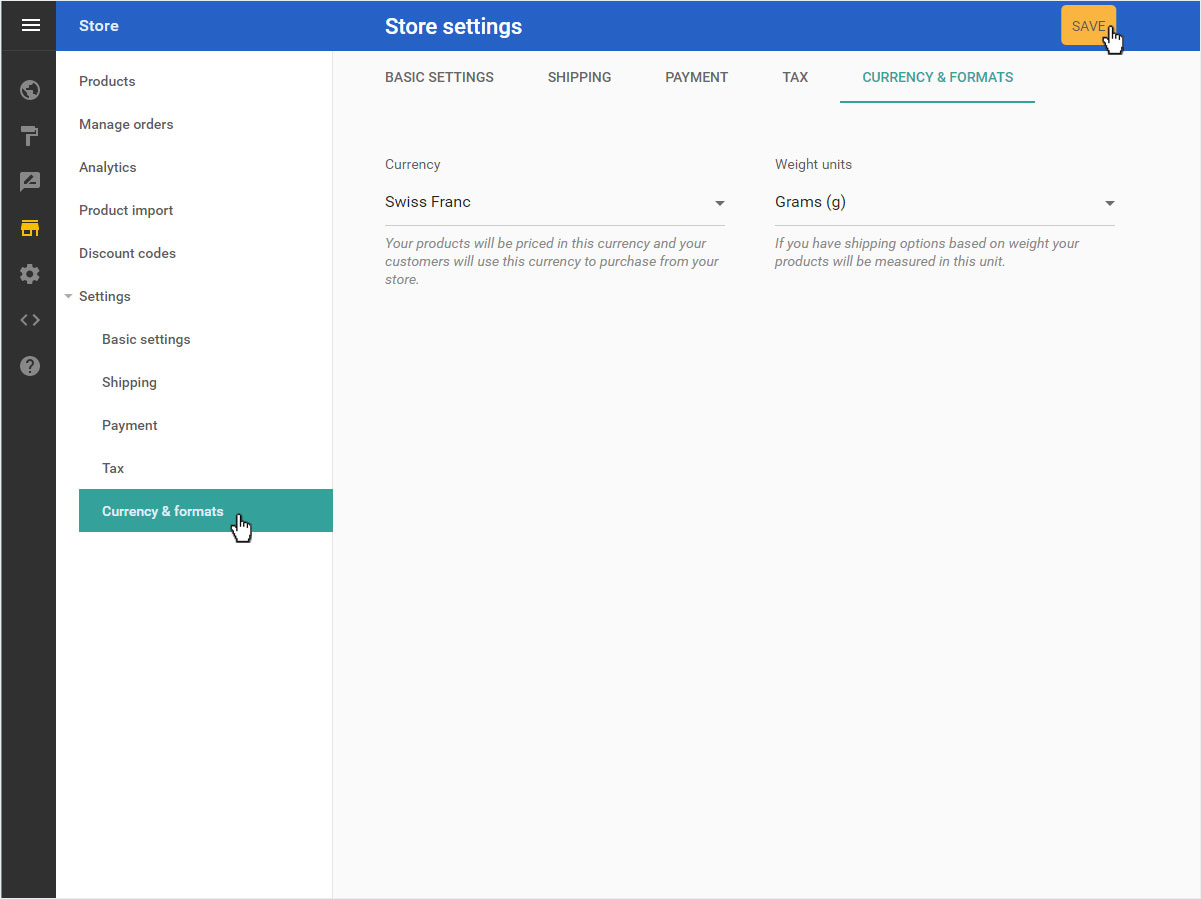
7. Currency and formats
Select the submenu item «Currency & formats».
Use the drop-down menu to select the standard currency and the weight unit for your shop.
Then click on the yellow «Save» button.