Managing automatic backups
Please note that the oldest backup will be overwritten depending on the number of automatic backups you have entered for this setting. Once you have created the maximum number of backups (e.g. three backups), the oldest backup will be removed each time you perform a new one.
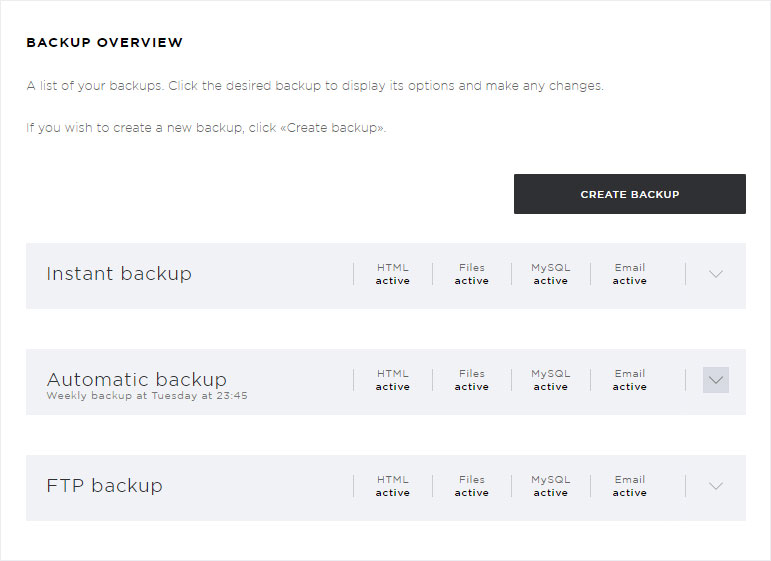
If you have configured the «Automatic backup» option, you can manage the backup by completing these steps. Follow these steps:
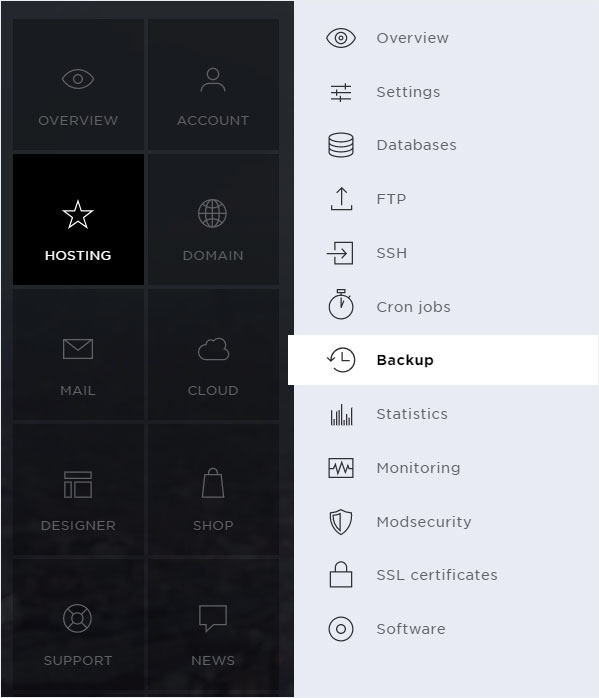
2. Navigate
Click the «Hosting» menu item and then «Backup».
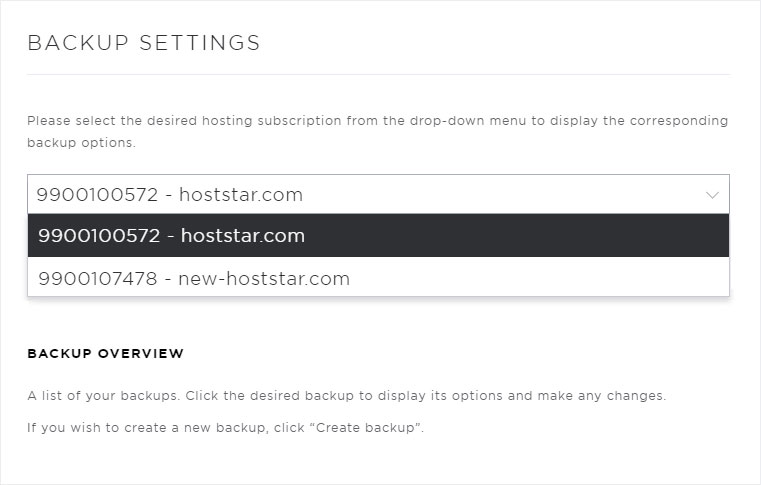
3. Select your subscription
Select the hosting subscription containing a backup you want to manage.
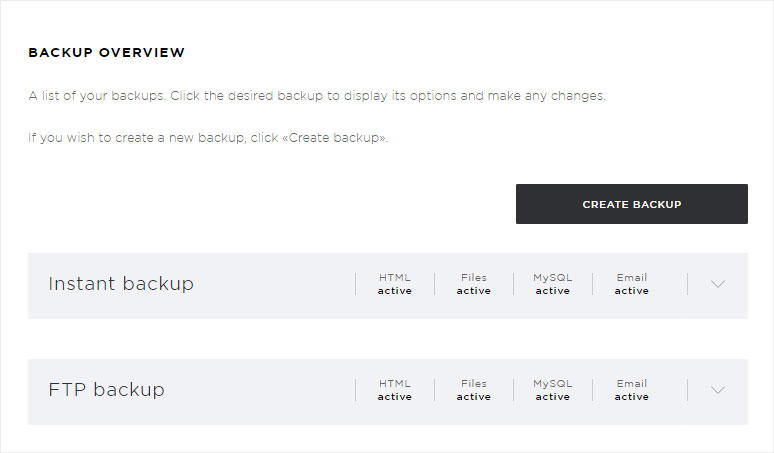
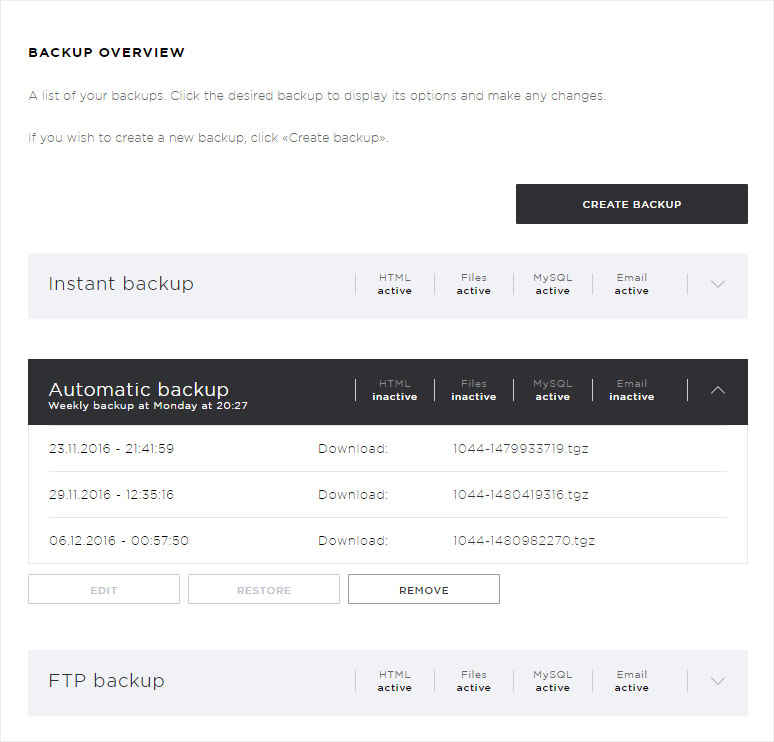
4. Select automatic backup
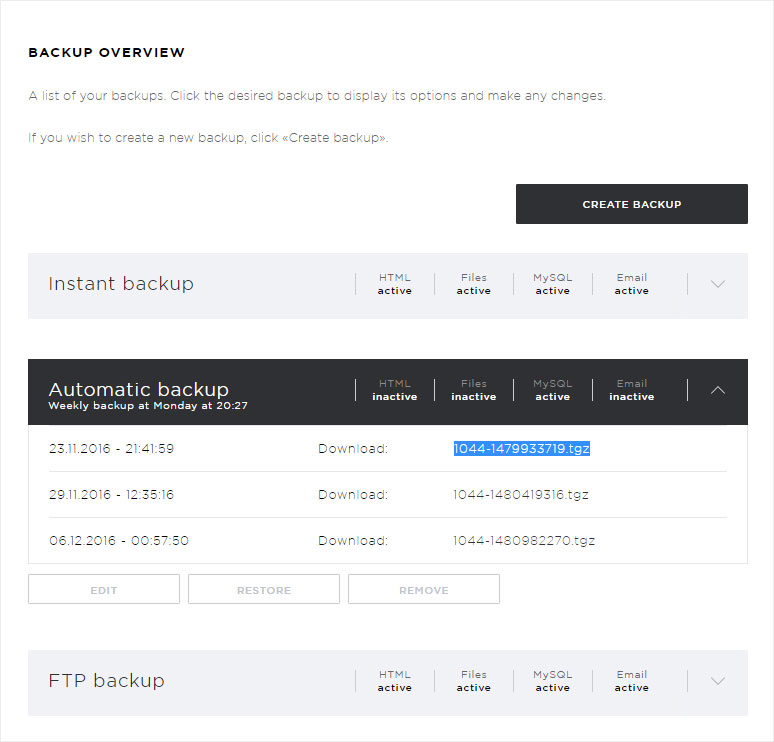
Under «Backup overview», click the arrow icon next to the desired automatic backup.
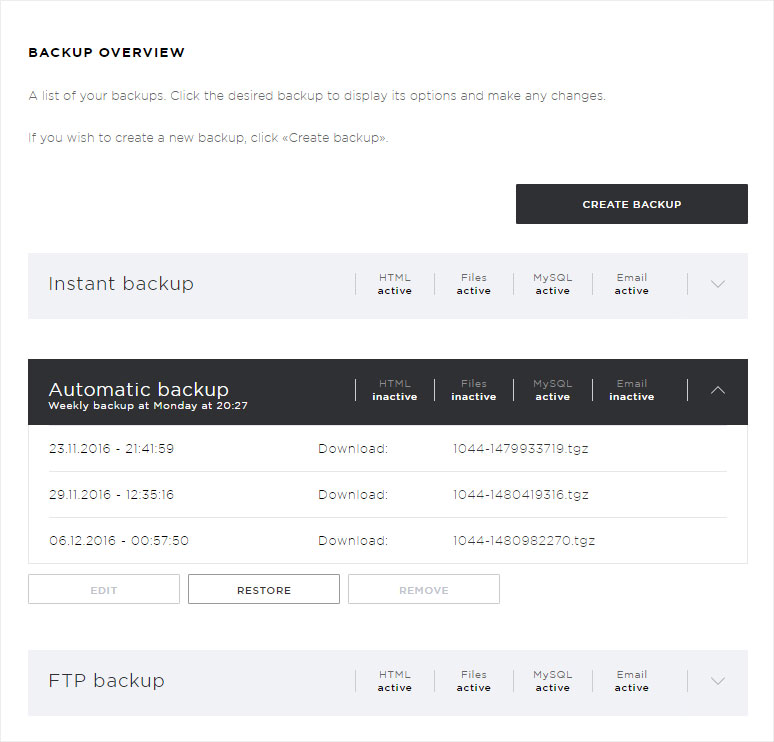
5. Details view
The details view of your automatic backup now appears.
Buttons for the following features are displayed:
You can download the backup file to your device at any time.
Click the appropriate link and follow the detailed instructions for completing the desired action.

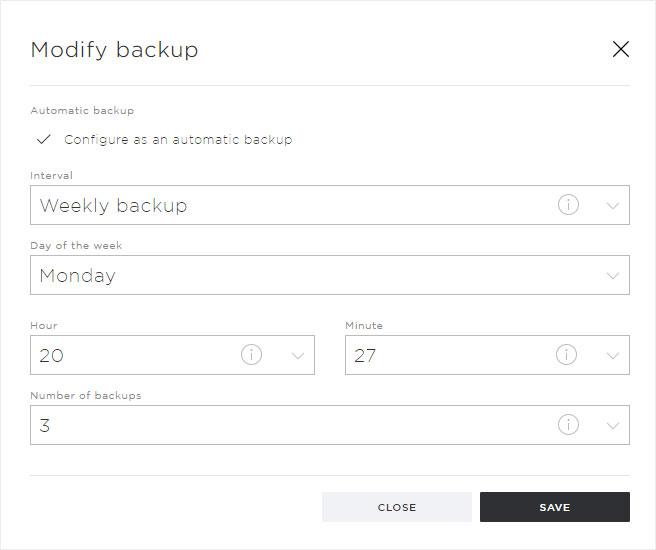
Editing an automatic backup
To make changes to the automatic backup, click «Edit».

A pop-up window appears. Here you can now make any desired changes to all of the various parameters (interval, scheduling, hour, minute and number of backups). Click «Save» to save your changes.
(Detailed information and support can be found here.)
When editing an Automatic backup in «Backup overview», you will see the note «Next backup pending». This indicates that the new parameters have been saved successfully and that the system is ready to create the next backup.
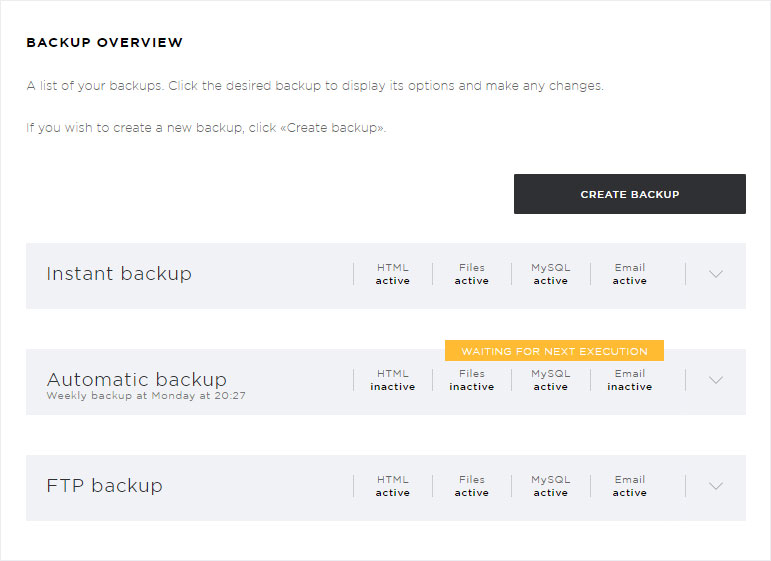
Once the backup is created, the note changes to «Backup created – Next scheduled backup pending». This indicates that your backup was created successfully.

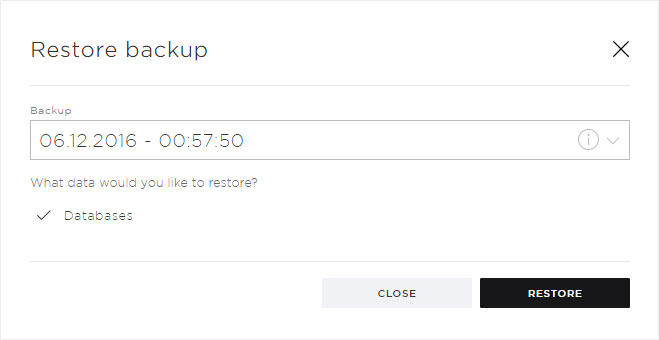
Restore automatic backup
To restore the data from a backup, click on «Restore».
You can select the specific backup (time) you want to restore under Backup.
You can select the files and directories you want to restore from the available data under «What data do you want to restore?».
Then click «Restore».
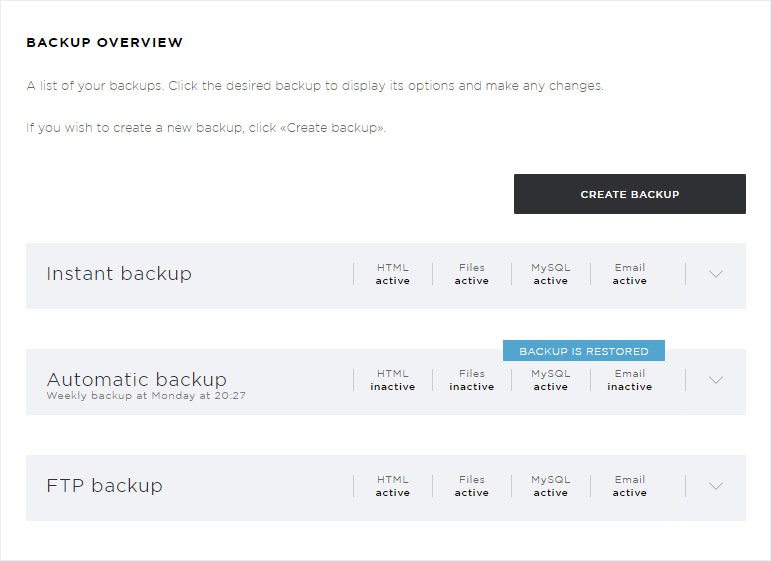
The restoration of the selected data starts immediately. In the list of backups that appears, the automatic backup you selected now shows the status Backup recovery in progress.
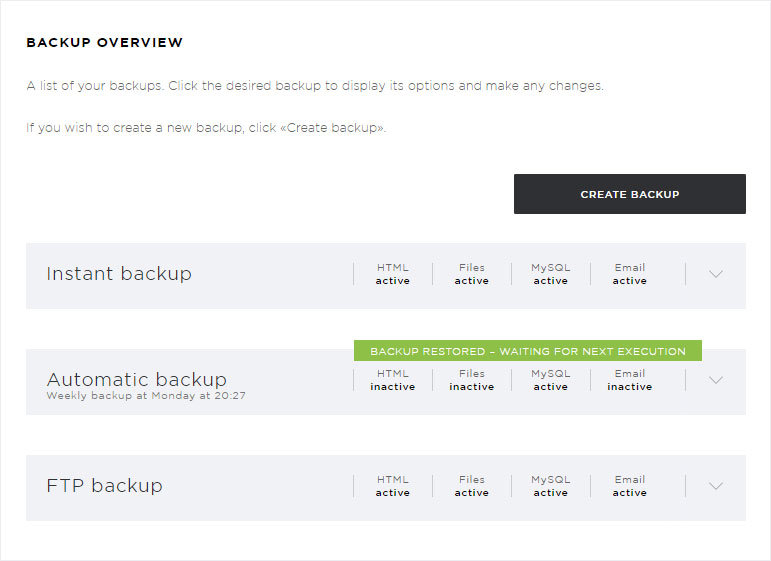
Once the recovery of the backup has completed successfully, the status changes to «Backup restored – next scheduled backup pending».
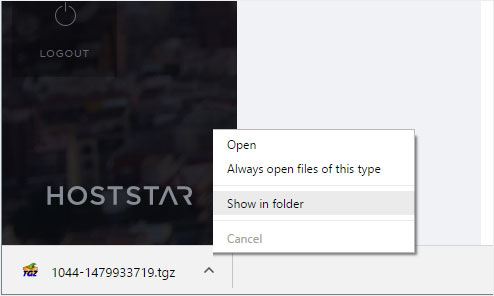
Download automatic backup
Click the file name with the extension .tgz (here, for example, «1044-1435516084.tgz») to save the data from an automatic backup to a local device.
We recommend doing this before removing an automatic backup, for example.
The download starts and appears immediately in your web browser. Right-clicking opens a context menu. Now select «Display in folder». There you will find the backup file. (Depending on the web browser you are using, what you see may differ from this example.)
Please note that you can «restore» a backup file that is saved on your device only via FTP or phpMyAdmin, and that this should only be done by an experienced person.
Remove automatic backup
To permanently remove an automatic backup (including the existing backups), click «Remove».
A pop-up window appears. You will be asked to confirm whether you are sure you want to delete the selected backup.
Please note that this operation cannot be undone. If there is any data you want to keep, you should download it first.
If you want to delete this backup entry permanently, click «Remove».

The backup is removed immediately and is no longer listed in the «Backup overview» that appears.