Start the Store
Hoststar Designer includes a «Store» section, which is a comprehensive e-commerce module for creating your own website and online store in no time.
To use the «Store» module, you must first configure the main store settings. After you have logged into Designer, follow these steps:
1. Navigate
Click on the menu item «Store» at the left.

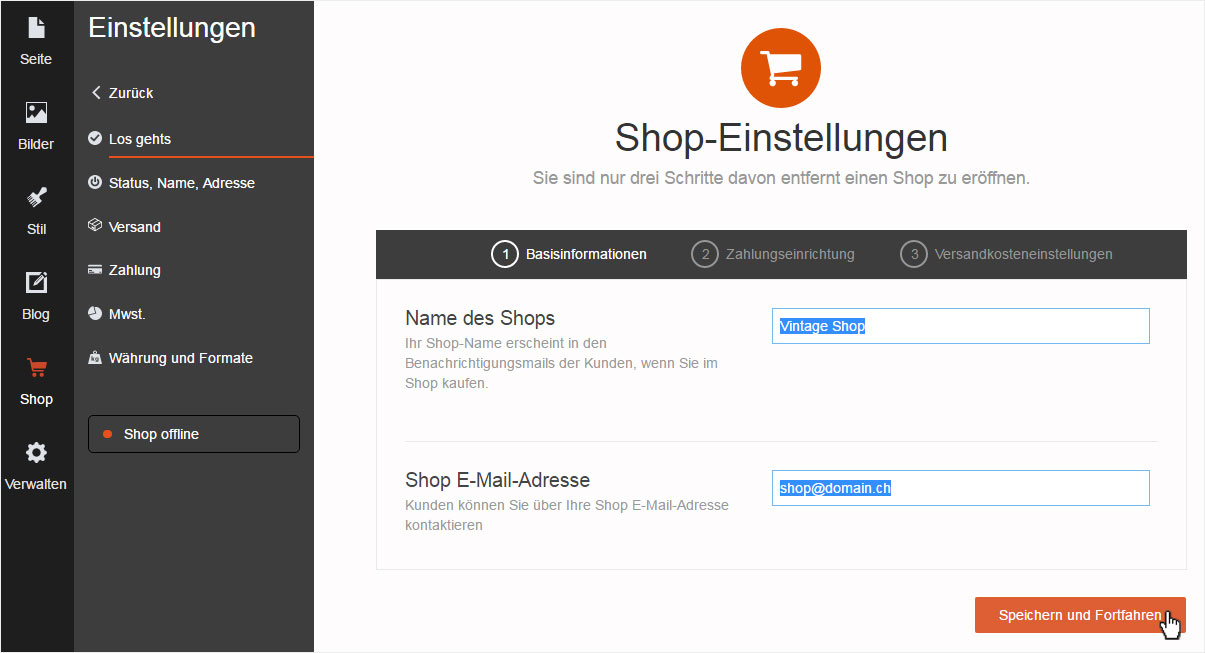
2. Getting started – Basic information
You will be taken to the «Get started» page. Start here by entering the basic details for your store.
Complete the «Store name» field and enter an email address in the «Store email» field. This is the address customers should use to contact you later.
You can make changes at any time later by going to the «Store» module, selecting «Settings» and then «Status, Name, Address».
Confirm your entries by clicking the «Save» button.
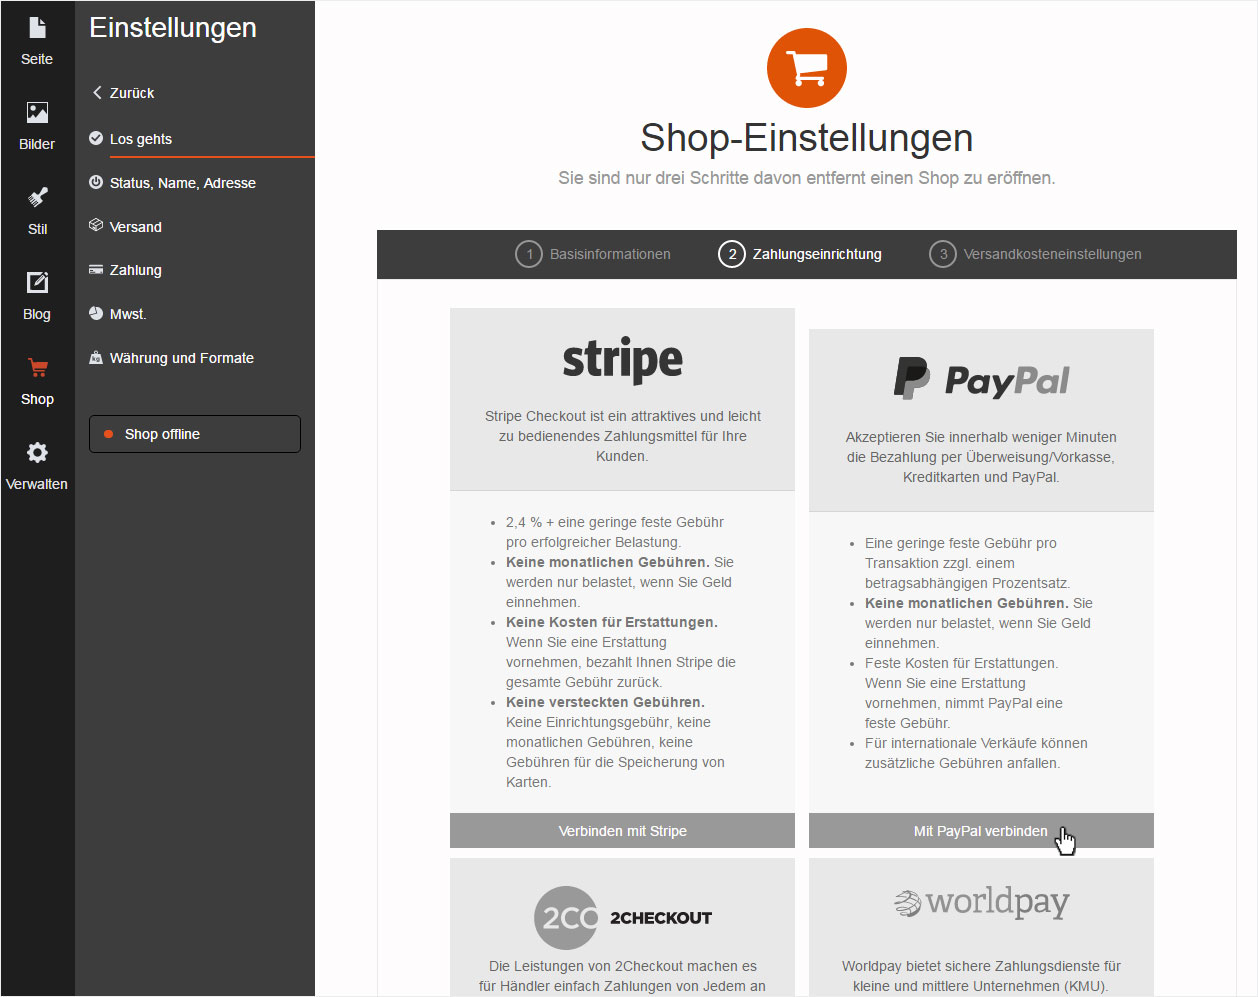
3. Getting started – Set up payment
In the next step you will add the various payment options. Choose one or more of the five available payment methods you would like to use and activate them by clicking on the grey bar.
Enter the required details on the provider page. For bank transfers, enter the necessary details in the text box.
You can always add additional payment methods in the «Store» module by going to «Settings» and then «Payment».
Please note, however, that you must activate at least one payment method in order to put your shop online.
For the «Bank Transfer» option, enter the necessary details in the text box and then click «Activate Bank Transfer». You will then be taken directly to the next step.

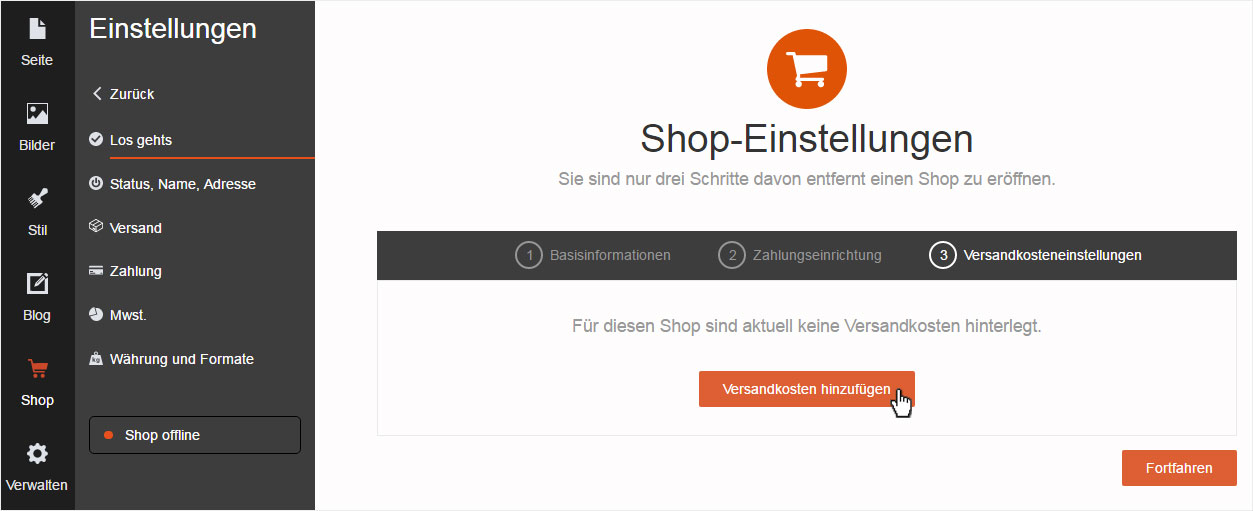
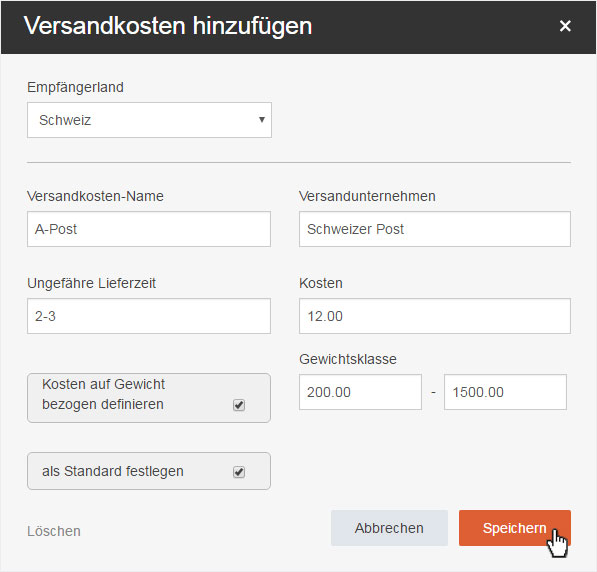
4. Getting started – Shipping rate settings
In this step you can configure the desired shipping rate settings. Click the «Add shipping rate» button.
Now complete the required fields. Click «Default rate» if you want to offer a choice of different shipping methods. This method will then be preselected as a suggestion for your customers. Next, click the «Add shipping rate» button.
Please note that at least one shipping method or rate must be saved before you can proceed. You can make changes at any time later by going to the «Store» module, selecting «Settings» and then «Shipping».
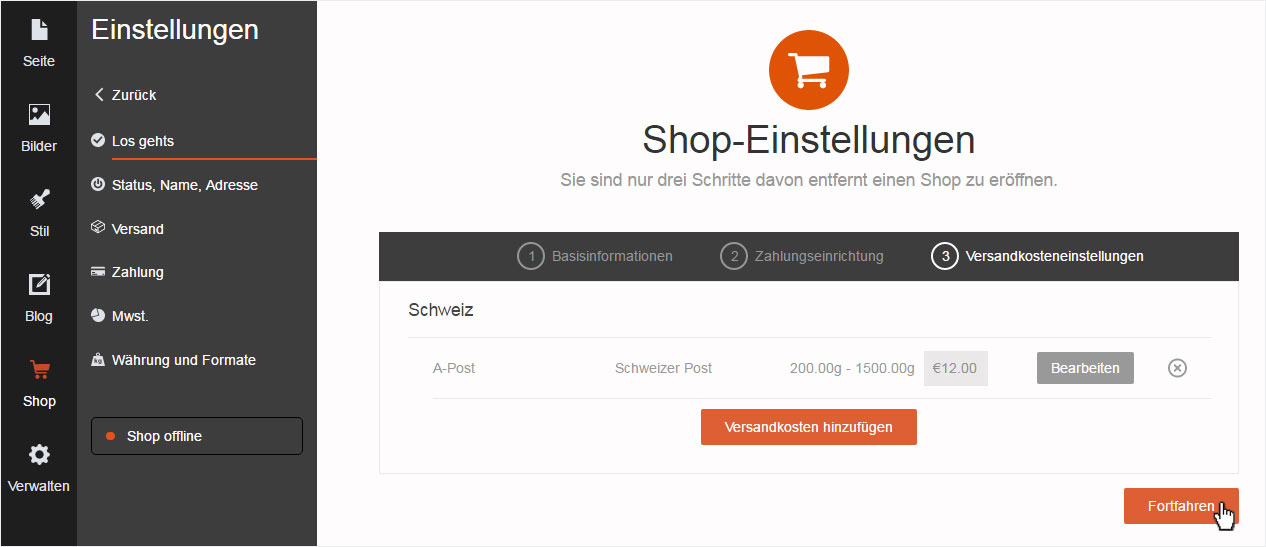
The shipping rates you have just entered are displayed immediately. If the wrong currency is being displayed, you can change this in the «Store» module by going to «Settings» and then «Currency and formats».
Then click the «Save» button.
5. Final steps
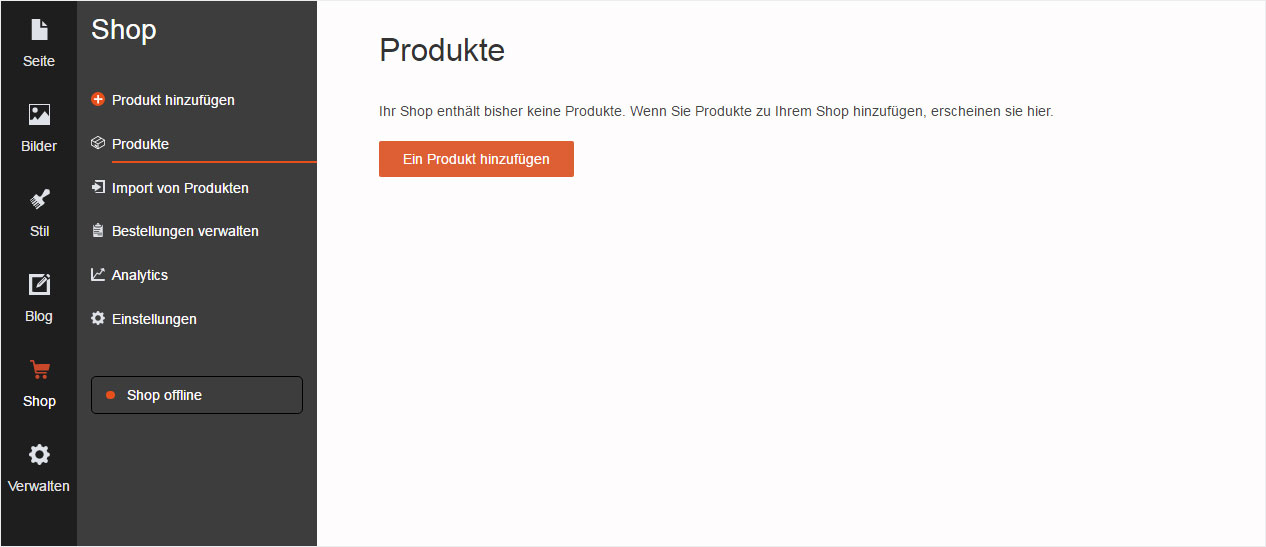
On the overview page, you will see that the status of your store is still «Offline». To continue, click the button «Finish setup and manage products».
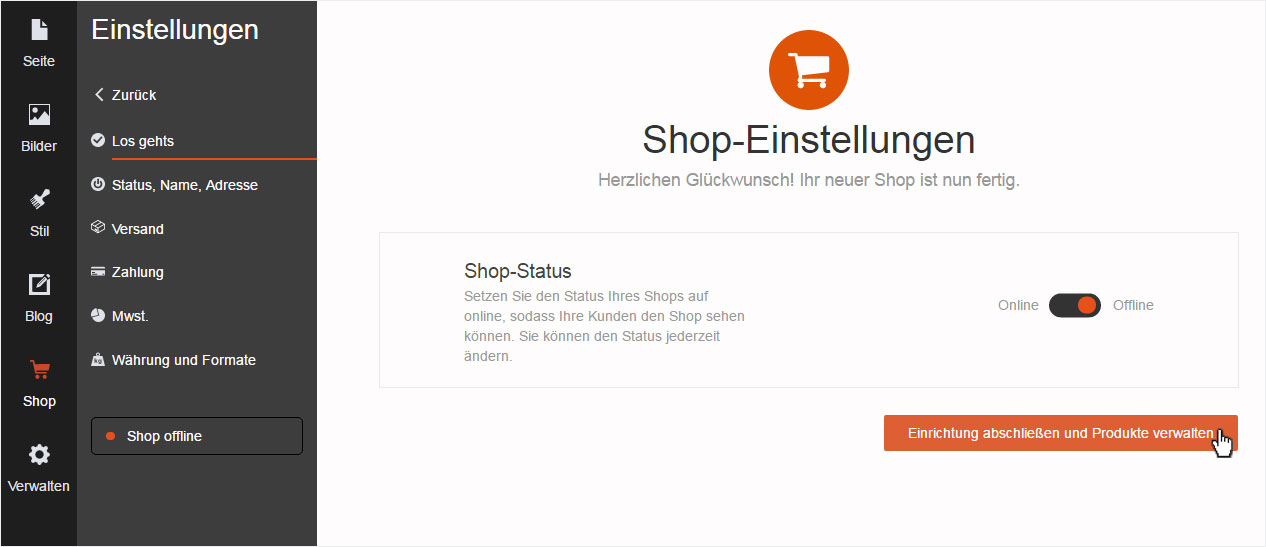
You are then taken straight to the «Products» overview. No products have been entered yet. Now begin with the procedure for adding a product.