Inserting documents
Documents such as PDF files can be uploaded via FTP to a specific directory and then linked to in Designer.
Proceed as described in these instructions:
2. Navigate
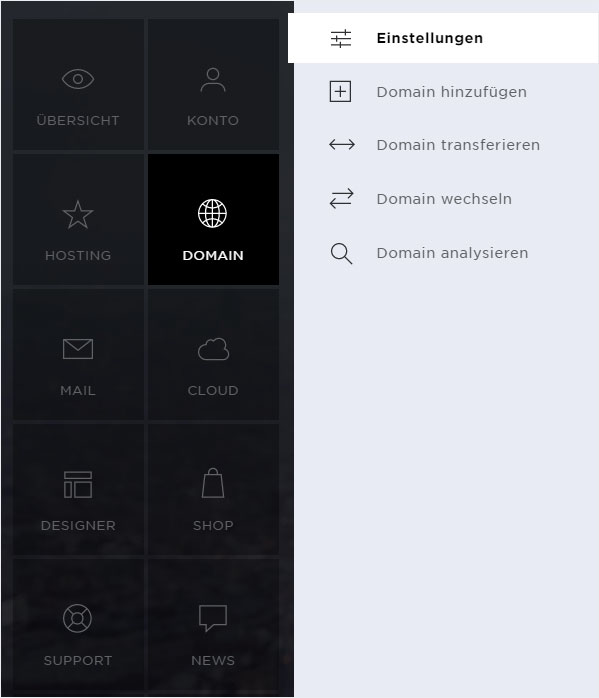
Click the «Domain» menu item and then «Settings».
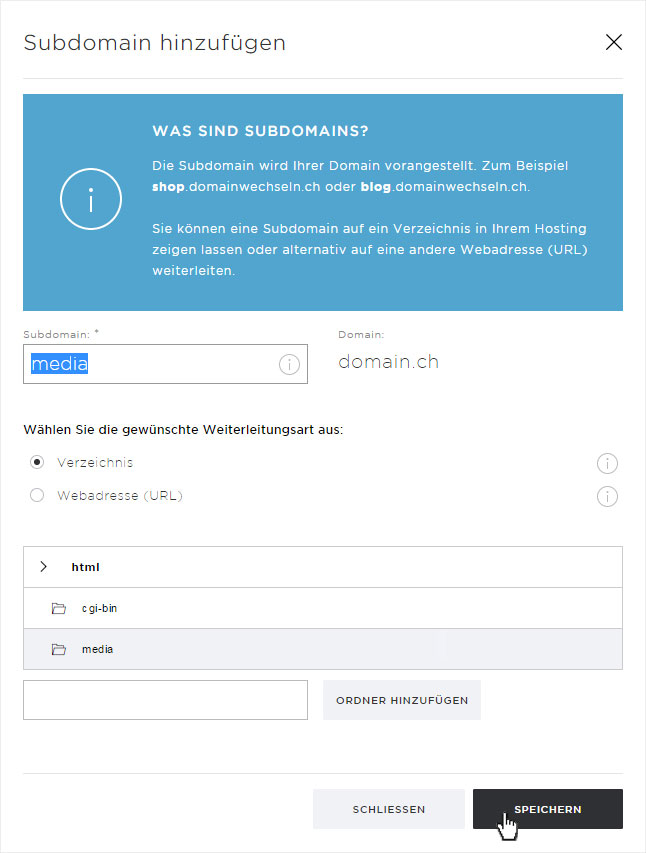
3. Create subdomain
Choose the domain for which Designer was installed. Click the «arrow» icon. In the details view, then click the «arrow» icon next to «Subdomains». Now click the «Add subdomain» button and proceed as described in the Add subdomain instructions.
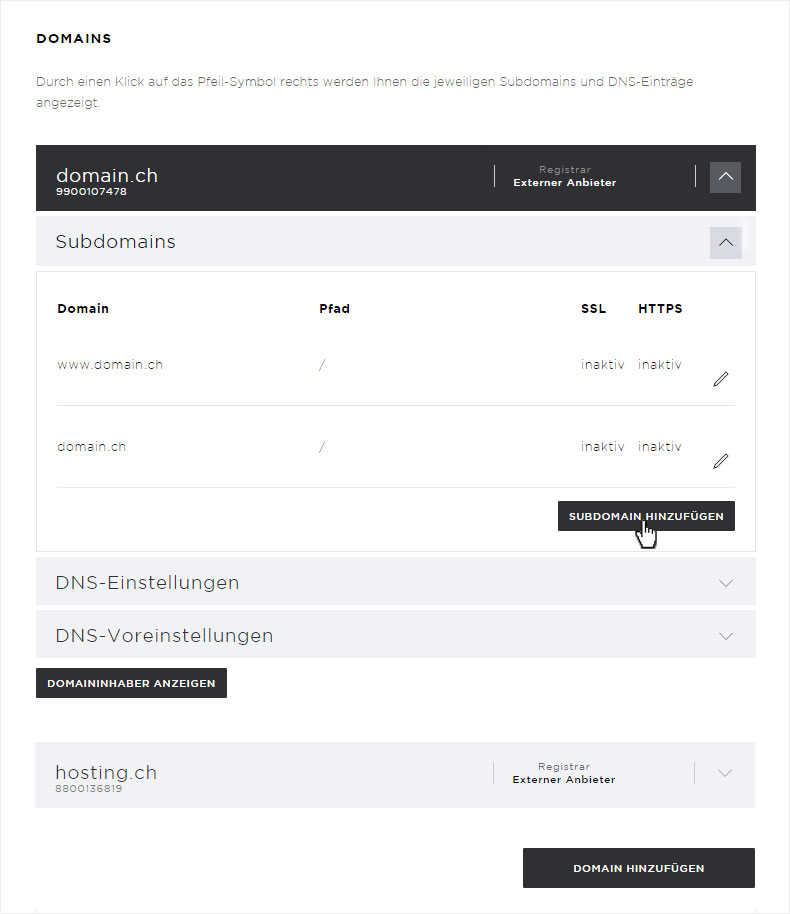
We recommend that you give both the subdomain and the new folder a descriptive name (e.g. «media» here).
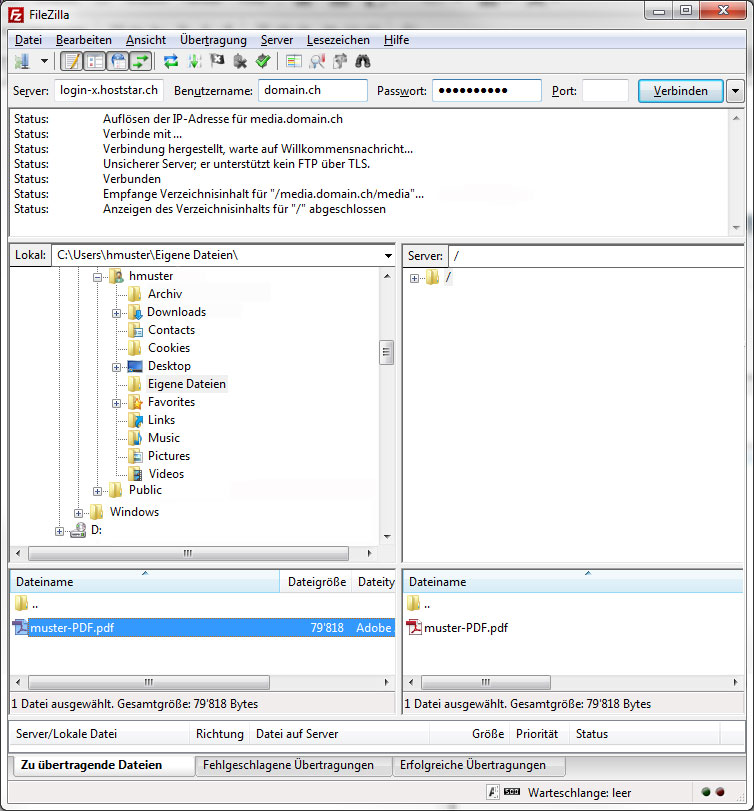
4. FTP upload
Upload the desired file over FTP into the folder (/html/media/) you just created for the new subdomain (media.domain.ch). You can find several different and free «FTP programs» on this page. You can also upload data via «Web FTP» by following the instructions on Web FTP.
Please make sure there are no spaces or special characters in the domain name and remember that our web server is case-sensitive!
5. Create a link in Designer
After you have «logged into Designer», select the page from which you want to link to the document.
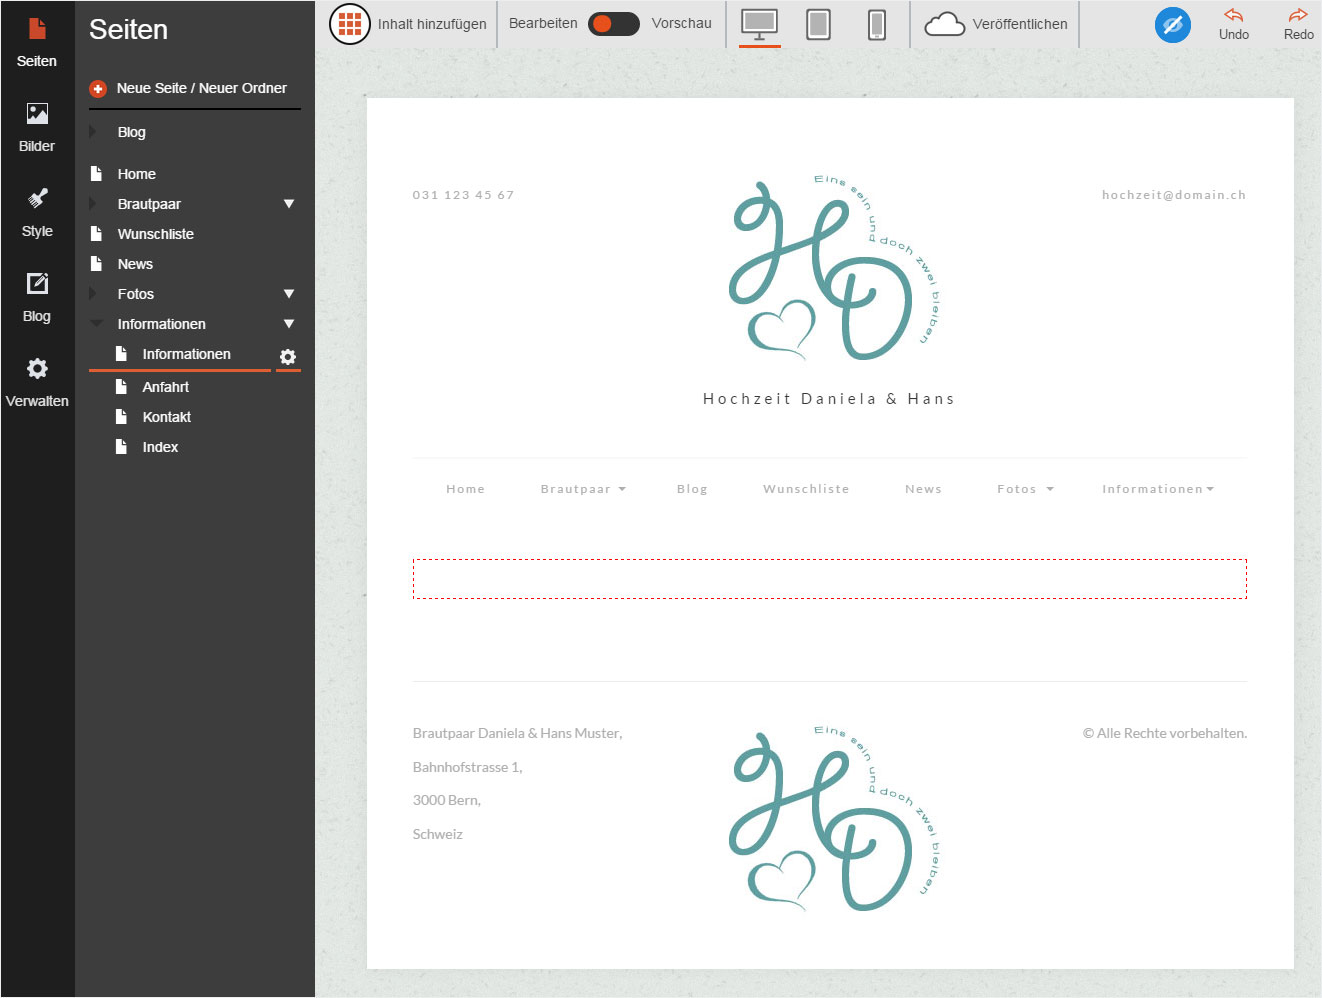
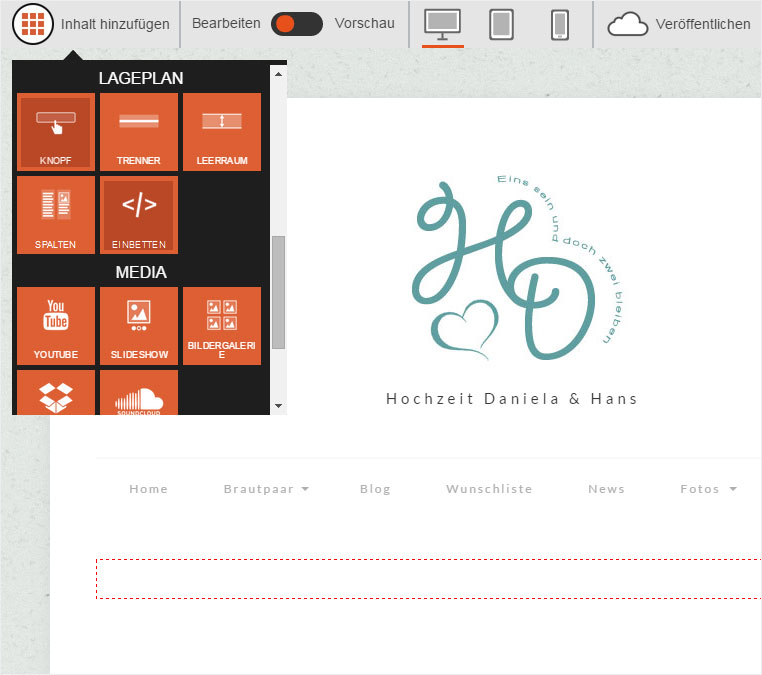
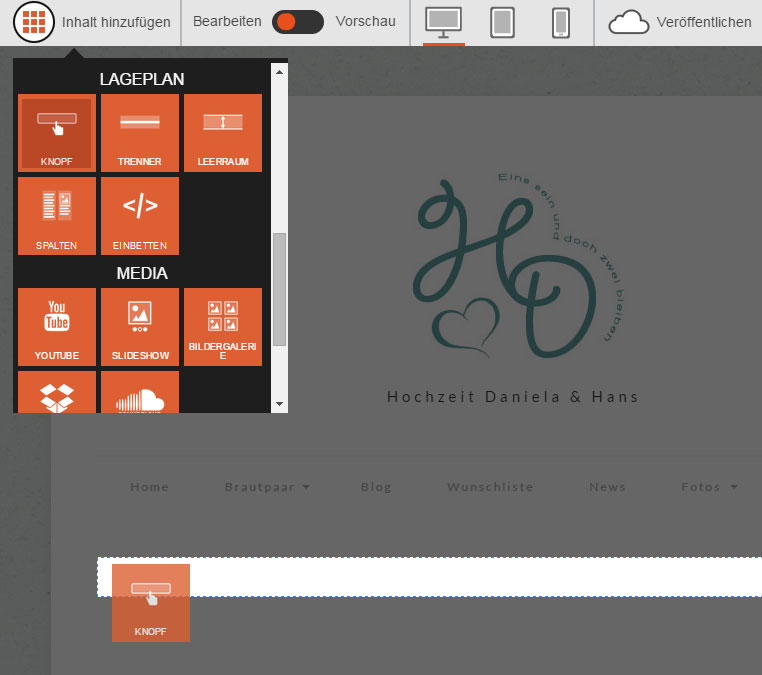
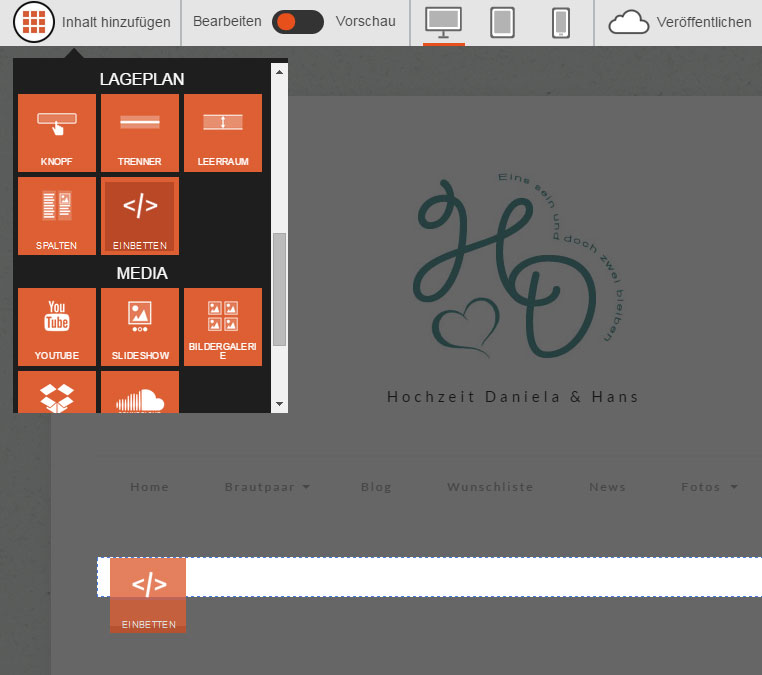
Under «Add Content», add either a «button» in the «Layout» section of the content area (with red-dashed border) or in the «Embed» area, which is also located under «Layout» section should you have a StarBiz or StarPlus subscription. You can also directly paste the link into a «text-entry field».
Version 1: add button
Click on the content element «Button» under «Add Content» → «Layout», hold down the mouse button and drag the button to the desired position in the content area.
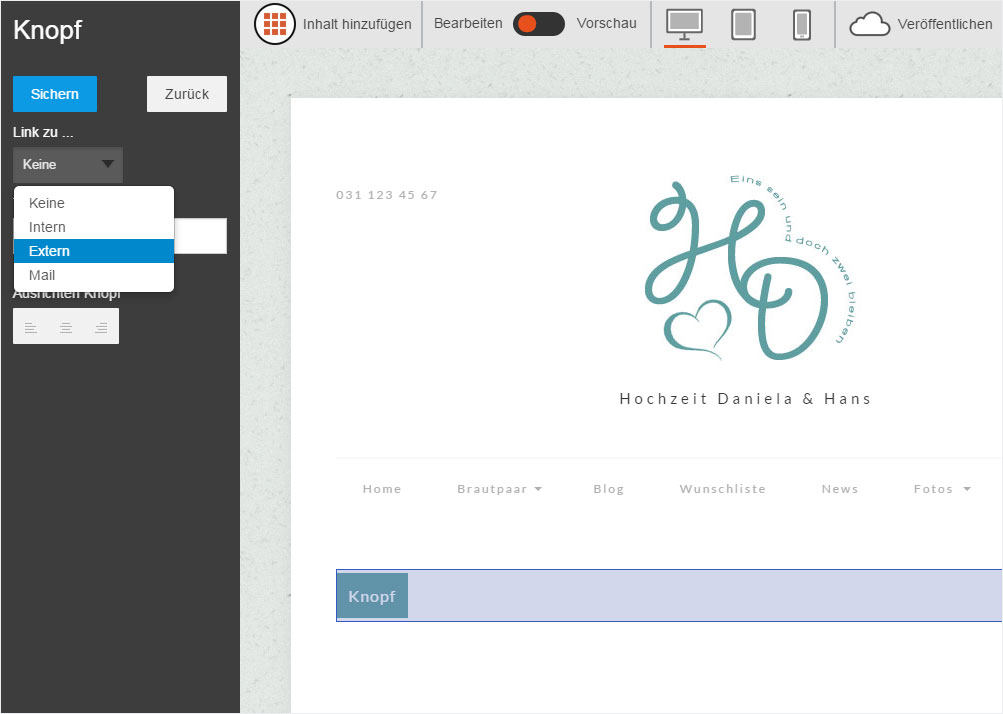
Double-clicking the «button» opens the editing area to the left. Select the option «External» under «Link to...».
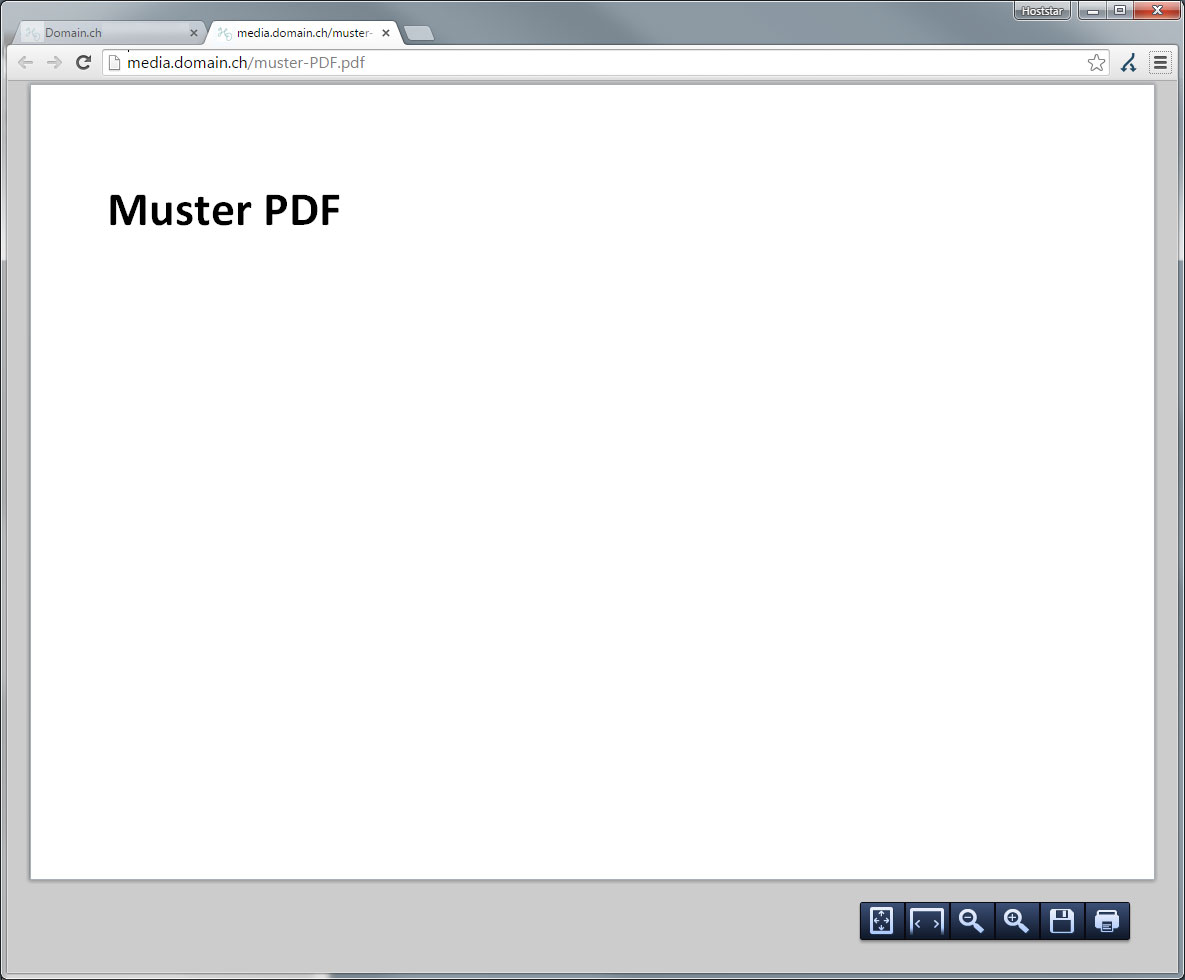
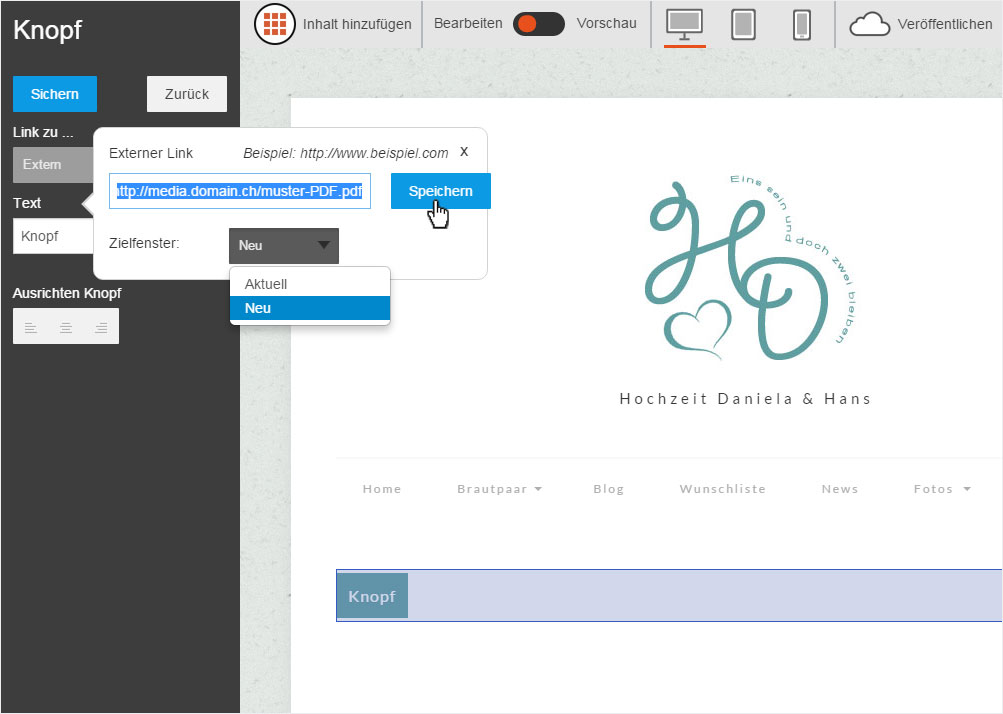
In the area you just opened, add the link (e.g. http://media.domain.ch/muster-PDF.pdf) and remember that the file names are case-sensitive. Next, select whether the link should open in the current tab or a new one. Click «Save» to apply your changes.
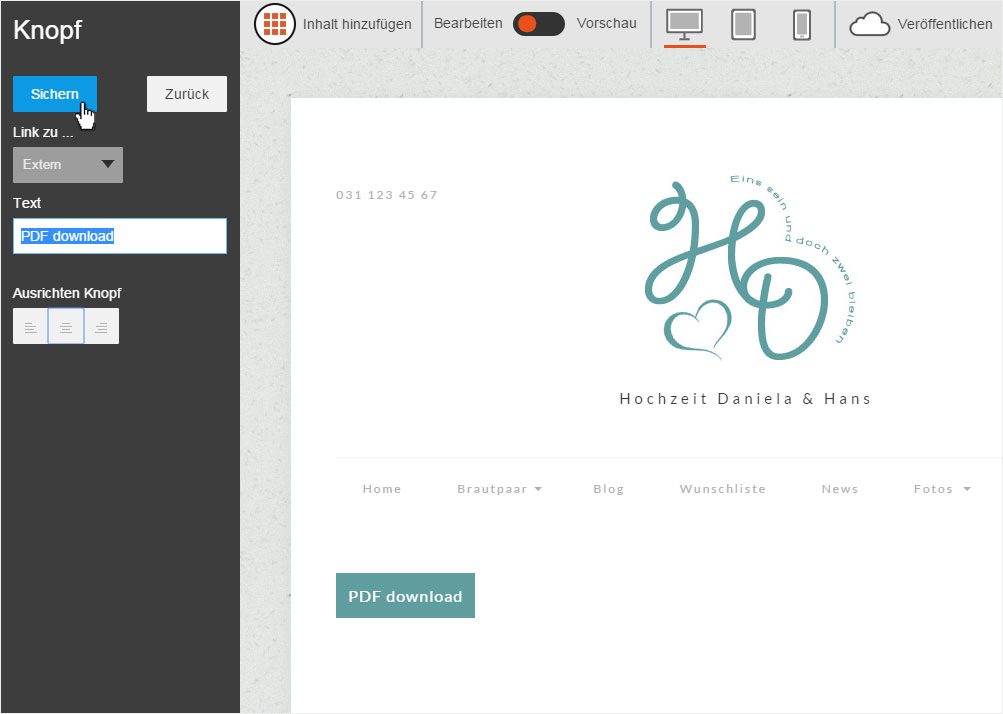
Give the button a name under «Text», and use «Align button» to set how the text on the button should be aligned (left, centred or right). Finally, click «Save» to apply your changes.
Version 2: embedded elements (HTML code)
Click the «Embed» area in the «Layout» section under «Add Content», hold down the mouse button and drag the button to the desired position in the content area.
Please note that embedding HTML code is only possible with the StarBiz and StarPlus subscriptions.
Double-clicking the «Embed» area opens an editing window. Enter your HTML code for the file download here and then click «Save».
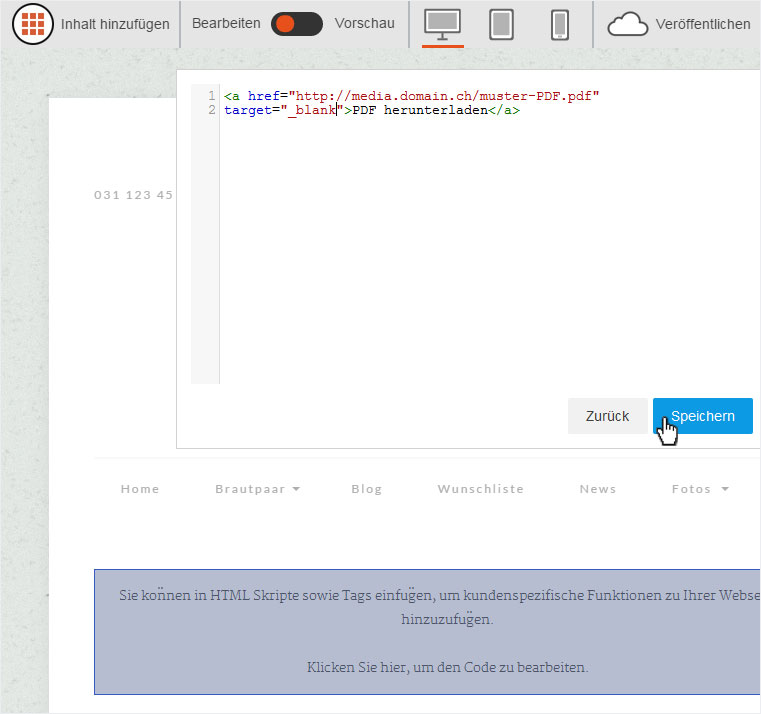
The link is inserted based on the settings in the HTML code.
Version 3: Linking by entering the direct directly
Click «Normal» under «Add Content», hold down the mouse button and drag the button to the desired position in the content area.
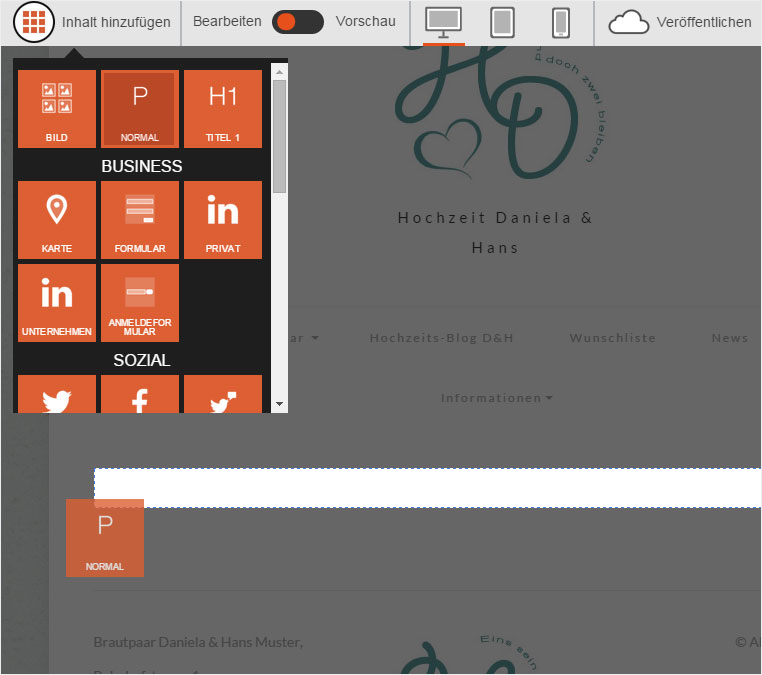
A text field is added with a «Lorem ipsum» placeholder. Click the text to open and editing window.
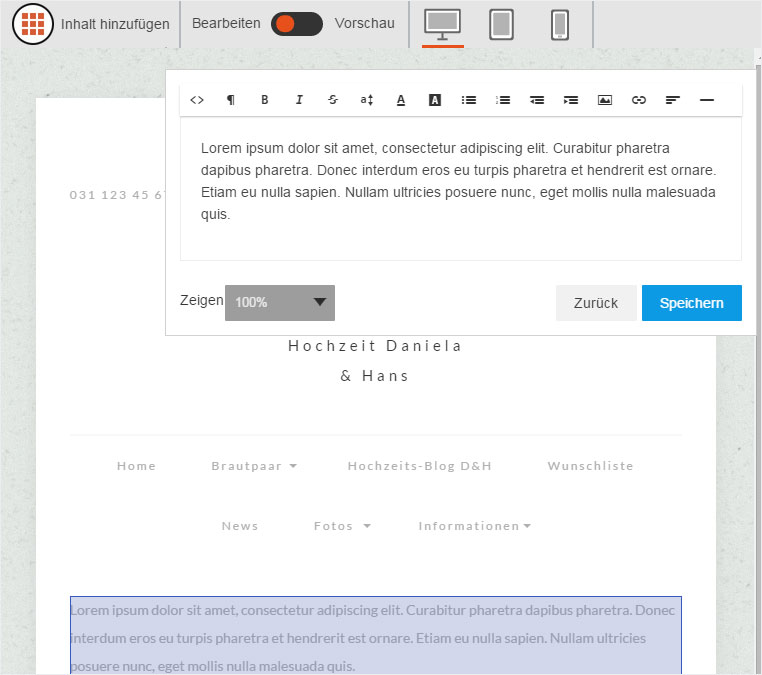
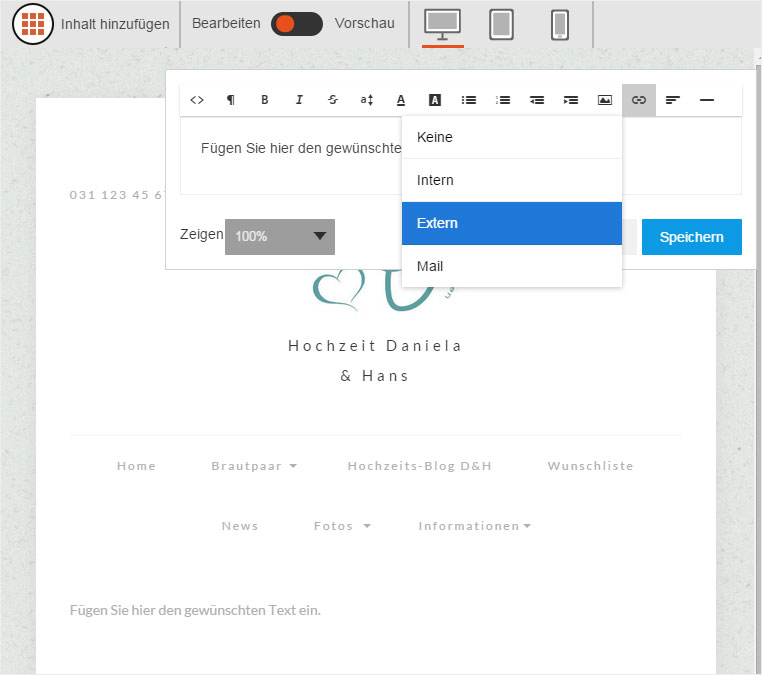
Enter the text you want to add. Highlight the word you want to operate as a link to the document and click the «Link» icon.

A drop-down menu appears. Select «External».
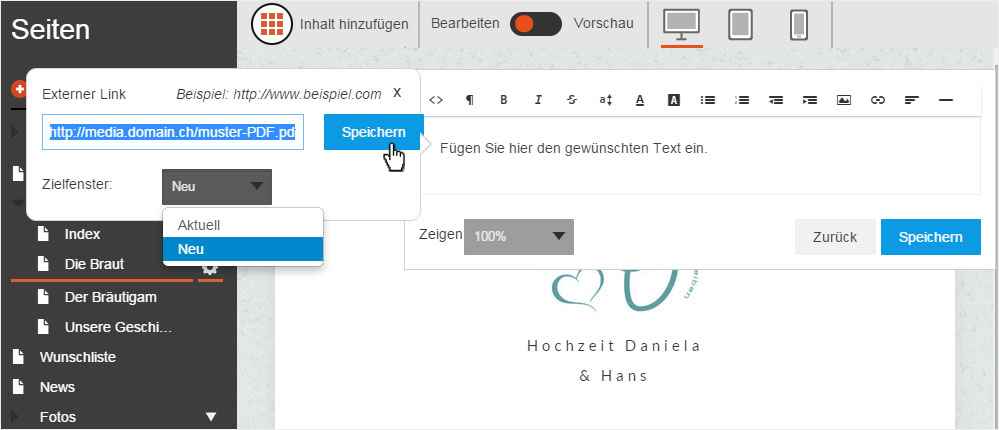
Another editing window opens in which you can enter the link. Under «Target window» you can set whether the file opens in the «Current» or in a «New» window. Click «Save» to apply your changes.
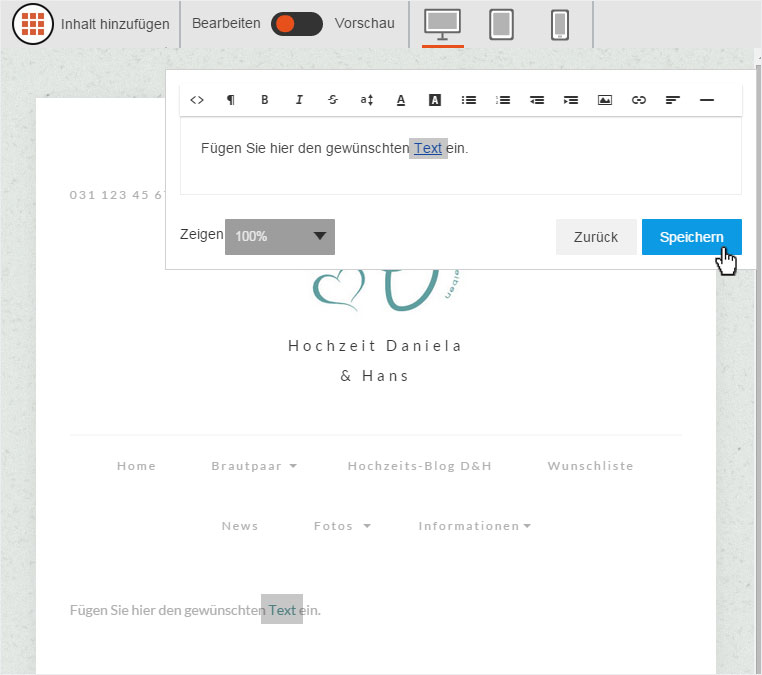
The text is immediately highlighted in the colour selected from the colour palette) to indicate that it is a link. Then click «Save». The link has now been added.
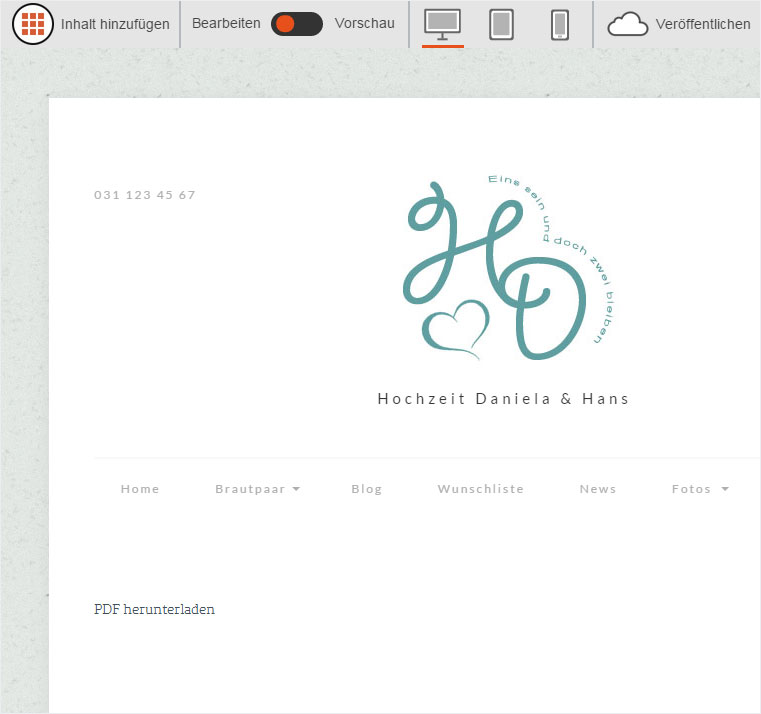
6. Preview
To test the button, link or text link, click «Preview» at the top of the editor. The view changes to preview mode. Click on the button, link or text-link.

In our case, the document opens in a new tab.